[SOLVED] GrovePi+ Firmware update fails (avr device not responding)

Hey there,

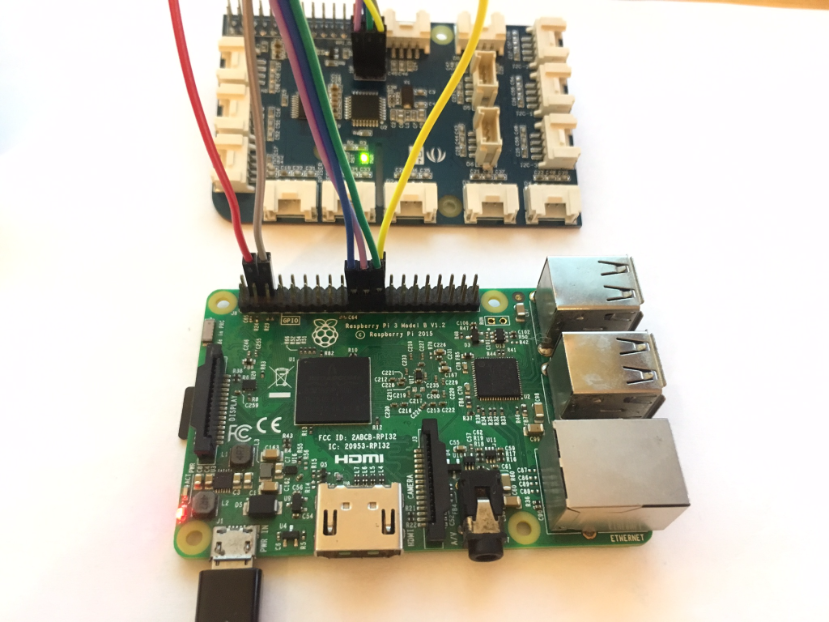
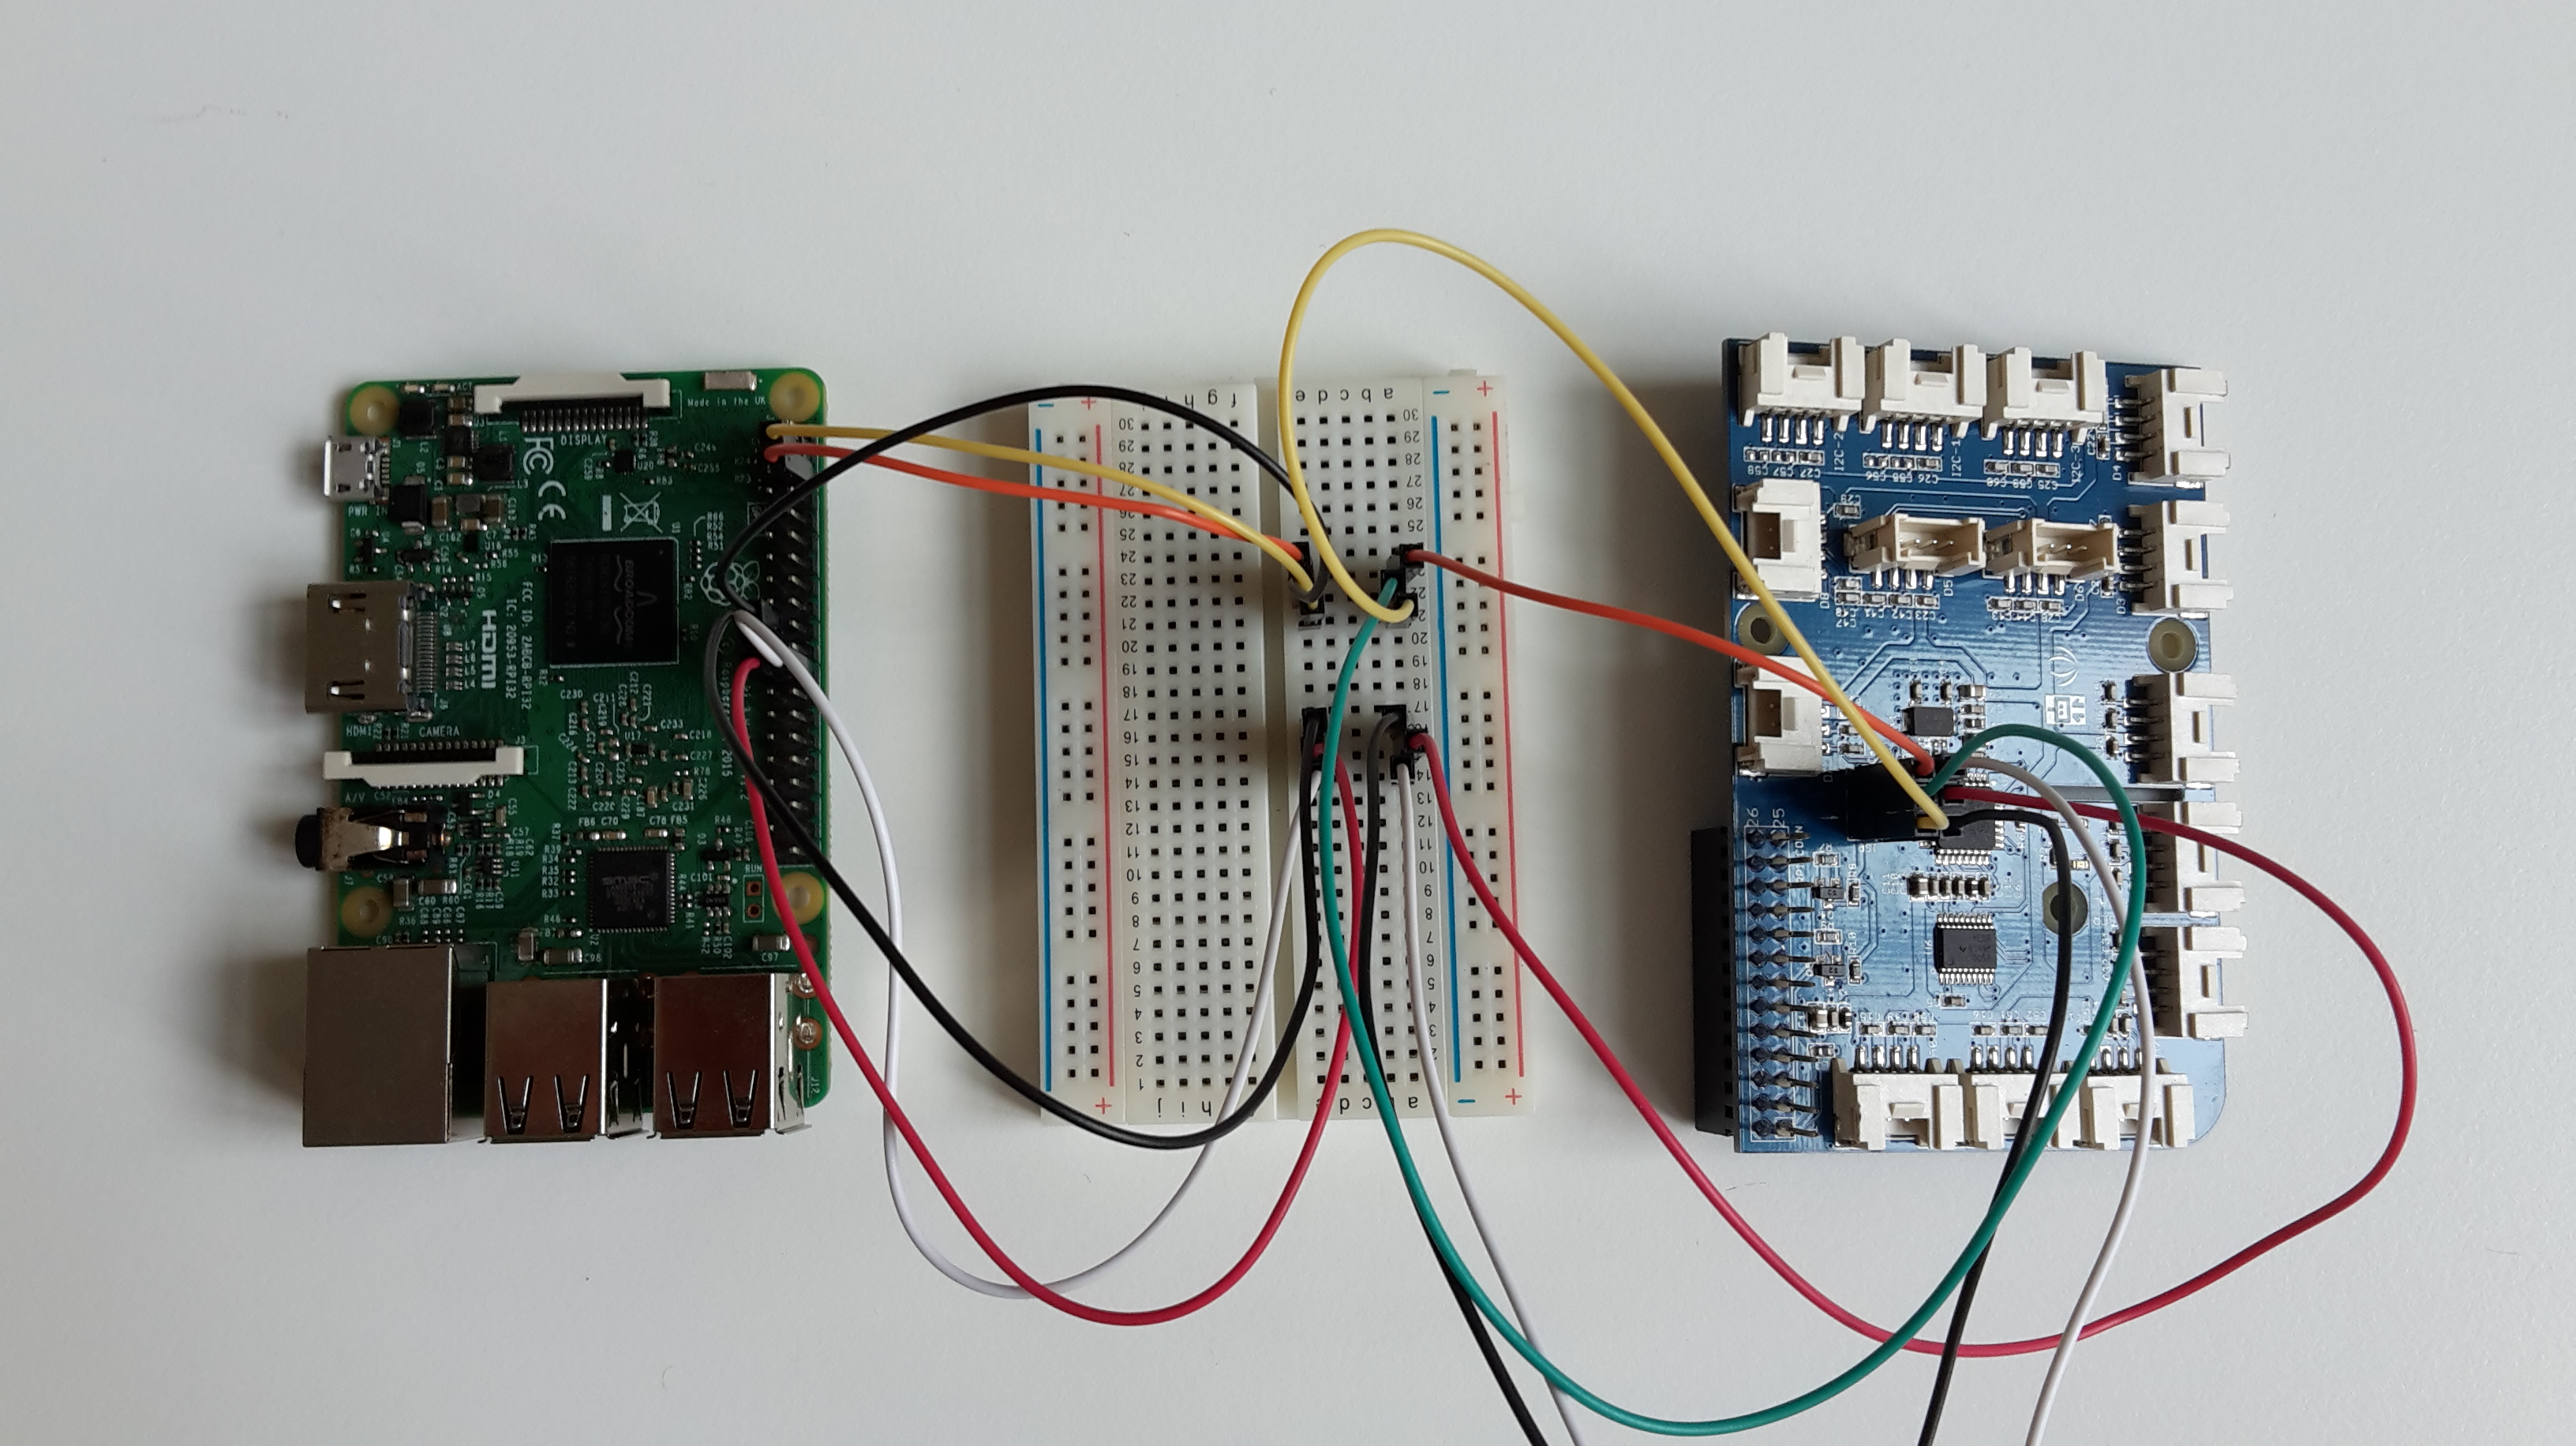
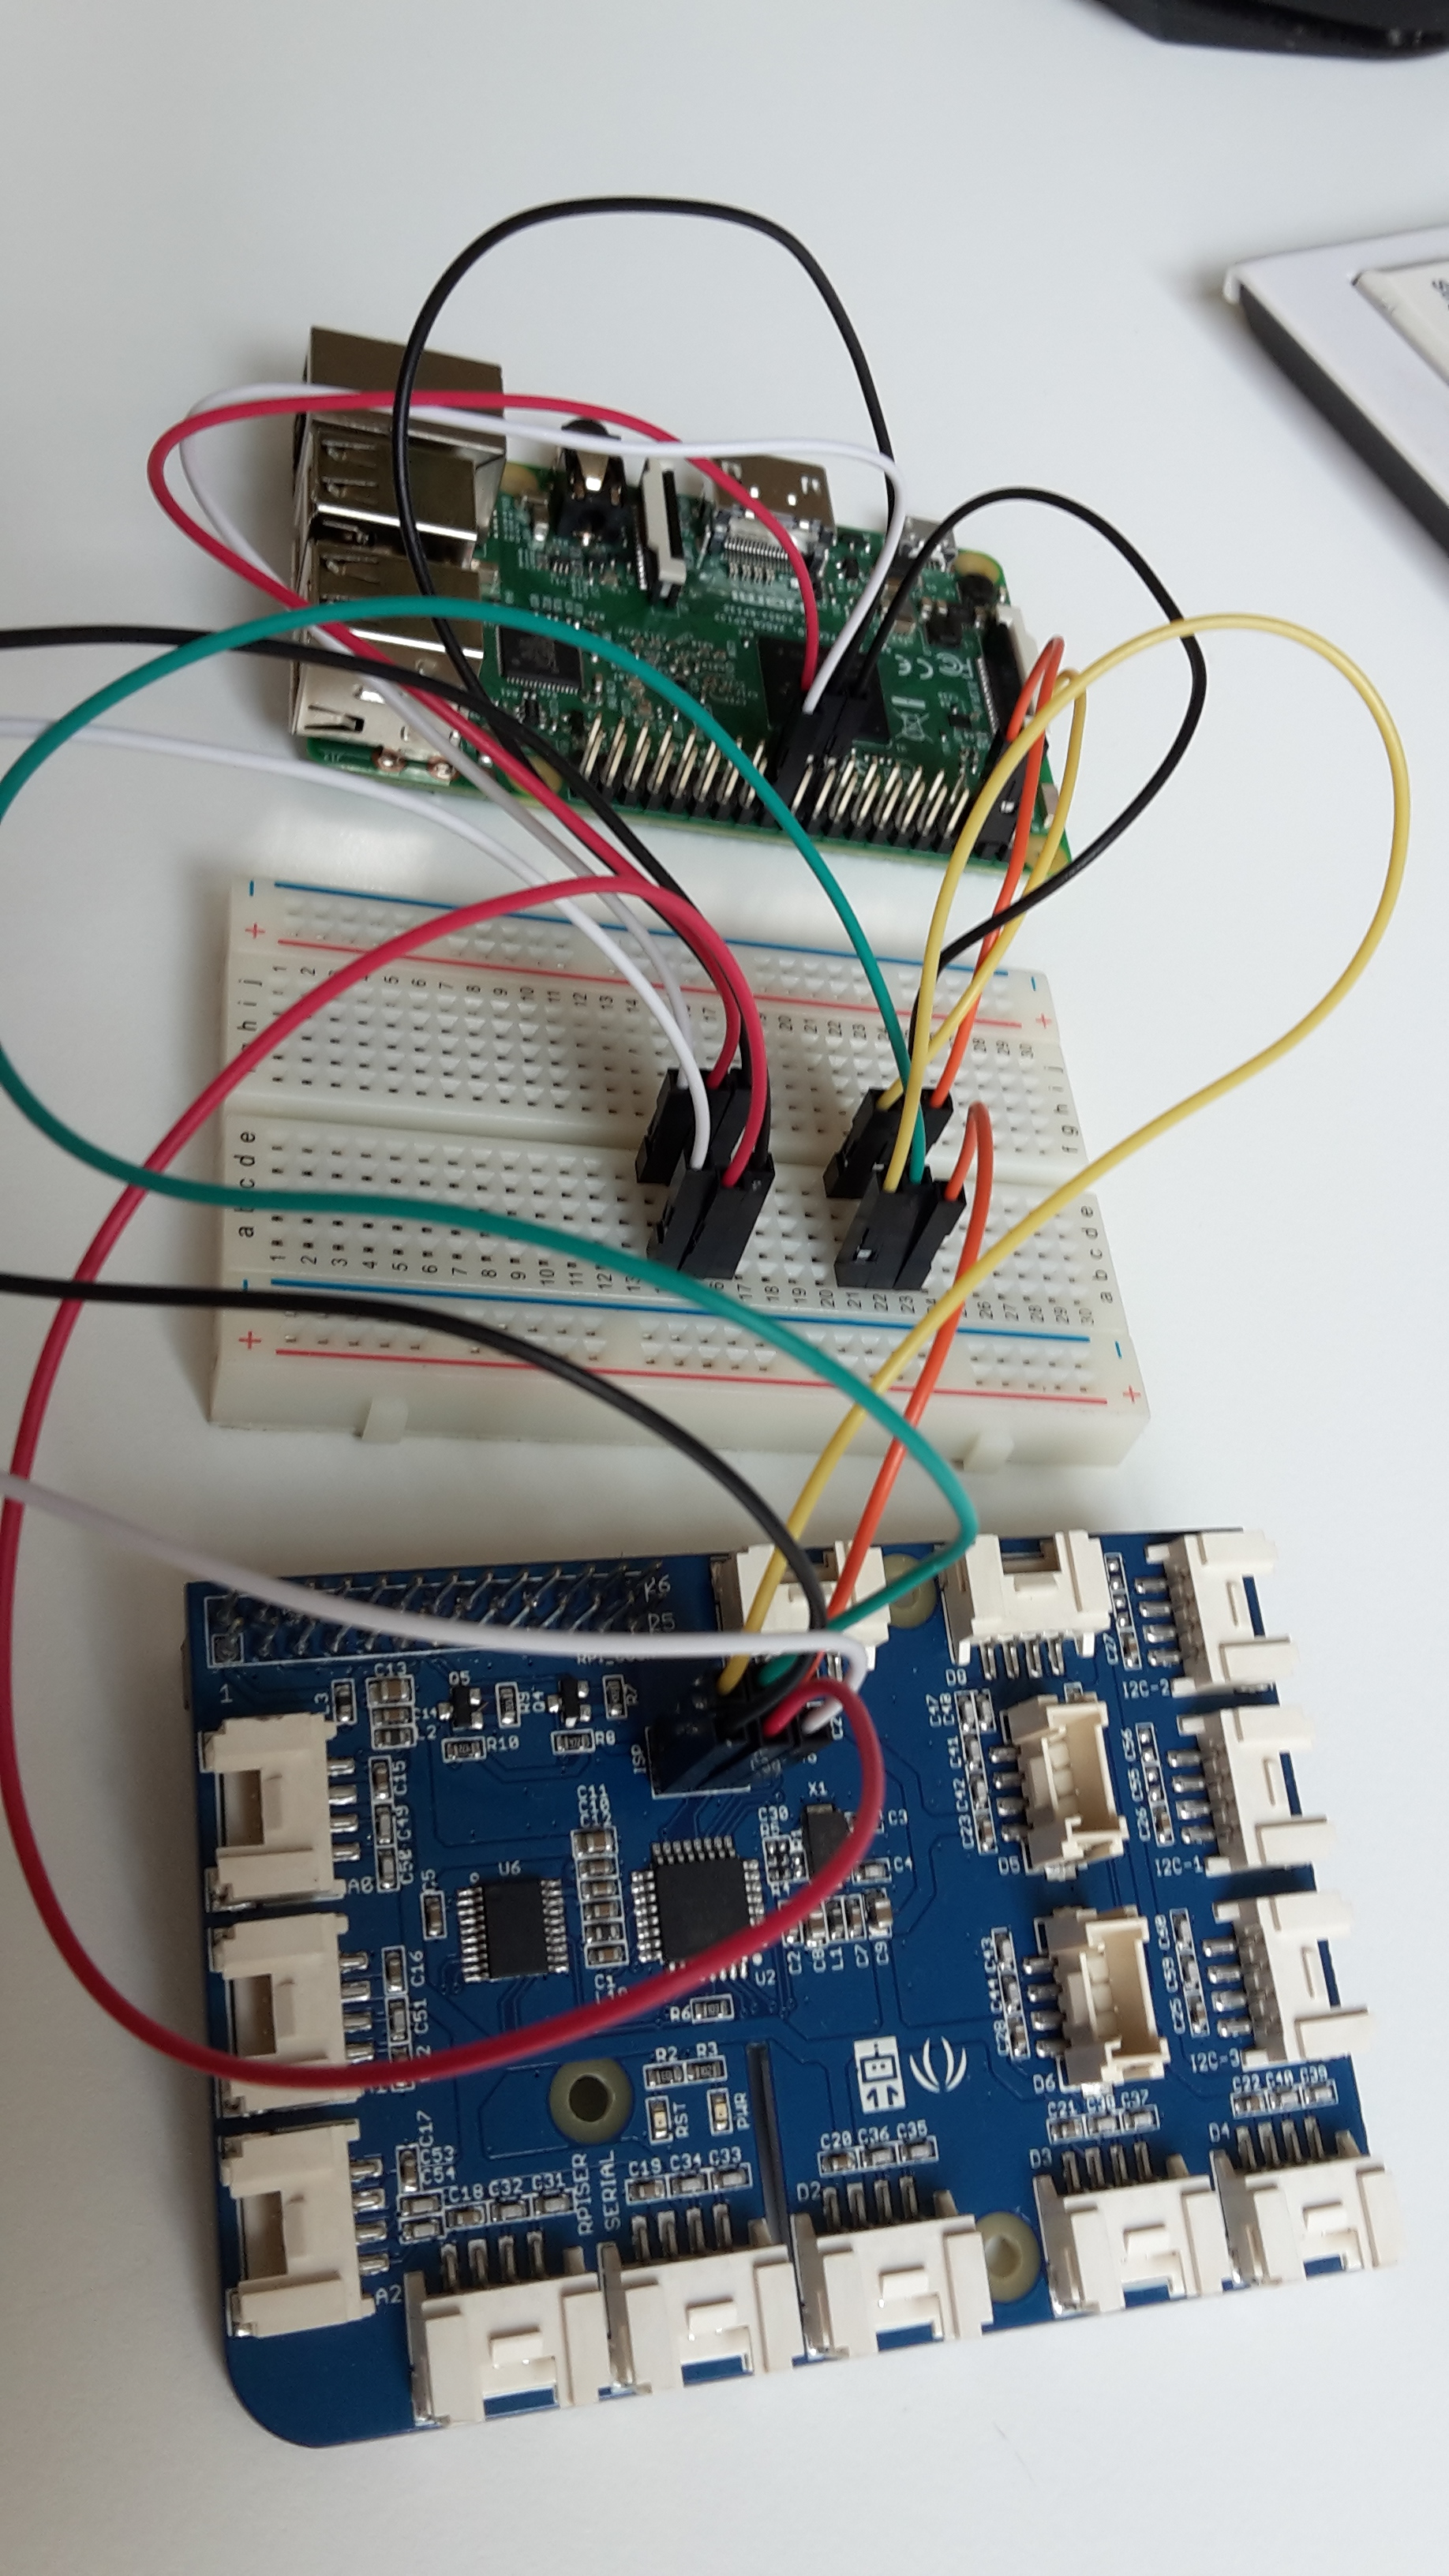
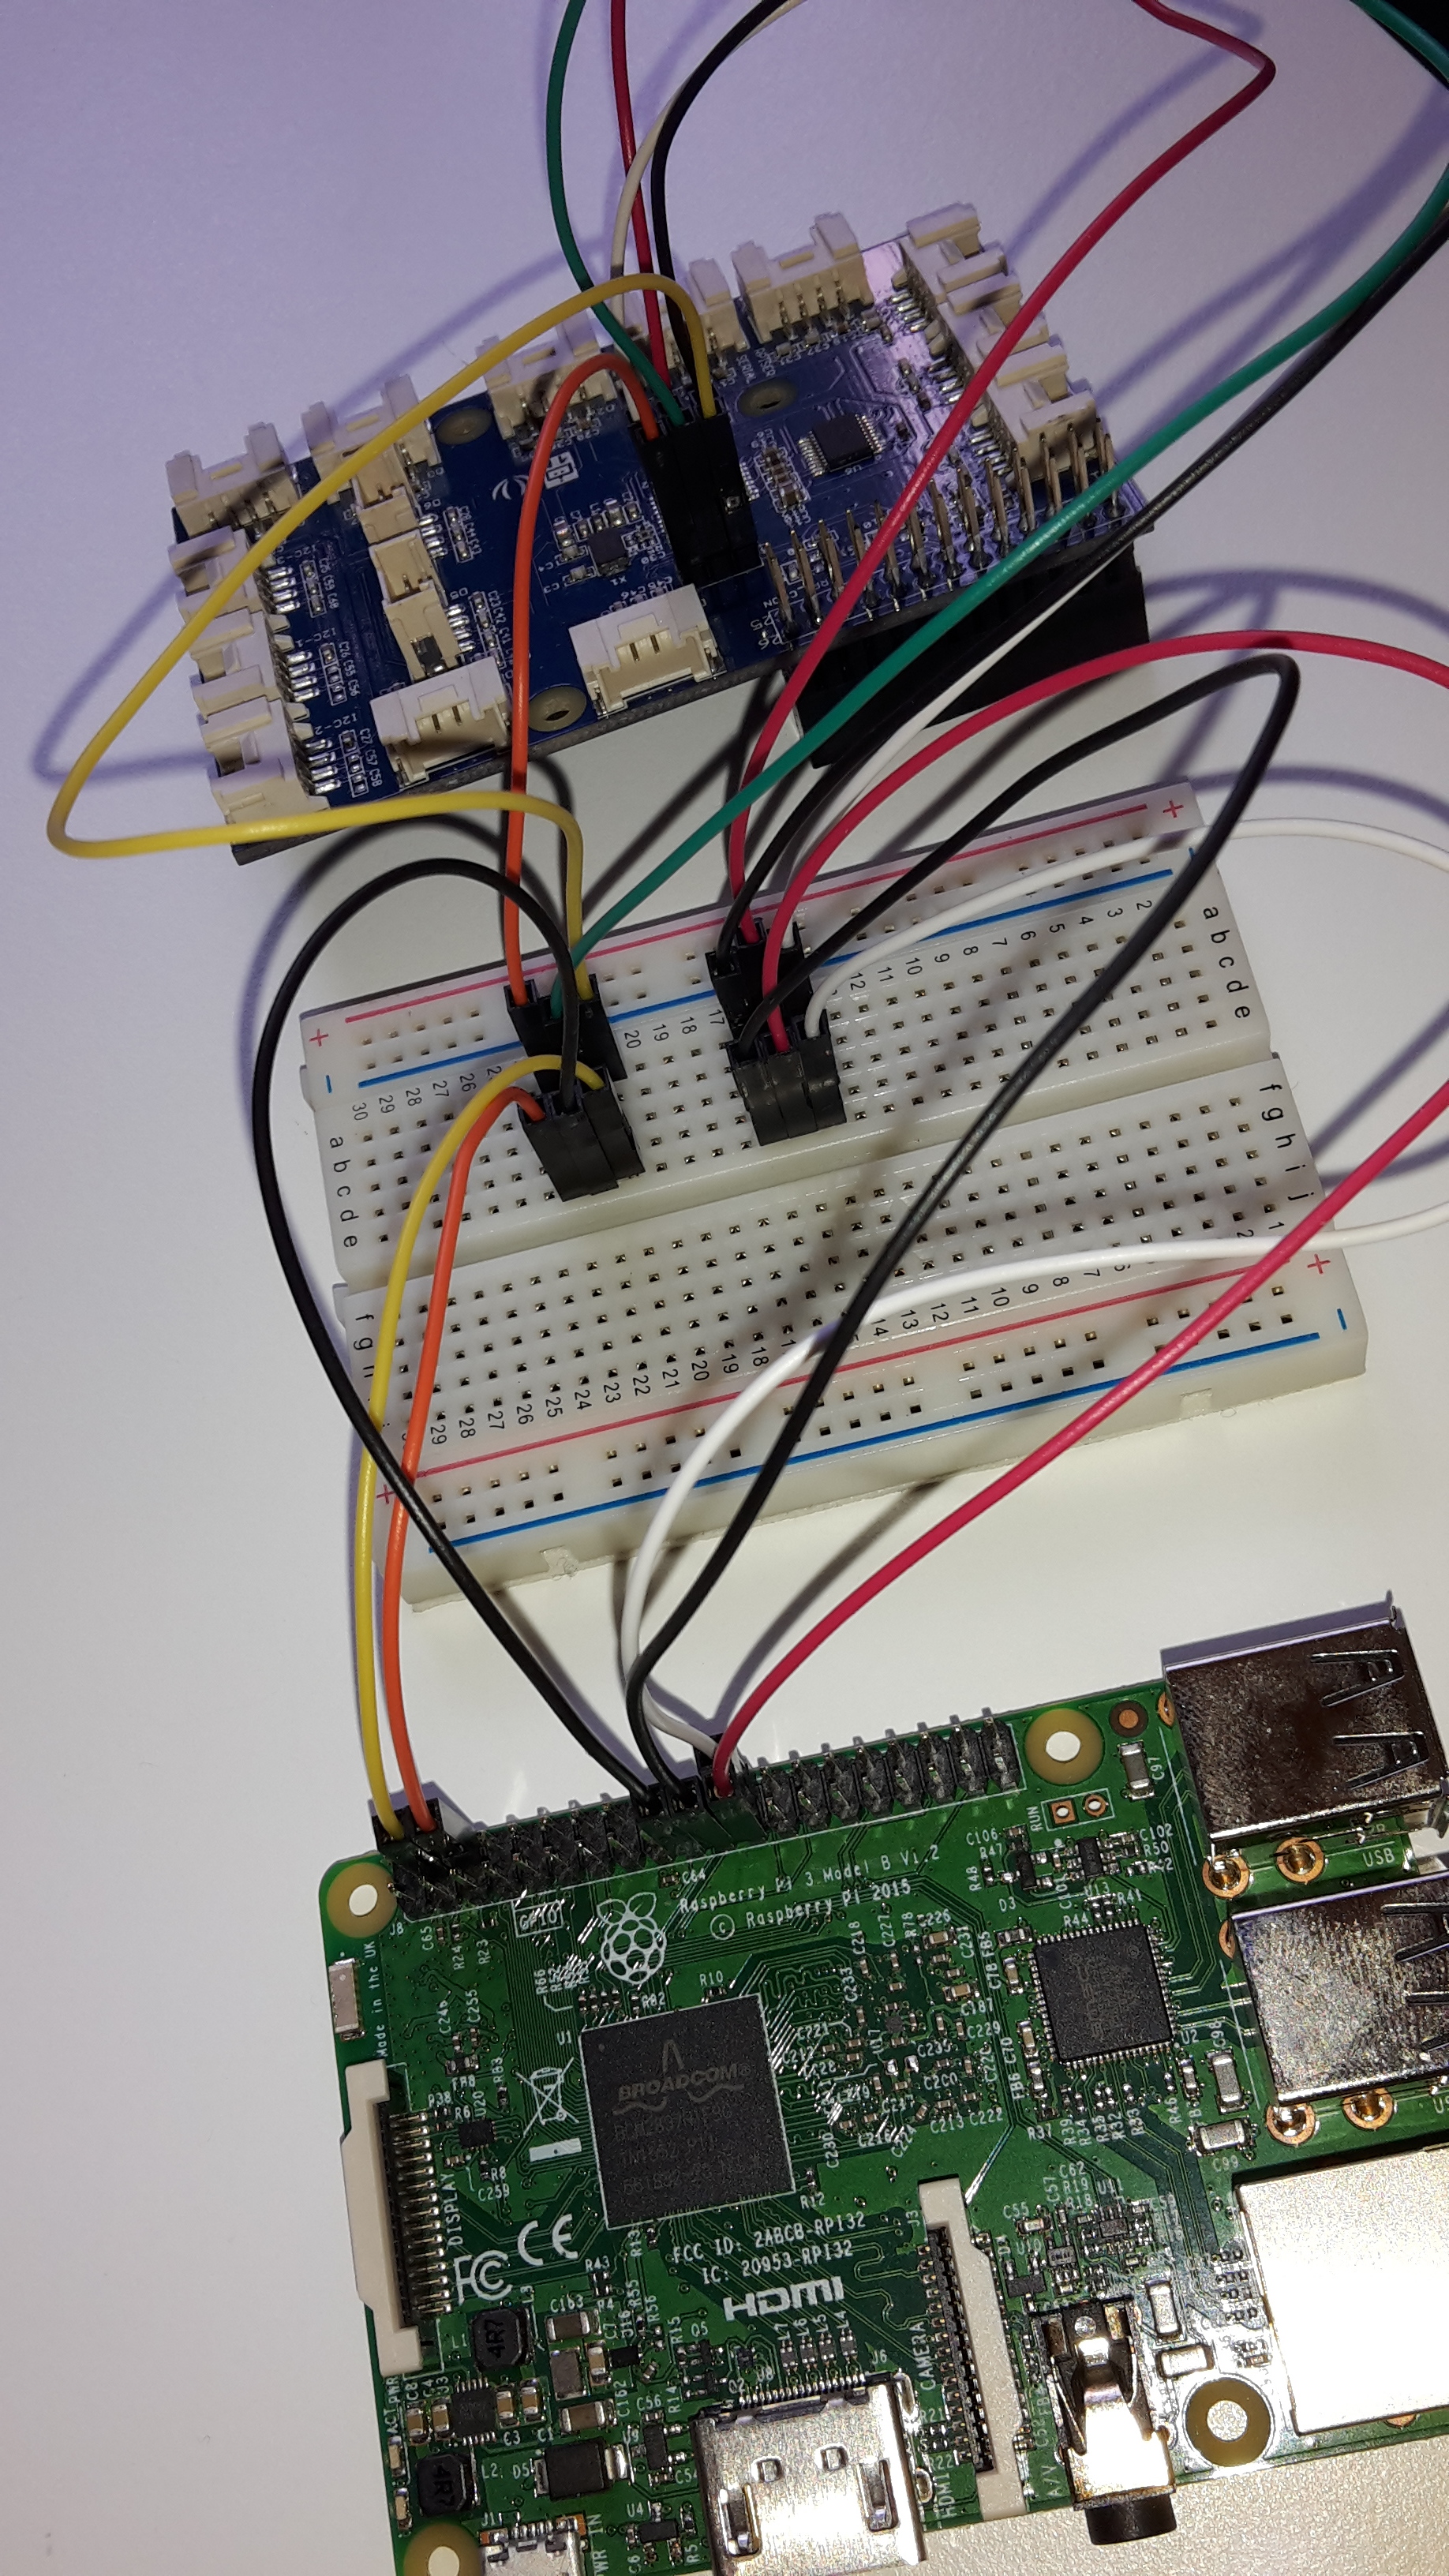
I am facing some trouble updating the firmware of a GrovePi+ board. The board is mounted correctly to a Raspberry 3 Model B.

I read all related posts and did not find a solution.

Here is what I tried so far:

  1. Download Raspian for Robots, (Jessie) and set it up as described here.

  2. Run the firmware update (both from shell and GUI). Both attempts produce the same error:

Script started on Tue 06 Jun 2017 12:17:05 UTC
access control disabled, clients can connect from any host
GrovePi
(165, 30)
setting drop down to GrovePi
Start Firmware test!GrovePi

avrdude: AVR device not responding
avrdude: initialization failed, rc=-1
         Double check connections and try again, or use -F to override
         this check.


avrdude done.  Thank you.


avrdude: AVR device not responding
avrdude: initialization failed, rc=-1
         Double check connections and try again, or use -F to override
         this check.


avrdude done.  Thank you.


avrdude: AVR device not responding
avrdude: initialization failed, rc=-1
         Double check connections and try again, or use -F to override
         this check.


avrdude done.  Thank you.


avrdude: AVR device not responding
avrdude: initialization failed, rc=-1
         Double check connections and try again, or use -F to override
         this check.


avrdude done.  Thank you.

Beginning to Update the GrovePi Firmware!
=============================
/home/pi/Dexter/GrovePi/Firmware /home/pi/di_update/Raspbian_For_Robots
/home/pi/di_update/Raspbian_For_Robots
Finished updating the GrovePi Firmware!
=============================

  1. Updating the OS and retring the firmware update leads to the same issue (see above)
sudo apt-get update
sudo apt-get upgrade
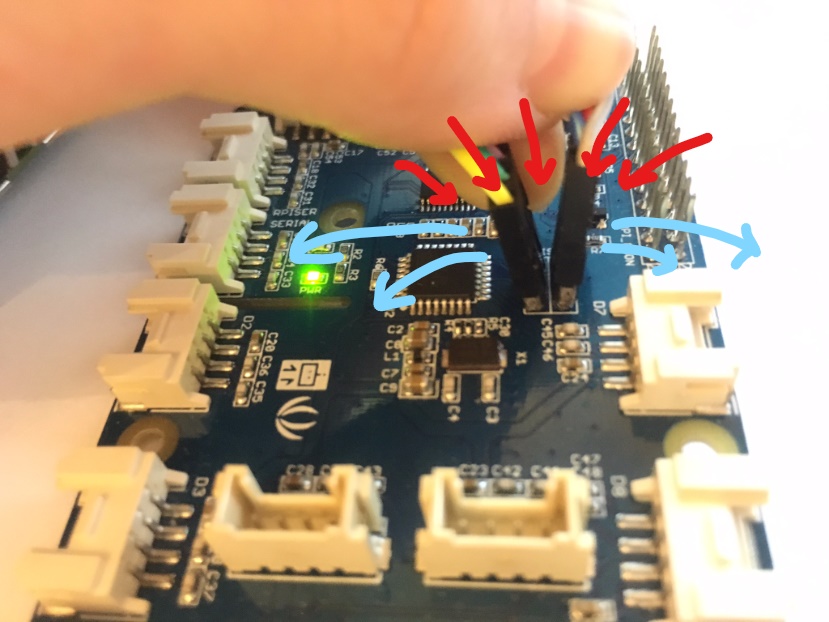
  1. run following code to test avr device:
pi@dex:~$ sudo avrdude -c gpio -p m328p

avrdude: AVR device not responding
avrdude: initialization failed, rc=-1
         Double check connections and try again, or use -F to override
         this check.


avrdude done.  Thank you.

pi@dex:~$ 
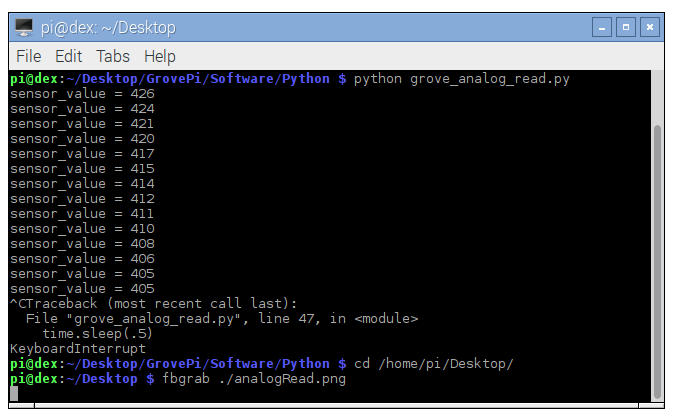
  1. Run GrovePi/Software/Python/grove_firmware_version_check.py:

That’s interesting. When running the script WITHOUT updating the OS, I receive:

GrovePi has firmware version: 1.2.2

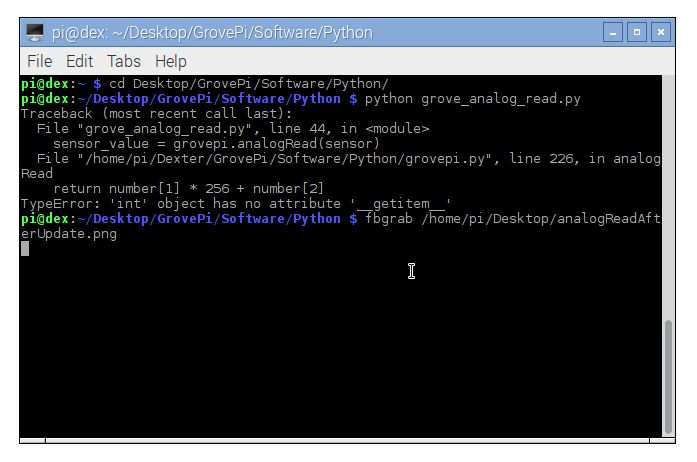
After updating the OS, I receive:

Traceback (most recent call last):
  File "/home/pi/Dexter/GrovePi/Software/Python/grove_firmware_version_check.py", line 40, in <module>
    print("GrovePi has firmware version: %s" %grovepi.version())
  File "/home/pi/Dexter/GrovePi/Software/Python/grovepi.py", line 271, in version
    return "%s.%s.%s" % (number[1], number[2], number[3])
TypeError: 'int' object has no attribute '__getitem__'
  1. Updating to the latest commit of the GrovePi github repo and retrying the Firmware update. Still getting the same error (see 2) )

  2. Finally, here are both Troubleshooting logs (before and after OS update):
    all_tests_before_update.txt (6.0 KB)
    all_tests_after_update.txt (6.6 KB)

Did I miss something? Do you guys have any idea what else I could try?
Is there possibly a solution like this one for the old GrovePi board?

Thanks for your support in advance!
Kind regard
Bruno

Hi @b.willenborg,

Let me summarize what I have understood so far:

  1. Before the OS update (through DI Software Update), you weren’t able to update the firmware on the GrovePi+, but you were able to run grove_firmware_version_check.py and see what the version was.

  2. After the OS update (through DI Software Update), you weren’t able to update the firmware on the GrovePi+, nor check the version it has with grove_firmware_version_check.py.


Seeing that GrovePi has firmware version : 1.2.2 makes me think the board is functional, but somehow the firmware flashing is failing - there may be improper contacts - but I need more feedback on this one.

Or maybe the firmware updating process is failing while it’s being flashed and this may lead to a non-responsive GrovePi+.


What I’m suggesting for the moment is to take a photo of your setup and share it with us.

We’re also interested to see how the LEDs on the GrovePi+ behave while it’s idling (when it’s not doing anything but it’s powered) and when it’s being flashed (or at least when it’s being tried to to).

This is all for now.


Thank you!

Hey @RobertLucian,

thanks for your reply. Your summary is almost exactly what happend. I did not use Di Software Update but upgraded manually using sudo apt-get update && sudo apt-get upgrade -y and running sudo ./install.sh from GrovePi/Scripts. However, I just retried starting from a fresh image using Di Software Update with the same result (see 2) in previous post).


Today, I created a fresh image, tested for proper connection with sudo i2cdetect -y 1 and retried the firmware flashing process both before and after OS upgrade. Before, I made sure I2C and SPI interfaces are enabled with raspi-config.

Here is an image of my setup in idle state (showing desktop after complete boot).

I recorded two videos of the flashing process. The PWR LED is constantly on, while the RST LED is constantly off for both cases.

By the way, I have several sensors and LEDs at my hands we could use for testing.

So long,
Bruno

Hey @bwibo, just hopping in here. This is an interesting problem, we’re on it. We can see the I2C bus always works. We can also see that the SPI bus never works. However, the thing we have to figure out on our end is why the call grovepi.version() is breaking after an update.

We’re going to run a few tests. Quick question though for you: what is the date of Raspbian for Robots you’re starting with?

Hey @JohnC,
I’m using the 2017-04-02_Dexter_Industires_jessie image. Just downloaded it from SourceForge a few days ago. Initially, I’ve been using the original Raspian image. After experiencing the issue we are discussing here, I tired the Dexter Ind Raspian for robots image.
If you need any further information on the version I’m running, please let me know the command I need to run to get it.

Here is what uname -a and cat /etc/os-release return:


# uname -a
Linux dex 4.4.50-v7+ #970 SMP Mon Feb 20 19:18:29 GMT 2017 armv7l GNU/Linux

# /etc/os-version
PRETTY_NAME="Raspbian GNU/Linux 8 (jessie)"
NAME="Raspbian GNU/Linux"
VERSION_ID="8"
VERSION="8 (jessie)"
ID=raspbian
ID_LIKE=debian
HOME_URL="http://www.raspbian.org/"
SUPPORT_URL="http://www.raspbian.org/RaspbianForums"
BUG_REPORT_URL="http://www.raspbian.org/RaspbianBugs"

Hi @bwibo,

I’ve been thinking about this and here’s what I think you should do.


Step 1

Rollback to your initial image.
This means you need to re-burn the micro SD Card and follow the steps you’ve already followed, but again.
Please, don’t upgrade anything.

  1. Download Raspian for Robots, and set it up as described here.

Step 2

Run the troubleshooter again and see:

  1. If address 0x04 shows up in the I2C table.

  2. If firmware version shows up and let us know again which version is displayed: 1.2.2, 1.2.7, etc.

Step 3

If the two steps before are a go, then I think we should be testing a really simple program and see if it works.
Open up a terminal on your Raspberry Pi and input the following commands:

 cd ~/Desktop/GrovePi/Software/Python
python grove_analog_read.py

You don’t need to have anything connected to your GrovePi.
Just let us know what’s being printed on your console. Screenshots are going to be helpful.


More suggestions

Also, we suspect that SPI isn’t working and the traces between the Raspberry Pi and the GrovePi are bad.
If you’re up for it, we could walk you through the testing phase to check that out.

Pogo pins can be useful for what we have in mind.


I’m waiting to see how your tests go.

Thank you!

Hey @RobertLucian,

I almost exactly followed your steps, I just installed fbcat for taking screenshots like this:

sudo apt-get update
sudo apt-get install fbcat -y

Step 1

I downloaded a fresh copy from SourceForge and and flashed it to my sd card.

Step 2

Right after boot completed, I ran the troubleshooter.
The I2C table shows 0x04 and firmware is reported as version 1.2.2, as expected. Here is the log file: log.txt (6.0 KB)

Step3

I tested analog read. See the output below.

When trying to run python grove_analog_read.py after performing a software upgrade with the Di updater it get this:


On other remark. One of my students just returned a Raspberry (same model as mine) he used in a project. I ran all test from above with the GrovePi+ mounted to that Raspberry. I got the exact same results as with the RPi I’ve been using before and, sadly, flashing the firmware failed as well. Hence, I assume we can exclude the RPi I’ve been using as an error source.
Here are the logs from that run: otherRPi.txt (13.2 KB)


Regarding your other suggestion, I’m in. However, I have neither worked with Pogo pins before, nor I do have some of them right now. But I’m willing to get them (I assume they are easy to find in Munich) and give it a try. From what I understand from Wikipedia they are used to establish a temporary connection between printed boards. Can I used Jumper cables instead, I have plenty of these available? I also have a Multimeter at my hands, if that helps.

So long,

Bruno

Hi @bwibo,

So let’s program the GrovePi with some jumper wires instead.
This way, we’ll bypass the GrovePi circuit trace and see if it’s something wrong with the board.


You will need the following:

  1. Jumper wires - female to female - 6 items - REQUIRED

  2. Header pins - the standard spacing of 2.54mm - we’ll need 2 pairs & each pair has 3 pins - REQUIRED

  3. Soldering Iron + Solder + Flux Cleaner - OPTIONAL


There are 2 ways of doing this job:

  1. By plugging the header pins on top of the GrovePi and keeping force with your hand - so that there’s electrical contact between them.

  2. By soldering the header pins the way I’m going to show - much easier, but may require extra tools.


The wiring

We need to separate the GrovePi from the Raspberry Pi like in the following photo.


The wiring is described in the following 2 drawings.
Here are the Raspberry Pis pins.


And here are the GrovePis pins we need to use.


Wire them like in the picture so that it looks exactly the same as in the first photo I took.
Please, use SPI0 port and not the other one (SPI1 port). You can see the difference in Raspberry Pi’s pin-out diagram.


How to connect the header pins

______1. By holding them together

You need to use force by pushing them “inside” the board and at the same time splitting the 2 header pins apart.
This way, you get them to make contact between the headers and the GrovePi.

It’s going to be a little hard, as you’ll have to keep the headers in place and at the same time operate the keyboard in order to reflash the firmware onto the GrovePi.

Here’s a photo on how to do this.
The arrows indicate the direction of the applied force.


______2. By soldering the headers onto the GrovePi

This one depends on whether you have the appropriate tools or not.
As I have said, you’ll need a soldering iron, solder & flux cleaner.
Flux is going to be really helpful, because it removes the oxidation from the metal - so it’s going to ensure the best connectivity between the header pins and the board.

I’m thinking that since you’re in Munich, there’re lots of shops for hobbyists where you can find anything.

I have a flux cleaner which has a brush with witch I apply onto the board before I do the soldering stuff.
Don’t wait more than 20 seconds after you’ve applied the flux to solder it, as it evaporates.
Here’s how I’ve been doing it.


Then apply the solder by keeping the header pins in place.
In the end, you should get something like this.


Reflashing the GrovePi

Turn on the Raspberry Pi.

After it has booted up, on your Raspberry Pi, open up a terminal and enter the following commands:

cd ~/Desktop/GrovePi/Firmware
 sudo bash firmware_update.sh

If everything was done correctly, then you should get the following logs in your terminal.
Please notice that what I’m showing now are only the last logs the updater printed out.


Diagnosis conclusion

If everything went okay, you should now be able to use your GrovePi again.
Before stacking the GrovePi back onto your Raspberry Pi, please power down the RaspberryPi.

Let me know how it goes for you, @bwibo.


Thank you!

Hey @RobertLucian,
many thanks for the detailed guide. I’ll get the requried soldering equipment some time this week from a colleage. When I have it, I’ll try what you described and get back to you with the results.
So long, Bruno

Hey @RobertLucian,

I finally managed to test what you described. I soldered the PINs to my board and connected them to my Pi. I only had female -> male jumper cables, so I used a breadboard in between to come by that issue.

Here are some images of my setup:

I tried flashing the firmware, as you described.
Here is a video of the LEDs of the GrovePi during the flashing process: LINK

Sadly, this is what I got:

Updating the GrovePi firmware
=============================
 http://www.dexterindustries.com/grovepi 
 Run this program: 
 sudo ./firmware_update.sh
 
=============================
Do you want to update the firmware? [y,n]y
Make sure that GrovePi is connected to Raspberry Pi
Firmware found
Press any key to start firmware update
. . .

avrdude: AVR device not responding
avrdude: initialization failed, rc=-1
         Double check connections and try again, or use -F to override
         this check.


avrdude done.  Thank you.


avrdude: AVR device not responding
avrdude: initialization failed, rc=-1
         Double check connections and try again, or use -F to override
         this check.


avrdude done.  Thank you.


avrdude: AVR device not responding
avrdude: initialization failed, rc=-1
         Double check connections and try again, or use -F to override
         this check.


avrdude done.  Thank you.


avrdude: AVR device not responding
avrdude: initialization failed, rc=-1
         Double check connections and try again, or use -F to override
         this check.


avrdude done.  Thank you.

Any suggestions? Do the flashing LEDs indicate, that the soldering + wiring is working?

So long,
Bruno

Hi @bwibo,

I think we have a faulty GrovePi board and therefore I’m really sorry to see you had to use so much of your time for this issue.


So, we’ll need to replace your board.

If you have bought the GrovePi board from us, please click on the following link and ask for a replacement in section General Questions and Feedback.
Someone will contact you back and will send you the package ASAP.


If you haven’t bought it from us, then you need to contact your reseller and ask him for a replacement.


Again, I’m really sorry to have put you up to this and I hope we solve the issue ASAP.

Thank you!