Can you comment on this?
(I prefer the look of your installation - preserves symmetry.)
Can you comment on this?
(I prefer the look of your installation - preserves symmetry.)
That’s exactly why I did it. I ended up drilling holes in the top plate to mount the lidar - just used a drill press and slow drill speed. Had a piece of wood under the plastic so it would drill cleanly. I positioned it where I thought I wanted it and then marked where the legs were with a marker.
It did require that I changed the URDF though, so that the robot knew what direction the lidar was pointing.
/K
The only negative to having the LIDAR on the top plate is the loss of a “Character Mount”. I would have loved to put a Minion Dave (two eyes) on ROSbot, or perhaps Tux.


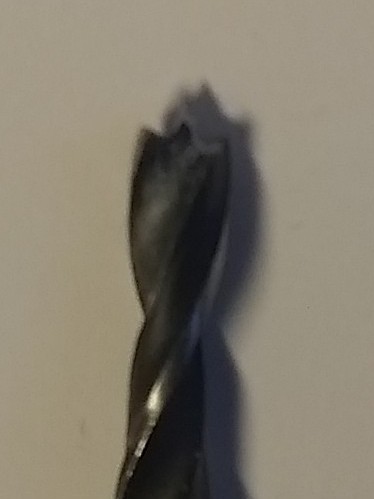
I have discovered that using a wood-boring bit is the best way to drill plastic.
SLOOOOOW and easy is the way to do it. The backup block prevents shattering brittle plastic on punch-through and helps keep a clean edge.
I stop often and remove excess tailings to make things easier to see and prevent binding.
Pictures:

Notice that a wood bit has a centering point and the outside edges are slightly raised to make a clean hole.
An even better way, (when using a wood bit that has a starting point), is to drill until the point just begins to break through, then flip the piece over and finish the hole from the other side.
This also works when drilling holes through finished walls to pass piping or wiring. Drill untill the point of the wood bit just begins to break through. Then finish the hole from the other side.
This is a picture of four holes drilled through “marlite” panels in our bathroom.
The top hole was drilled by me using the “reverse drill when the point breaks through” technique.
The bottom three were drilled by (so called) “professionals”
Note the difference.
Yeah, that is a definite downside, unless you want Dave to get REALLY dizzy 
/K
Yep - that’s exactly what I used - I pressed the sharp tip in to get a little starting point before turning on the drill press. It would be easy enough to do with a hand drill. My drill press is a really cheap Harbor Freight model, but it does help make sure I’m going straight down.
/K
@KeithW Question: If I mount the LIDAR between two decks such that there are four standoffs blocking the beam, will the LIDAR / SLAM ignore those “too close returns”?
This way I can mount a character on top and when the bot rotates a little or moves a little the “world” view will get updated. I’m assuming the localization algorithm does a best match of the LIDAR return data with the world map, knowing that perfect match is unlikely.
I don’t know - I’ve wondered that. I’ll attach a post to my upper deck and see what happens with the lidar returns.
/K
Cool. parzival answered “probably ok” on answers.ros.org and said if it is a problem to add a small filter box to fix.
Yeah, I just tried it. There is a setting in the URDF for a minimum distance for the base_scan (which is what the lidar is set as in the model).
I added a couple of standoffs to Finmark:
And then placed it where I would get a solid return (at least in the forward direction:
Here’s what I got in RVIZ running the lidar - note there doesn’t seem to be any gaps in the map (black) or lidar return (green):
On a different note - your new robot seems to be shaping up nicely, but I wonder if it won’t be a bit top-heavy. I’ve got my battery on the back, and that seems to work fine (and would help lower the center-of-gravity. You’ve got your distance sensor on a servo, so you’ll need a bit more clearance than I do. But you could still shorten the layer where you currently have the battery and still easily clear the distance sensor.
Regardless, you’ll need an updated URDF to account for the extra height and different positioning of the sensors.
/K
That’s really encouraging. Thanks for running the experiment.
LIDAR arrived today - this is getting exciting.