Share your experiences using GoPiGo OS beta 1 (Nov 2, 2020 version)
1 Like
Configuration:
- Laptop running “Raspberry Pi Desktop Debian Stretch” (9.12 32-bit) with 1.7GHz Intel Core i5
- Laptop display: 1366x768 Intel HD 4000 graphics
- Web Browser: Chromium Version 73.0.3683.75 Developer Build
Drive:
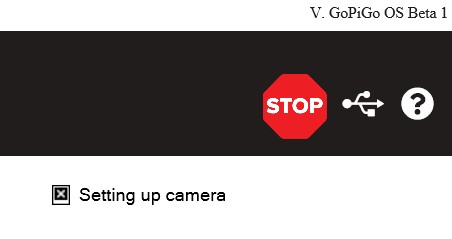
- 10.10.10.10/drive initially had the broken link icon with “Setting Up Camera”
Suggest it say “Setting Up Camera, Please Reload Webpage” - First refresh of the drive page displayed half of the camera image, subsequent reloads display whole image
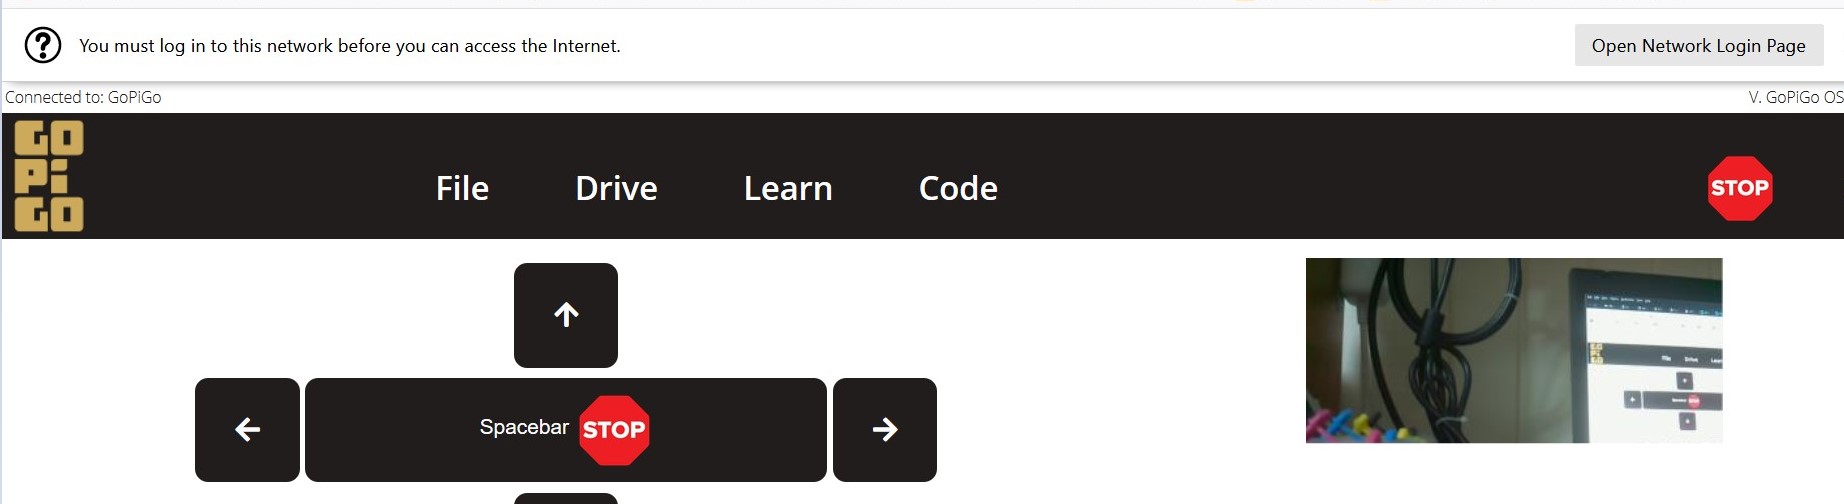
- All functions below the “GoPiGo Banner” functioned as expected, repeatedly
- Mouse clicking the “Spacebar Stop Sign” button stopped robot motion and left the camera active
- Mouse clicking the “GoPiGo Banner Stop Sign” halted the drive page camera, requiring page reload to reactivate the camera
- The “>_” characters in front of Code->Python and Learn->Python are not familiar to me. Perhaps they should be [ ]: to reflect the real console prompt? Weird.
Learn->Python
- Initially, I did not realize it was loading something, then a graphic appeared, then “Welcome…” and a pop-up stating
- Below “Welcome to your first Python lesson…” is broken link icon: title
- If I close the 1_Moving_Around.ipynb tab, how will I reopen it? It does not appear under the navigation area at left.
- On this 1_Moving_Around.ipynb page, the line “click on the Play icon (broken link icon title) right above.”
- At the bottom of the 1_Moving_Around.ipynb page, it says “You can go to the next lesson by using the file navigator to the left. Your next lesson is called 2_The_Environment” BUT I only see First Ride Around.ipynb, Hardware Testing.ipynb, and library_test.ipynb
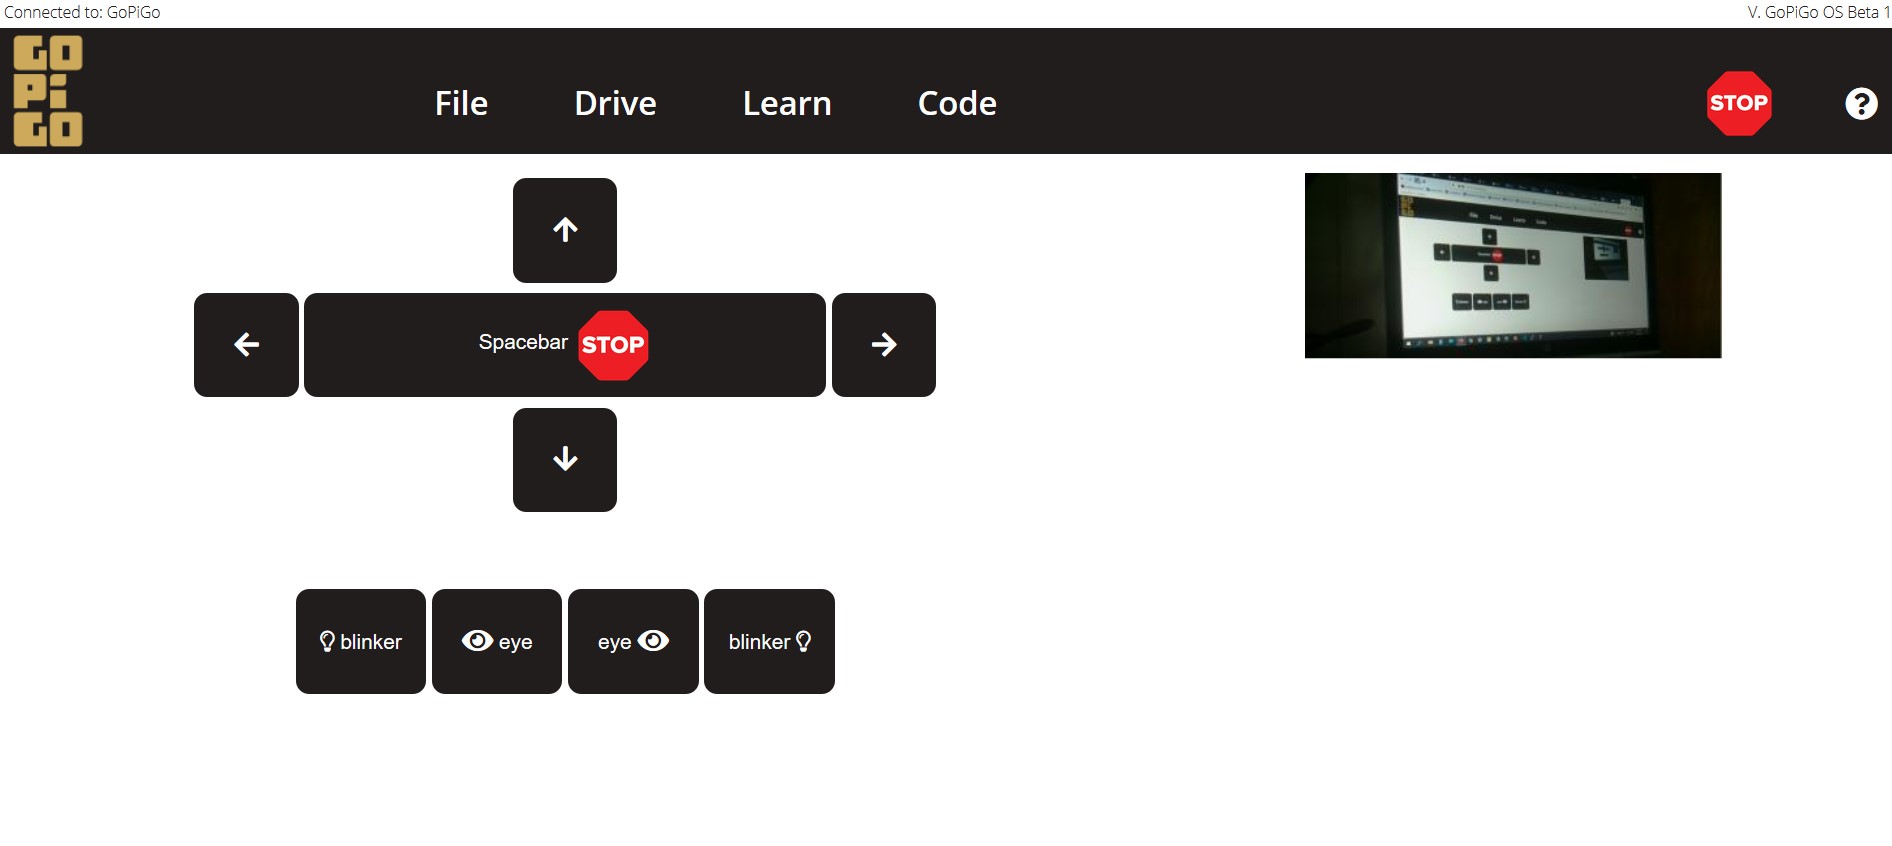
Sensor Control Panel
- I2C-1 Distance Sensor worked
- AD1 IMU(compass) - after calibration, shows “North West Heading 312.9” when headed South
IMU is mounted vertically at rear of GoPiGo with chips facing front
- Clicking the Sensor Control->Camera took me to 10.10.10.10/photos (with a bunch of photos
One photo had an overlay of Other Folders/photo_folder link which took me to a page with a broken link icon to
/static/images/usb_photos/photo_folder/photo_1_1.jpg ??
Connecting to existing WiFi:
- It worked but I’m not sure that Yellow is a good word to describe the color - When I look at the LED I see red, green, and yellow colors.
- There were a lot of words in the two blocks - I didn’t take the time to read them…
- I first clicked the button under the yellow block - no cigars
- I realized I needed to switch my laptop WiFi from the GOPIGO3 access point, back to my WiFI router and then clicking the button still didn’t work, so I typed in the IP that I heard from the speaker. That worked!.
- Reconnecting to the access point using the “Set As Default Access Point” worked exactly as the text directed. Pretty Cool.
Note: Booting with a USB WiFi Dongle attached:
- LED first turned GREEN, then went “yellow”(Red/Green/Yellow visible to my eyes)
I was able to connect to the GoPiGo3 access point just fine, but the LED never turned BLUE.
Note: You got rid of the battery meter. A voltage meter would be very helpful to me as an 8xAA NiMH cell user.
2 Likes
Thank you for testing GoPiGo OS, @cyclicalobsessive!
I’ll go down point by point, as much as possible
-
10.10.10.10/drive initially had the broken link icon with “Setting Up Camera”
Suggest it say “Setting Up Camera, Please Reload Webpage”
What broken link? You are not meant to reload the page. Once the camera is set up, the video feed is meant to magically appear. If you have a camera connected, that is.
-
Seems related to 1.
-
Thanks, it should not have killed the camera. I’ll look into that one.
-
it’s the “terminal” icon. In the set of icons we’re using there was no Python related icon.
Learn -> Python.
We know. They were forgotten, but will be added back in for the release
Sensor Control Panel/IMU
nothing was changed in the way we handle the IMU. Within Bloxter, it is meant to be oriented this way:
Sensor Control Panel / Camera
Hmm, I guess a soft link was left behind. Thanks for the reminder. I’ll add it to the list of things to check when creating an image. You need a USB drive in if you want to take photos while using Bloxter.
Connecting to existing Wifi:
that “lot of words” was telling you exactly what you ended up doing  You figured it out on your own.
Unfortunately, we can’t guarantee that everyone will be able to connect using the hostname as it depends on the configuration of the home network. Providing the IP address orally is the best we can do at the moment.
As for the yellow, it’s a RGB led, so there is no yellow. It’s a mix of green and red, and most people will see yellow, but some won’t. The eye biology is a funny thing .
Battery meter:
it was hotly debated internally. We don’t want to encourage people to use 8xAA cells. And the Li-Ion battery has different cut-off values. The battery meter ended up not working for either configuration.
2 Likes
This is one of the Chromium “my browser acts different” headaches.
When I use my iPad and Safari - there is no broken link icon, just “Setting up camera” until I reload the page.
When I use my iPad and Chrome - the camera image appears “magically”.
1 Like
Ok - my orientation is 180 rotated, so explains that one.
2 Likes
Absolutely agree. IMHO, this is essential functionality and should appear somewhere, (upper right or left), on every page.
Should read “The final assembly should look like this:”
1 Like
While it doesn’t bring back the battery voltage indicator, I am adding this block
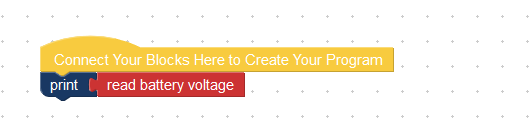
It’s not in this version (it was literally born 5 min ago) but will be in the next one.
2 Likes
Can we have the patch to include it in this version?
One of the things that I would like to be able to do is create blockly program statement tiles for functionality that may not exist.
- Is that possible? (Of course it is)
- Is there any documentation on how to create them, aside from the article you wrote awhile ago in micro:mag for the Microsoft block editor?
This may be more general than Chromium. On the Remote Camera Robot code, whenever you start/restart the streaming server, you have to reload the page with the video stream in both Firefox and Chrome before the video will work.
Assuming that you are using a similar streaming server here, I would expect a similar behavior.
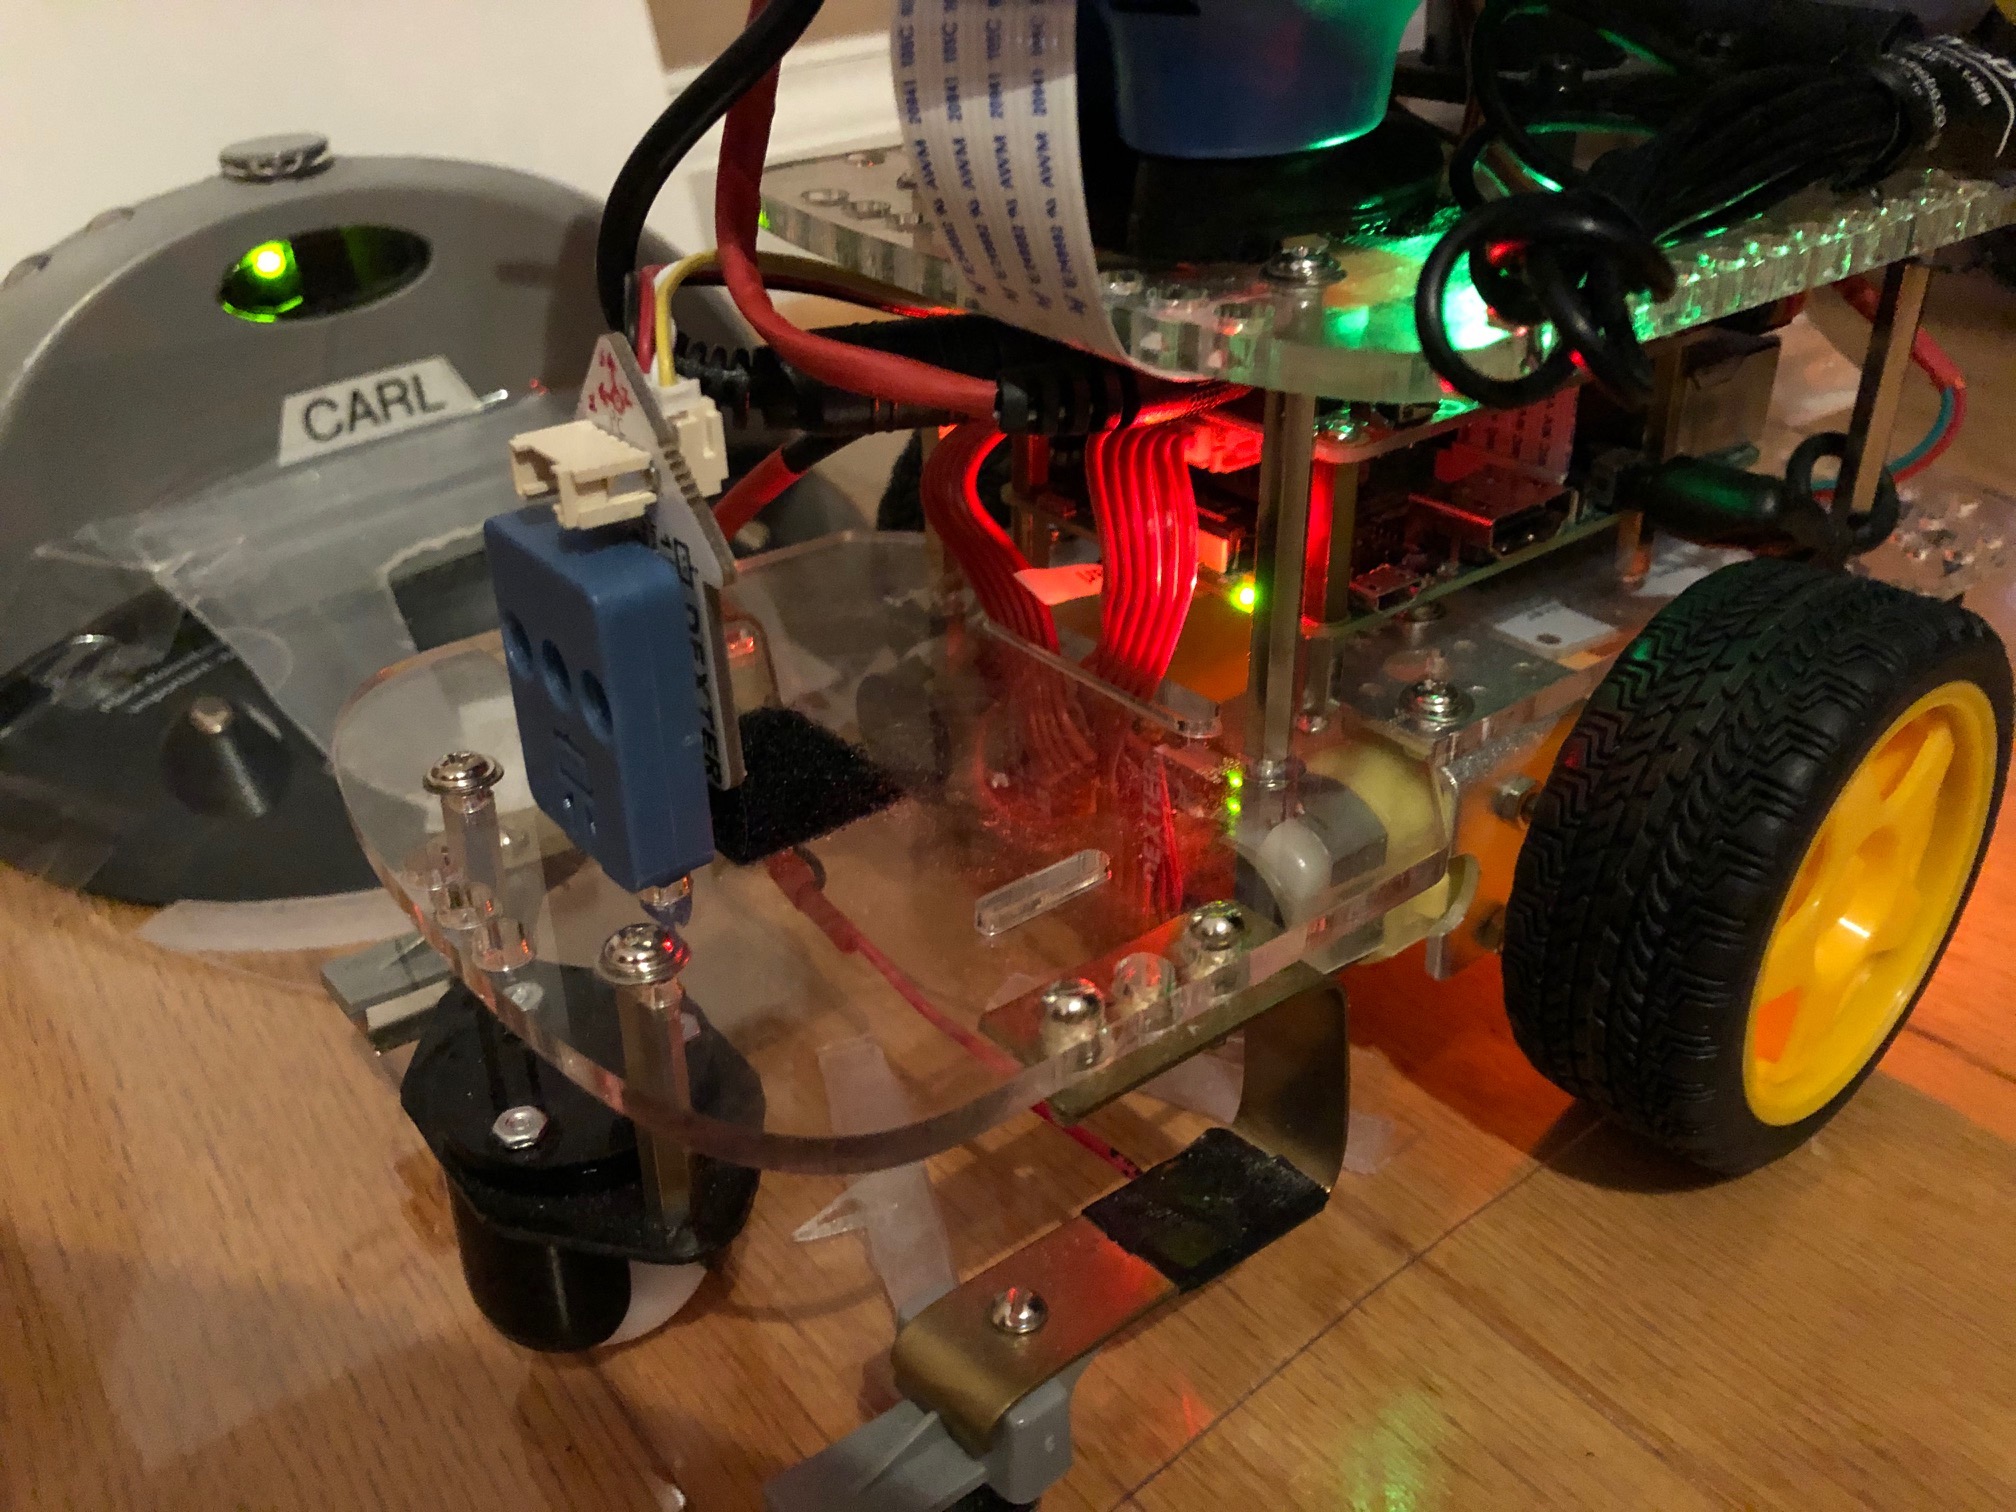
Got my new motor installed - decided to test it with the Beta.
I kept the Lidar disconnected so it didn’t cause problems, and temporarily mounted the IMU in back as indicated.
Drive screen - I’m on a laptop with Ubuntu 18.04 Bionic. When I connect to the GoPiGo wifi I get a “hotspot login” screen with everything showing, so I didn’t need to connect with Chrome. I did end up closing the login screen and using Chrome (not Chromium).
Drive screen works fine. Camera works. Control buttons on browser work, and arrow keys/space bar works. All the lights work.
File screen comes up fine. I didn’t try renaming the robot.
Learn - Bloxter
I have the IMU attached to AD2. The Bloxter program example runs fine after I calibrated the sensor - it prints the correct direction for 10 seconds. The calibration instructions suggest that the Sensor Control Panel will start showing IMU readings after enough data are gathered, but nothing is showing.
The camera worked fine when I was driving, but when I click the Camera icon on the Sensor Control Panel I go to 10.10.10.10/photos on a new tab with the message “If you’re not seeing any photos you need to make sure a USB key is inserted in the Raspberry Pi (green board) of your robot.” I do have the USB key that came with my robot in a USB port. I can sftp into the robot, and see the USB key, so the Raspberry Pi knows it’s there. So I’m not sure why I’m getting this message. USB is formatted in fat32 if that matters. And I do get the USB icon on the top bar (between the stop sign and the question mark).
Distance sensor “Don’t crash” program worked fine
Learn Python
Seems to take a long time for the Jupyter notebook screen to load and it’s not clear that anything is happening. I get the same directory error as cyclicalobsessive of course. The Jupyter notebook does open with the File Browser left sidebar open - don’t know if that was intentional, but might be confusing for newbies.
Code Bloxter and Advanced Bloxter seem to come up fine- didn’t really test the options.
Code Python pulls up the same Jupyter Notebook first lesson as “Learn -> Python” pulls up. I suspect that’s a known issue with the beta, but am mentioning it in case it isn’t.
If I used Bloxter primarily it looks pretty good (except for the camera/photos page and the fact that no data show on the sensor control panel).
Hope that helps. Happy to try anything specific you’d like tested. And happy to try the next beta. Otherwise it’s back to ROS now that I’ve got my motor fixed. 
/K
2 Likes
What happens if you remove the USB key and re-insert it? I think there’s a timing issue if the USB is already in when booting up. Something for me to look at, so thanks for the reminder.
1 Like
When I remove the USB key the USB symbol disappears from the top bar. When I reinsert the key the logo shows up again after a few seconds. But I get the same error message then when I click the Camera icon and I get taken to the /photos page. This was after booting with the key in place.
I tried booting without the key. Got the same results after inserting the USB key. Tried with a different USB key - same. The USB icon does show/disappear as I insert/pull the USB key.
/K
1 Like
Findings while testing with Charlie:
My system:
Windows 10 2004, 64 bit on a HP EliteBook 8570p Laptop with 16 gigs of RAM
Firefox 82.0.2 (64-bit) which is current as of this instant date.
Chrome 86.0.4240.183 (Official Build) (64-bit) which is current as of this instant date.
Microsoft Edge 86.0.622.63 (Official build) (64-bit) which is also current as of this instant date.
Internet Explorer 11.572.19041.0, update version 11.0.210 which is also current.
Charlie’s configuration:
Raspberry Pi:
Pi-4, 4gb, latest firmware.
Raspberry Pi Camera, V2, connected with a standard Pi ribbon cable.
V1 GoPiGo controller board, with v1.0 firmware.
Attached devices:
Dexter distance sensor, (with the eyes) in i2c port 1
Dexter “black-board” Line Following Sensor in parallel with the distance sensor on i2c port 1
Custom bumper contact switches configured as “Grove” normally closed switches on A/D-1
Dexter IMU sensor on A/D-2
Servos, used to control a pan-and-tilt mount for Charlie’s “head”, (the distance sensor)
Servo-1: “Pan” (left-and-right motion).
Servo-2: “Tilt” (up-and-down motion).
Software:
GoPiGo OS, version Beta-1, downloaded to Windows 10 and flashed to a Micro Center 64 gig SD card using Balena Etcher v1.5.73.
Preliminary Findings:
Note:
Unless specified otherwise, all tests were done using Firefox.
While running as a stand-alone device:
- IMU sensor test appears to work correctly, at least with regard to the 8 points of the compass.
- “Blinkers” and “eyes” appear to work correctly.
- Motion was not tested
Discrepancies:
-
UI Discrepancies:
- There is no clear way to move backward between the various levels of the various pages.
i.e. While in the Learn=>Learn Bloxter=>[any lesson], you cannot:
a. Restart a lesson.
b. Re-enable the text box lesson overlays without completely exiting the lesson.
c. Move backward to another stage or lesson.
d. Move backwards to the “Learn/Code” menu page.
e. Move backwards to the opening menu.
Note that there IS a way to do many of these things, (click on the GoPiGo icon, dig through the “help” menu, etc. - but these ways are essentially hidden or perhaps even “Easter Eggs” as they are totally non-intuitive.
Ideally, there should be a clearly indicated way on each page to move backwards or undo what has been done. - When selected, a selected item or button, (at least on the “Drive” page), does not change color or state to indicate being selected.
- There is no clear way to move backward between the various levels of the various pages.
-
Functional Discrepancies on the “Drive” page;
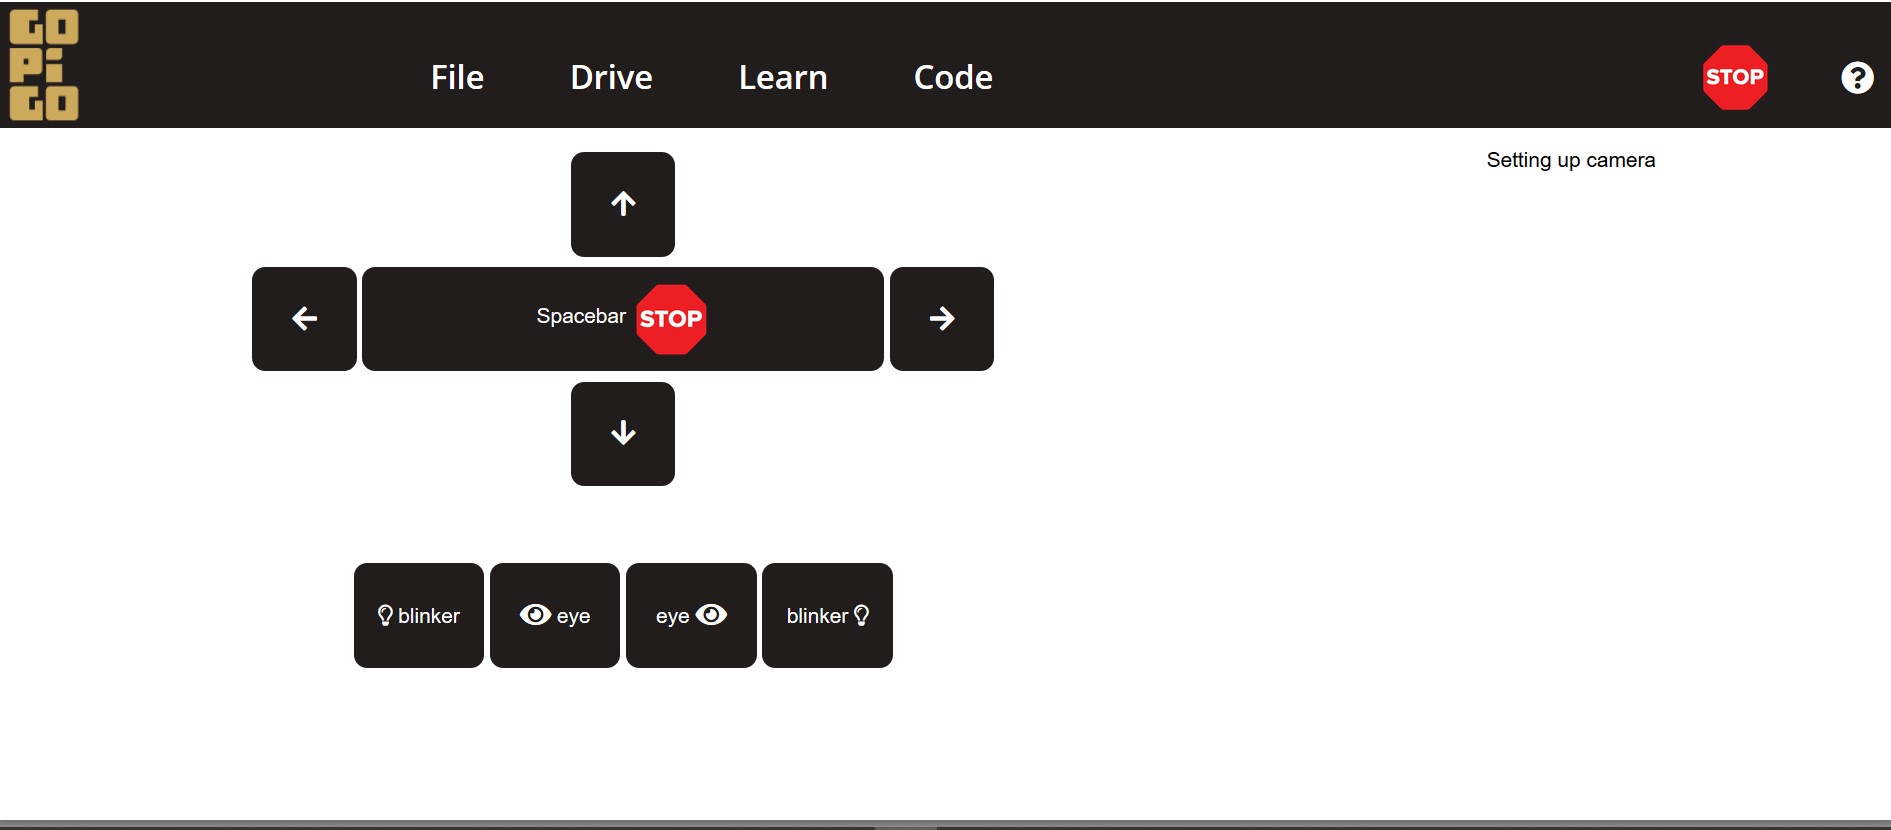
1.While using Firefox, the camera image on the “Drive” page never worked correctly.
When starting the page, the camera window would:
a. Display “Setting up camera”
b. Display a full-size image briefly than crop the bottom of the image to about 1/3 of the image, showing only the top 1/3
c. Display a full-size image briefly than crop the bottom of the image to about 1/2 of the image, showing only the top 1/2
d. Display a full-size image briefly than crop the bottom of the image to about 2/3 of the image, showing only the top 2/3
e. Occasionally show a full-size image. I do not know if the image was frozen on the full-size image as I had a great deal of difficulty getting a full-size image.
f. The image frame would be frozen after being cropped.
g. I did not test motion.
2. Using Chrome, the image worked as expected.
3. Using Microsoft Edge, there was no response at all in the picture’s frame area. No messages, no picture, nothing.
4. Using Internet Explorer 11, I was only able to get the “Setting up camera” message.
a. While using Internet Explorer 11, I had a “USB” icon show in the upper right-hand side task-bar, even though a USB device was not present. -
Hardware discrepancies:
- When shutting down using the button, the system did not completely shut down, rather it halted at a “purple blinking” state of the power LED.
- Note that this also happens when using R4R Buster on occasion.
Illustrations:
Firefox: Setting Up Camera

Firefox: Truncated image
Note: ALL Firefox pages for this robot had the “You Must Login” banner that, when selected, takes you nowhere.
Firefox: Less truncated image.
Internet Explorer 11: USB icon and never shows any picture at all.
1 Like
I also saw that. Forgot to record it as I was busy trying to find the little button.
1 Like
I am sure I only scratched the surface.
Unfortunately, I do not wish to test using a different, (3.n), Raspberry Pi board because I really don’t want to disassemble and reassemble Charlie any more than necessary.
I really wish there was a battery meter in the task bar, (or at least a way of putting one there during testing), so that I can try to correlate errors with battery voltage. I know there’s a really good chance that these errors have absolutely NOTHING to do with battery voltage but. . . I have seen so many weird things happen due to low battery voltage, I’d really like that data point available, at least during testing.
@cleoqc,
May we please have a battery meter on the page, preferably in the task-bar, on both the “teaching” page and the desktop?
Perhaps this can be implemented as a “secret” feature, like SSH in DexterOS, by “touching” a filename somewhere?
Jim, Is it possible in the GoPiGoOS to run a battery voltage reading app via an ssh connection?
#!/usr/bin/python3

# battV.py    Read Battery Voltage (thread-safe)

# IMPORTS
import time
from datetime import datetime
import easygopigo3

def printStatus(egpg):
    vBatt = egpg.volt()  # use thread-safe version not get_battery_voltage
    print("{} Battery Voltage: {:0.2f}".format( datetime.now().date(),vBatt))


# ##### MAIN ######

def main():

    # #### Create a mutex protected instance of EasyGoPiGo3 base class
    egpg = easygopigo3.EasyGoPiGo3(use_mutex=True)
    try:
        while True:
            printStatus(egpg)
            time.sleep(5)
        # end while
    except KeyboardInterrupt:
        print("\nExiting battV.py")
        time.sleep(1)

if __name__ == "__main__":
    main()
copy it into battV.py
chmod +x battV.py
./battV.py (control-c to exit)
Or can you run a Jupyter console tab at the same time you are testing? Then you wouldn’t need to remote ssh in.
1 Like
Yup!
It’s also possible to run the Jupiter code you suggested, wire a voltmeter, or a whole host of things. 
The point I’m trying to make is:
- The charge state of any battery powered device is an absolutely essential piece of information - no matter how powerful or long-lasting the battery may be.
Ref: Laptop, cellphone, etc. - Since this is an essential piece of information, it should be convenient to examine without jumping through hoops.
a. Even in a classroom environment, (make that “ESPECIALLY in a classroom environment”), it is not unreasonable to expect batteries to run-down or inadvertently not be recharged.
b. It’s a known, and oft’ proved fact that 99.99999. . .99999. . .99999% of the unexplainable flaky behaviors with both the Raspberry Pi and the GoPiGo stem from low battery voltage.
c. It’s important enough that, now that the design is up for grabs, it is not unreasonable to ask for at least SOME kind of battery state icon on the task-bar. This has been available in every distribution of Linux known to man since the Dawn of Time.
Ref: Red-Hat Linux v5, which pre-dates Fedora, loaded up on floppies, and came with a roller-skate key so that you could wind it up, had a battery meter - IF you could get the desktop working! 
d. The UI doctrines of “least surprise”, “closure”, and “making essential information easily accessible to the user”, argue strongly in its favor.
e. Taskbar widgets aren’t exactly bleeding edge technology. It shouldn’t be any more difficult to implement than a real-time-clock. Once I get some spare time after completely disassembling this version, (evil laugh!), I will look into that.
1 Like
@cleoqc,
Is there any kind of formal specification I can test against? As it is, I am doing shot-in-the-dark ad-hoc testing which is guaranteed to miss as many defects as it finds.
Is there any formalized bug tracking system I can enter bugs into, rather than posting mile-long messages here?
Additional issues found upon further testing:
Note:
This session, Firefox did NOT show the “Login to network” banner and camera video was full-size and not frozen. I do not know why. Repeated refreshes did not cause the original problem to recur.
Test: Change hostname: (Rename Robot)
- Changing hostname from “GoPiGo” to “Charlie” was successful.
- After changing hostname, attempts to refresh the window simply repeats the reboot step. You have to use the browser’s back button, restart, or change the URL to just the IP address in order to return. This should automatically redirect after the reboot.
- Within the context of changing the hostname, it should be possible to change the robot’s IP address. This is especially desirable if more than one robot is going to be used in a class.
a. How do you do this, if at all possible? - Likewise, when changing the robot’s WiFi mode type from within a VNC window, it is not possible to select a static IP address.
Test: Use major controls from home screen.
- The action menu bar is not populated with choices on the “home” screen. The choices, (File, Drive, Learn, Code), should always be at the top of the page so that they are selectable from anywhere.
- In this session, the video on the “Drive” screen was correct in Firefox. Likewise the “log into the network” banner shown before was not present. This could be cause and effect, (absence of login banner causes video to work), but I was not able to characterize it.
Test: Working with lessons:
- It is not possible to navigate within lessons without using the help icon. This should be more intuitive and obvious.
- When in a modal dialog, (lesson steps), the lesson modal dialog can extend beyond the bottom of the screen, making the controls unreachable.
a. The modal dialog itself is not scrollable.
b. Because it is a modal dialog, the controls within the window, such as scroll bars, do not work.
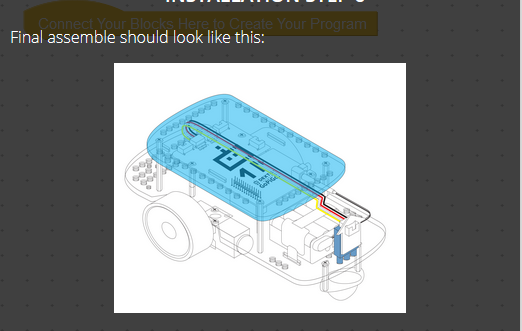
c. The only way to exit is via the browser back button. - Some of the modal dialogs, (i.e. the IMU dialog, etc.), have grammar and spelling errors.
Viz.: “Final assemble should look like this” should be “The final assembly should look like this”
a. Recommendation: Carefully examine all the text assets for grammar and spelling.
b. Note that I did not examine, nor did I test, any languages other than English. - There is no audio via the audio jack. (I don’t have a USB speaker.)
Test: Working with Bloxter.
- The sensor control panel in Bloxter shows no data for the IMU, regardless of which one is selected. Other sensor selections show data for the particular sensor.
- The individual sensor selections can only accept one sensor per port. However, it is possible and perfectly legal to apply more than one sensor to a port.
Example: Charlie has both his distance sensor and the line-follower sensor wired to i2c port “1” as a matter of convenience and to reduce the tangle of wires at the front of the Raspberry Pi board. - The IMU has two selections: “IMU (compass)” and “IMU (airplane)”
a. There is nothing that describes the difference in functionality, or why one would be used instead of the other.
b. All references to the IMU do not specify either version, they simply say “IMU”. - All repeat loops have a built-in half-second delay that is not configurable.
a. This delay should not be there because it is unexpected and can neither be changed or disabled.
b. This also violates the “law of least astonishment” as the behavior of the loop is unexpected.
c. Suggestion: There should be no built-in, (and hidden) time intervals in any program construct. Any program construct should do exactly what it says and only what it says.
d. Alternate Suggestion: Loops that have a built-in delay should show that delay at the end of the loop and - ideally - it should be configurable. - The block for “Turn [blinker] on for [count] [interval]” has no way to reverse the logic.
a. Suggestion: The block should be redesigned to be:
“Turn [blinker] [on|off] for [count] [interval]” - Loops have no “pause” construct that would allow the program flow to be paused for a specified interval. This is true in both Bloxter and Advanced Bloxter.
a. Suggestion: Add a “Pause” construct with a configurable interval.
Test: Working with the VNC Desktop
- From within the VNC desktop, the “panel properties” show a battery meter widget installed, however it is not visible.
- Why is there a “PivotPi” control panel icon visible on the desktop? It does nothing when clicked.
- Likewise, there is an “IP address” message file on the desktop. Why is it there?
- After selecting the “Advanced Communication” control, pressing the “exit” button without making changes requests a reboot anyway. This should only request a reboot if any change has been made, even if reverted.
- In Scratch, there is the ability to go to a bunch of example programs by clicking on a button that opens a file browser window. Double clicking on any Scratch program file there does NOT launch Scratch with the program loaded. Perhaps a file association is missing?
- From within the Network Configuration dialog, there is no way to set a static IP address.
-
CRITICAL: Unable to change WiFi country within raspi-config.
a. Attempting to change the WiFi country returns a “cannot connect to wpa_supplicant” error.
b. This is a critical error because this robot can, and likely will, be used outside of the US and Canada.
c. It is a matter of established law and treaty that WiFi bands and frequencies must be changeable to conform to the standards of the locale used, unless use of the device is specifically limited to the US/Canada.
d. This functionality exists in both Raspbian/Raspberry Pi O/S and Raspbian for Robots.
Respectfully submitted: