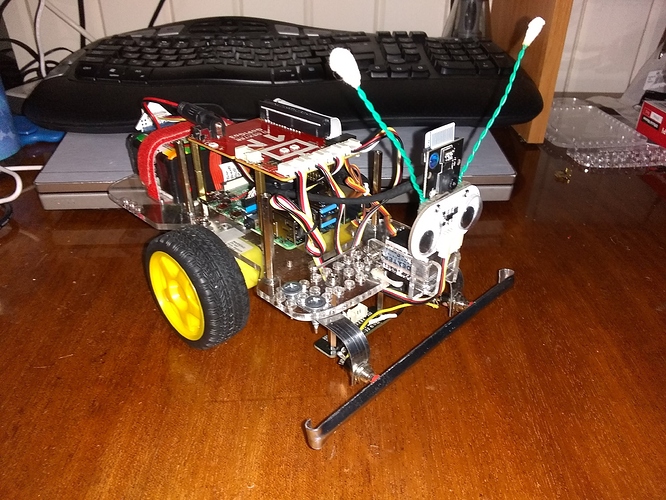
Greetings!
Now that the Latest and Greatest Raspberry Pi - the P-4 - is officially a Happening Thing, the burning question is “Can I build a GoPiGo using a Pi-4?”
Update:
As cleoqc mentioned in a later posting (below), newer versions of the GoPiGo controller/driver board CAN be assembled using a Pi-4 without having to jump through the hoops I had to jump through. So, this appears to apply to earlier version GoPiGo-3 boards.
Short Answer:
If you’re looking for “plug-and-play”, (as in “assemble the kit according to the published documentation” kind of plug-and-play), and expect it to work right outta’ the box - not going to happen.
Longer Answer:
It can be done, but there are significant differences between a “Pi-4 build” and a “stock” GoPiGo build.
-
The Pi-4 absolutely, positively, requires some kind of active cooling unless you plan to have your 'bot swimming in refrigerant all the time. This translates into a heat-sink and fan. Oh, and did I forget to mention it eats batteries? Yep! It does.
-
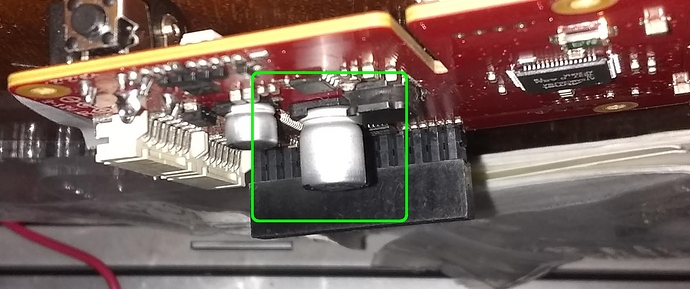
On the bottom side of the GoPiGo circuit board is a (relatively) large component - CP-14, a 470μf electrolytic filter capacitor - which projects downward toward the Raspberry Pi circuit board almost directly over the CPU and memory chips.
Viz.:
This is the GoPiGo controller/driver board, showing how far “down” C-14 projects.
.
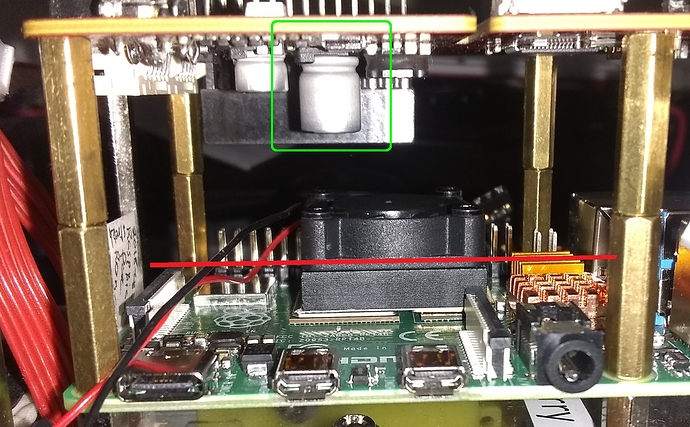
And this shows (approximately), how far down C-14 projects relative to the processor and heat-sink - the red line shows about where the top of C-14 would be if the normal amount of spacing were maintained.
.
As you can see, there needs to be significantly more space between the GoPiGo controller/driver board and the Raspberry Pi-4’s PCB to accommodate the extra height required by the Pi-4’s heat-sink and fan.
.
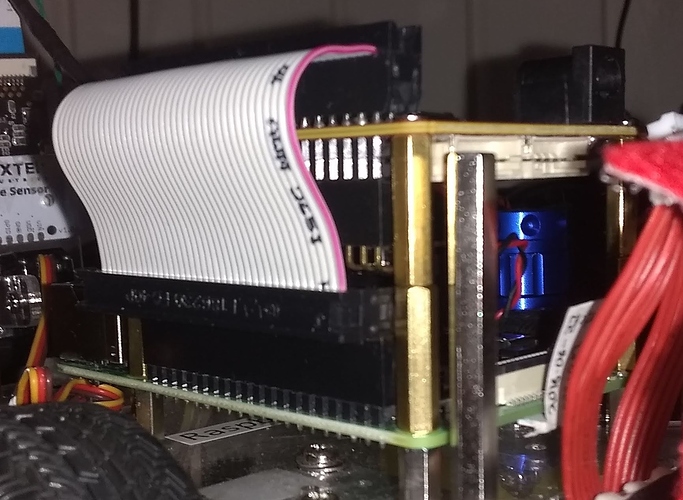
All this additional height requires a 40-conductor ribbon-cable to connect the Pi-4 to the GoPiGo’s controller/driver board.
.
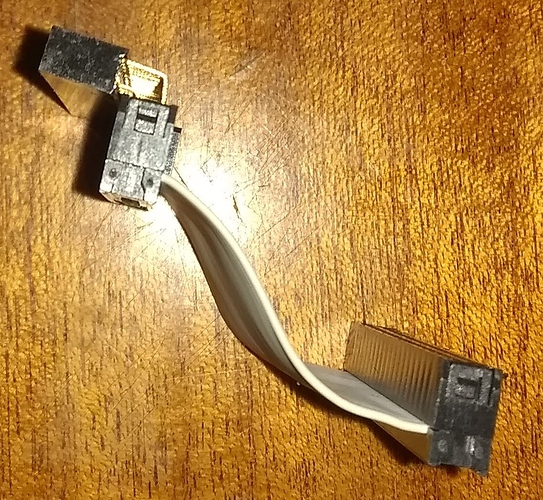
In addition to that, the amount of space between the mounting spacers is too narrow to fit the ribbon cable’s connector - so I had to adapt it by using a 90° female PCB header as shown below.
.
Does this mean you should give up the idea of a Pi-4 powered GoPiGo? Absolutely not!
I did a full-up revamp of Charlie, including both the Pi-4, an Adafruit RTC (hardware clock) module, an IMU (Inertial Measurement Unit) upgrade - the pointy thing behind the batteries, an upgraded camera and camera cable, an updated rear swivel, and a new battery holder to replace the one I (accidentally) damaged earlier in Charlie’s career.
And here’s the proof!
.
Here’s the New and Improved “Charlie” with batteries installed, Pi-4 (and heat-sink) powered up and ready to go!
.
Just in case you didn’t believe me. . . . He talks! Courtesy of noVNC
It is doable. All it takes is some imagination, patience, and higher-capacity batteries!
What say ye?
Jim “JR”
