Line Follower Mat - best practices / ideas for mat creation

All -

I need to create 10 line following mats which will be used in Girl Scout program boxes. They need to last through numerous troop meetings.

I had created a mat for an event using a roll of contact paper and applying glossy electrical tape to contact paper (roughly 18" x 50"). Applying the tape was time consuming, and in practice I discovered that it worked well indoors, but not outdoors (glare off the glossy tape).

As I need to create 10, I was hoping to enlist some Girl Scouts for this task. Thought I’d reach out through this forum for ideas for mat creation - hope to hear your thoughts and learn something!

Hello @brad.hontz

If it helps any, we do distribute templates so you don’t have to put tape on your surface.

What I do for development but I’m not certain how it would survive a summer camp, is I print the template and tape the pages to a plaskolite which can be moved around.

The template for the gigglebot is the same as the one for the GoPiGo, with only the most commonly chosen pages.

Thanks so much! We’re making “Programs in a Box” that troop leaders can check out, so there will literally be a “box” (like a rubbermaid container) that everything needs to fit in, including the line following mat or tiles. For that reason, I liked something that rolled up. After writing this post I thought I might try to make a stencil and then flat spraypaint the stencil on top of a roll of shelving contact paper. Not sure how the paint will hold up. I have also found articles on using art tape to make curves that I may look at. Thanks again!

Well, I’d like to come back to the “line following mat” creation issue once again.

As mentioned previous, I need to make 10 mats for 10 “program in a box” kits I’m building for troop leaders.

I had created an initial mat (used for a Girl Scout event) using a roll of contact paper and electrical tape IMG_3462 
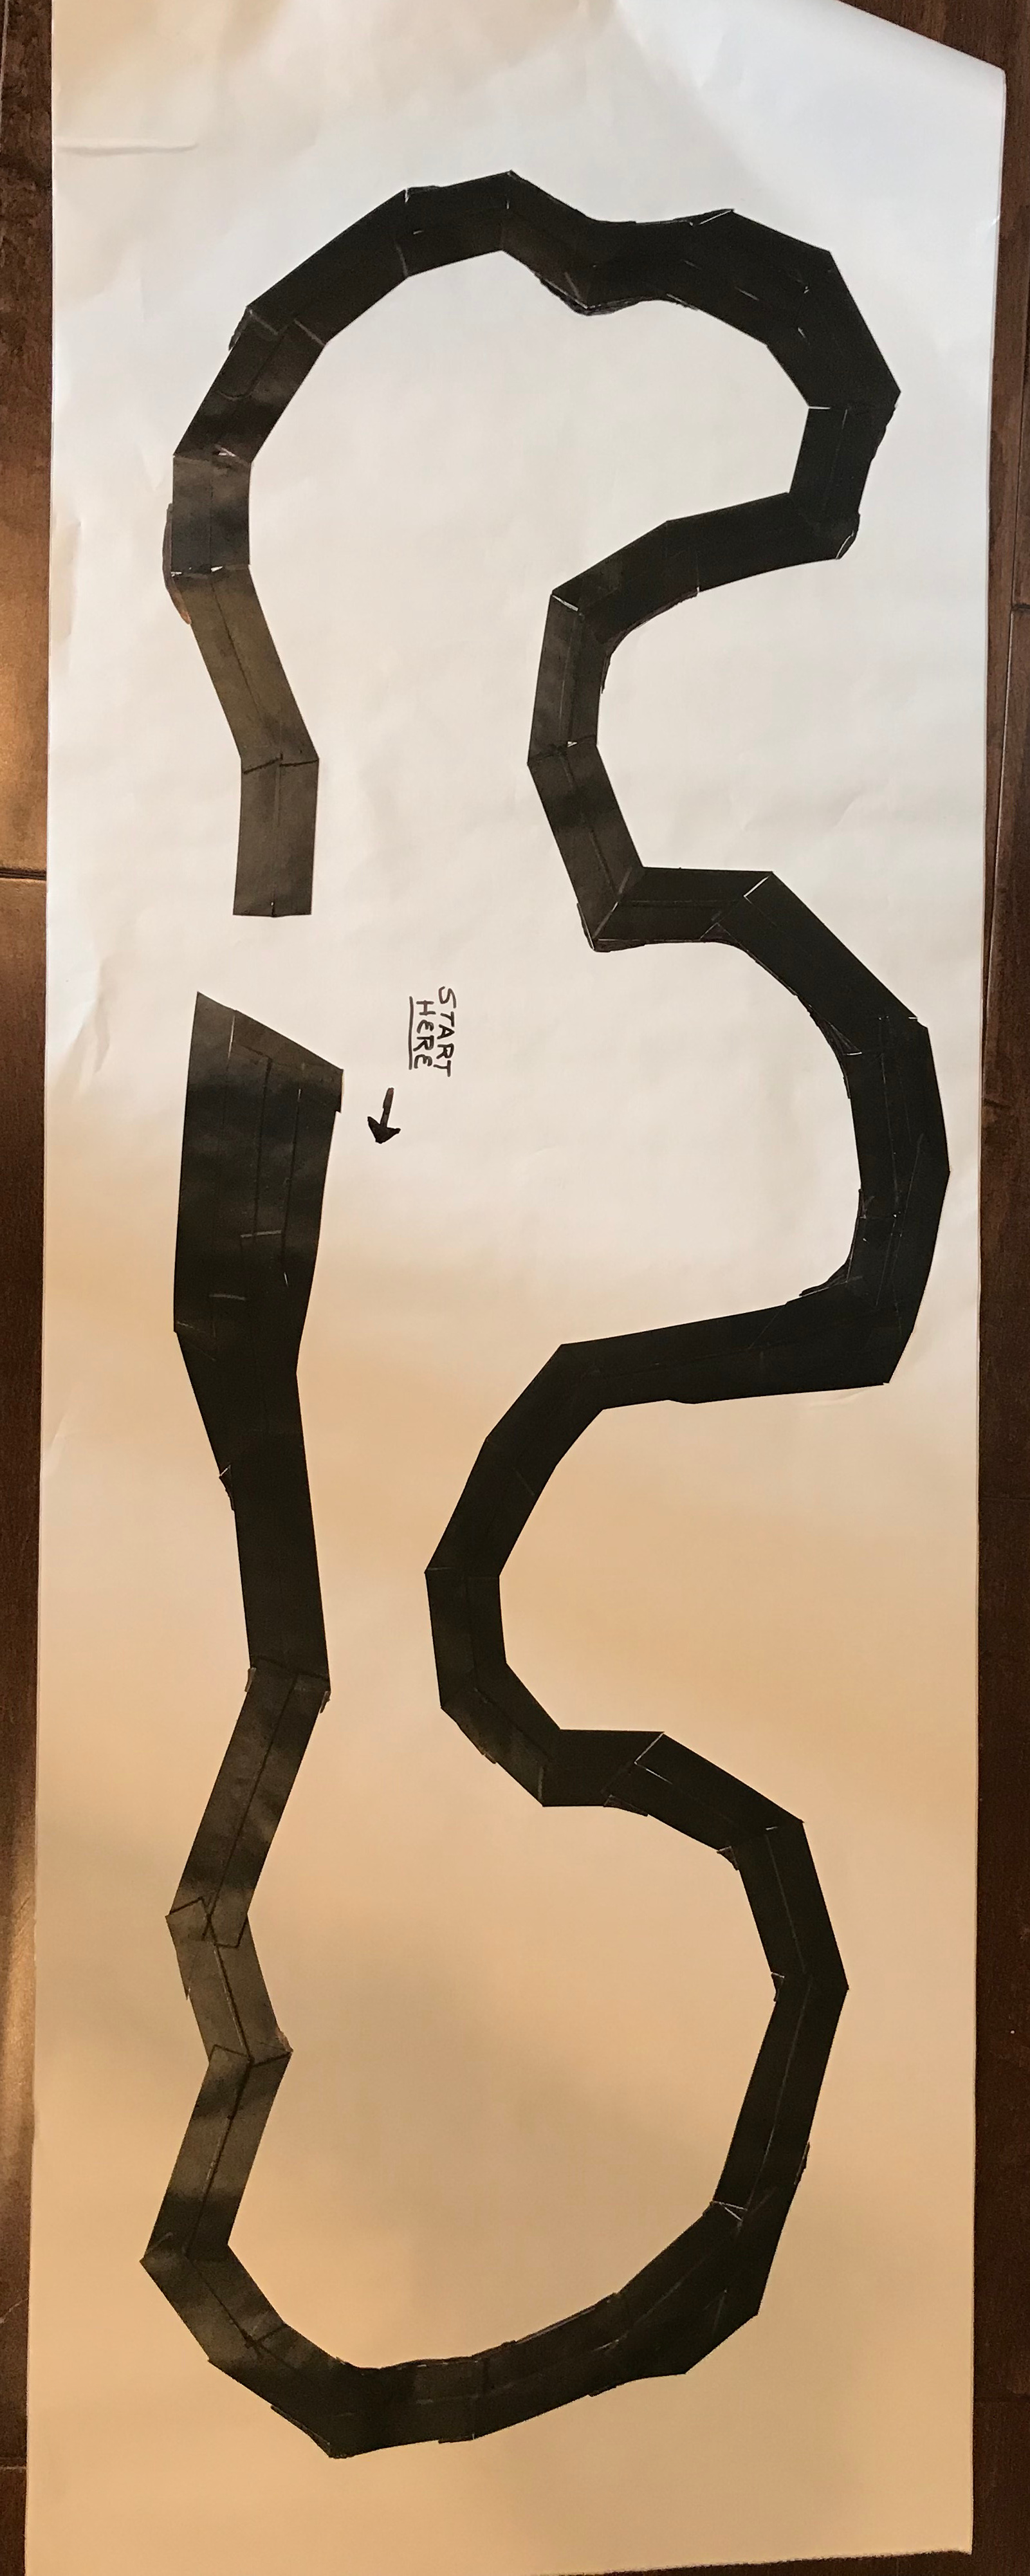
. That worked just fine, however, it is too labor intensive (lots of cuts of the tape to make corners) to consider using this method to create 10 mats. BTW I did try stretching the tape to make corners, but that just bunched up the contact paper, so I reverted to “lots of cuts”.

My plan for creating 10 mats was to create a design using Powerpoint and have it printed on a 24" x 36" vinyl mat from VistaPrint ($10/per). Today I printed my design on regular paper (FedEx large format printer) as a test, and was surprised that the Gigglebot didn’t recognize the line at all. Specifically, if utilize this micropython code fragment:

    right, left = read_sensor(LINE_SENSOR, BOTH)
    display.scroll(left)
    display.scroll(right)

… when placed over black electrical tape, I will get a reading of 0 from both line sensors. When placed over a printed line I get readings of 300 - 400 (seems to be a lot of variance between the two sensors), but the readings are high enough that there doesn’t seem to be much differential in sensor readings from white paper.

I then tried printing one of the Dexter template pages using my home inkjet and had the same experience as the FedEx 24" x 36" printed example.

I would ideally like to use Microsoft Makecode to use with the line following mats, and I don’t believe you can tweak the threshold using Makecode (there is just a line following block). Makecode does work fine with the black electrical tape just FYI.

Not sure how to proceed, just hoping to get some feedback at this point!

Thank you in advance,
Brad Hontz
Volunteer,
STEM program development
Girl Scouts of Orange County

Brad:

Though I understand the idea of the roll-up mat, I would like to place the idea of a whole collection of movable tiles back at your feet.

I am planning some line follower experiments myself, and plan to use the tiles for the following reasons:

  1. It’s durable and replaceable.
    If one tile gets damaged, you don’t have to replace the whole mat.
    There’s less chance of tear/damage.

  2. It’s “pre-tested” and known working.
    As Cleoqc said, they use it in-house and the Gigglebot uses them too.

  3. You can make as many, or as few, as you need.
    Additionally, if you share the Dexter link for the tile templates, your girls can print any additional tiles they may need/want.

  4. Your girls are not limited to a set track layout.
    With movable and separate tiles, your girls can get as creative as they wish.
    What happens if the 'bot circles and crosses it’s own line? What about a line tangent to a complete circle? What about corners of different radii? Maybe you can make tiles with different line thicknesses?

  5. Black toner** and black ink - especially pigmented ink - are “flat” black, (on plain paper).
    You get a nice non-reflective surface.
    You can experiment with different line weights, (densities).
    You can experiment with different line colors.
    ** This assumes powdered toner. The “wax” based toner slugs used in some color printers has a decided gloss.

You can stick the paper sheets directly down on the floor, or - a potentially better idea - get a sheet of masonite, marlite, or some other thin, cheep, cardboard-like panels or squares. If you get panels, (4’ x 8’ is a common size, though many places will cut them into 4x4’s for you), you can make cutting them into tile-sized pieces part of the girl’s project. About time they learned to use real tools! (Just kidding!!)

Though it may not be as convenient as a rolled-up sheet of kraft paper, I think it’s a better idea in the long run.

What say ye?

Jim “JR”

P.S. @cleoqc
What size paper is used in Canada? A4 or “Letter” (8.5 x 11")?

What paper? (Plain? Glossy? High-brightness?) What printing density? (Normal? Draft/Eco? High Quality/Photo?)