Hi Loretta,
I’m terribly sorry you’ve had issues booting up your Raspberry Pi. Because of this, I’m going to reiterate what needs to be done in order to get it up and running.
-
For your Raspberry Pi, you need to have a micro SD Card with a DexterOS image on it.
You can download the latest DexterOS image from here. Download it and un-archive it.
-
Plug in your micro SD Card into your laptop (or adapter for SD cards) and using Win32DiskImager or Etcher, burn the image to your micro SD Card.
-
Insert it in your Raspberry Pi and with the GoPiGo3 already stacked on top of your Raspberry Pi, boot up the Raspberry Pi.
Following these 3 steps, you should see the red power LED turn on, whilst the green state LED of your Raspberry Pi (and not the one of the GoPiGo3 board) should haphazardly blink, with no apparent coherence if you catch my drift.
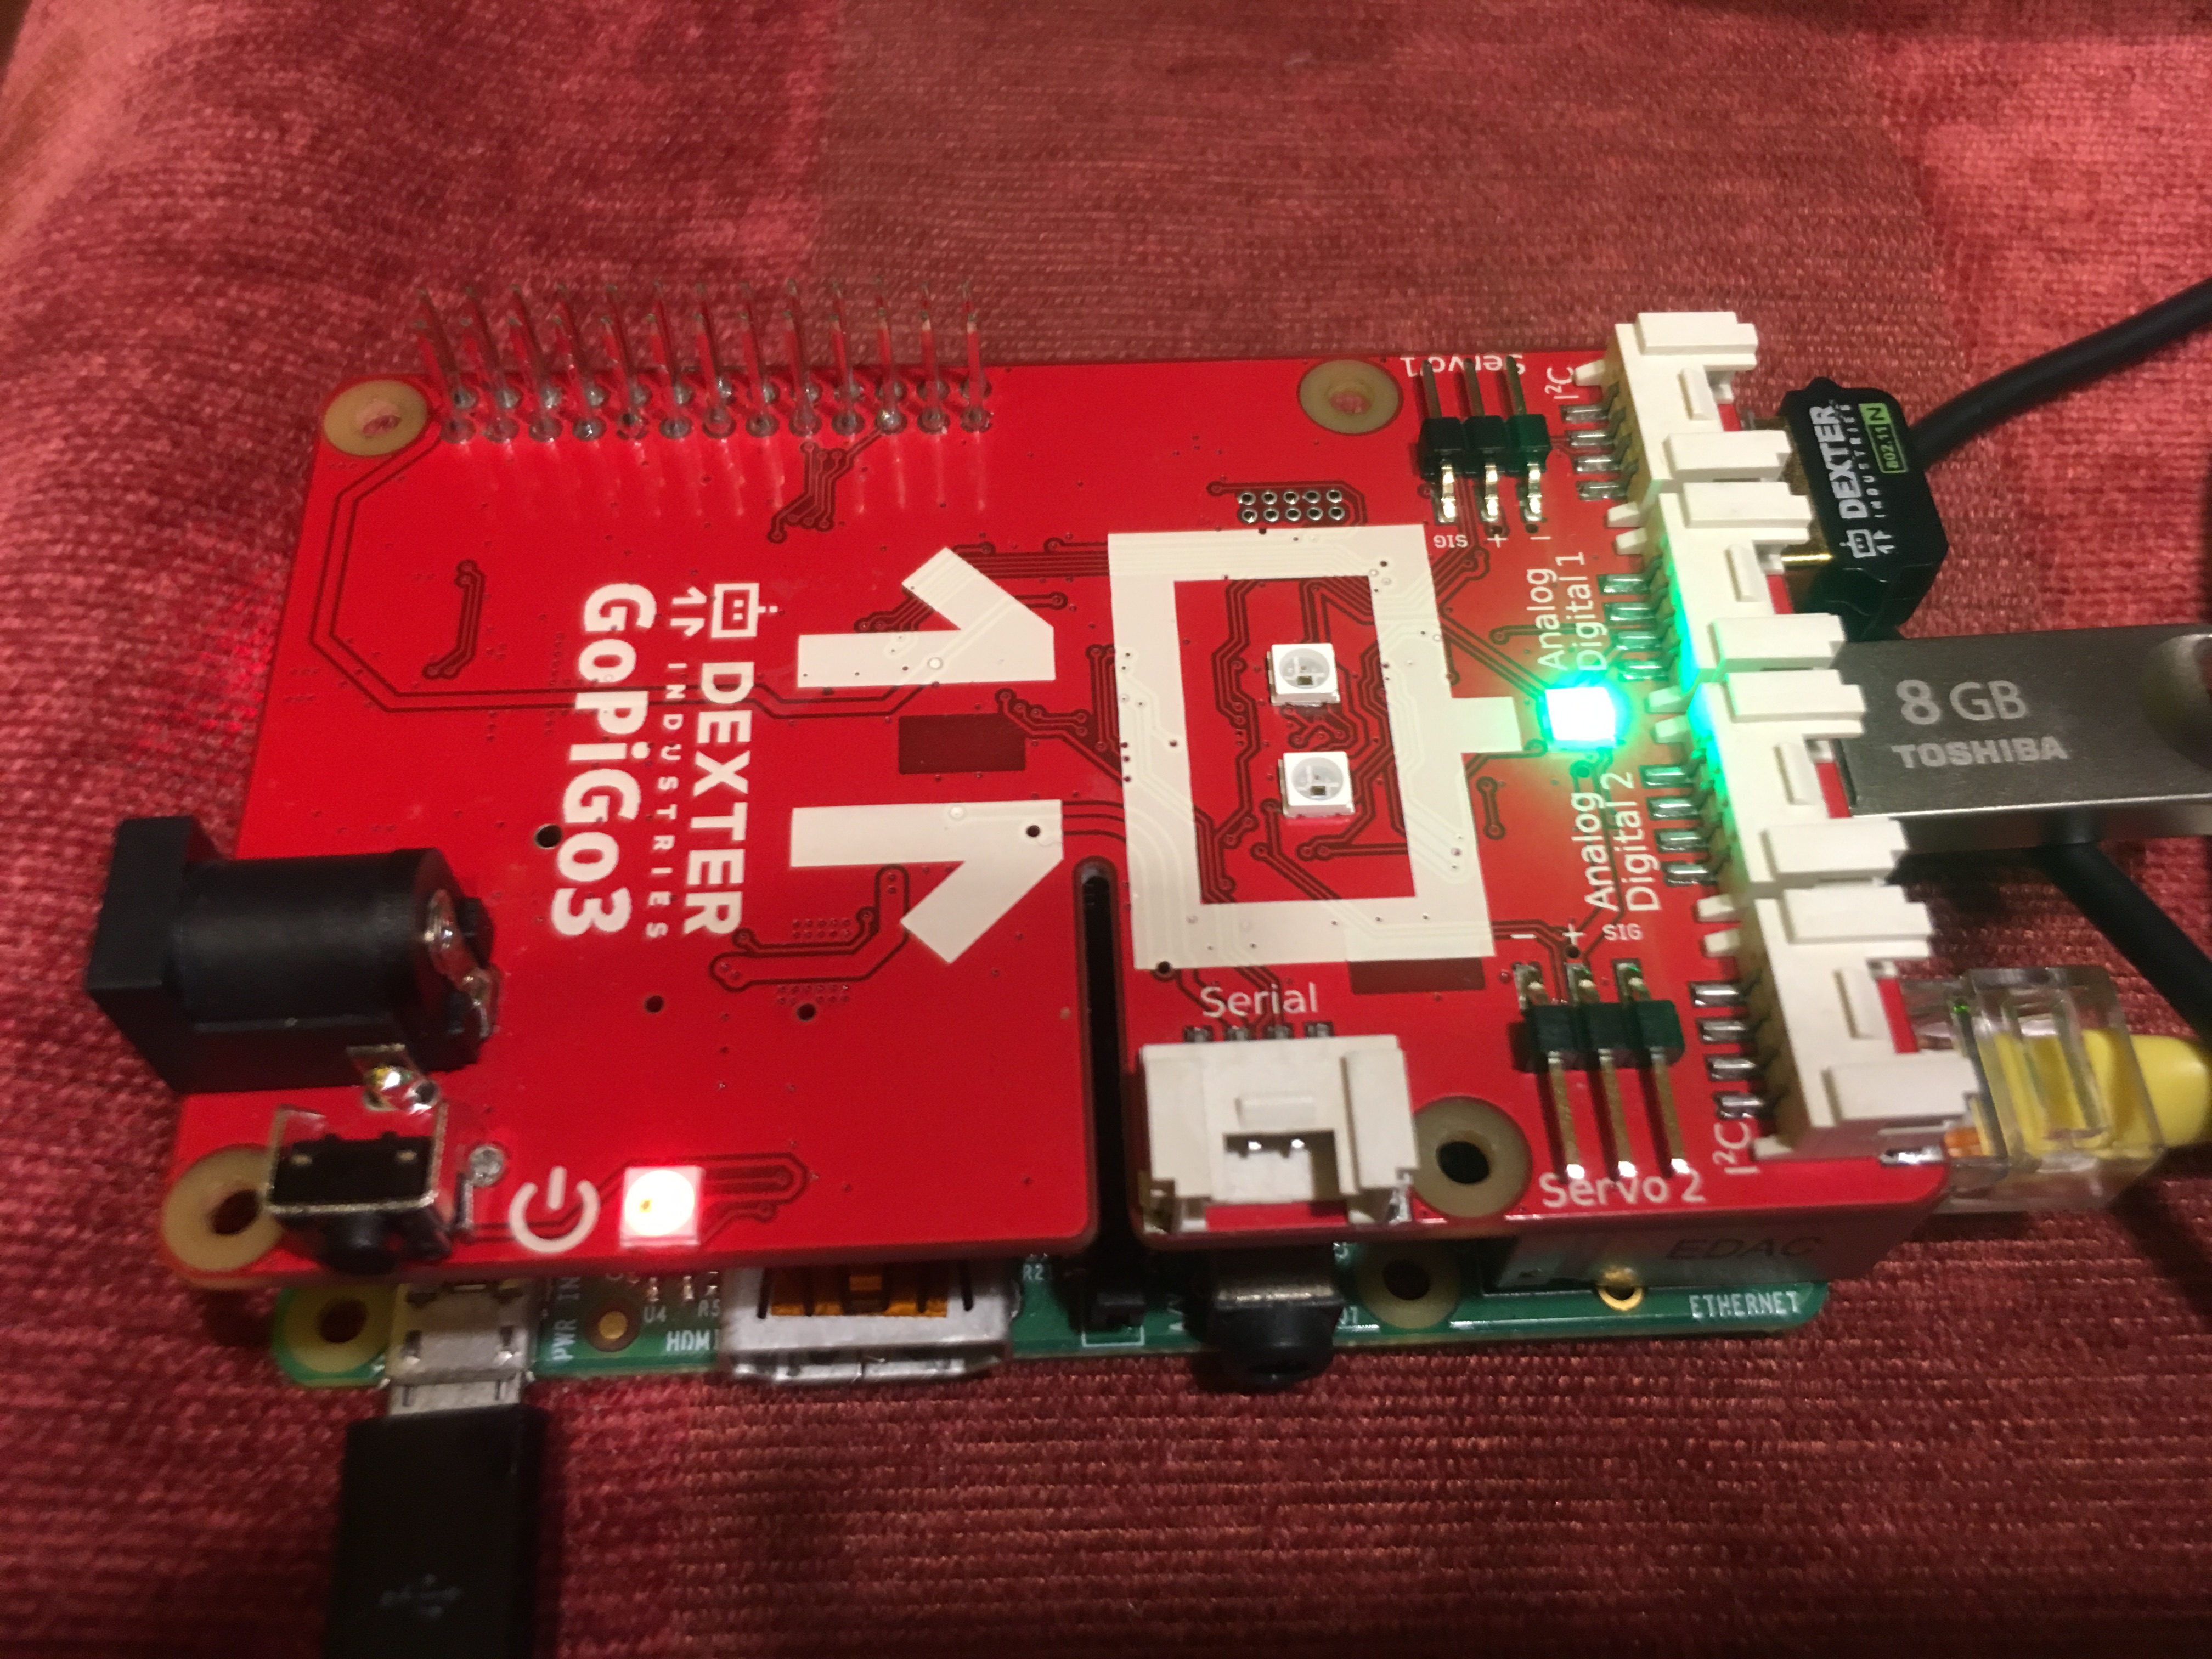
After a minute or so, you should see the green LED on the GoPiGo3 board light up just like in the following scenario:

Next up, you should see on any wireless-enabled machine the GoPiGo network showing up.
If you don’t see any network show up, could you then hook up the Raspberry Pi to a TV that has an HDMI port? Apropos, before hooking it up to a TV screen, shutdown the Pi and after you get it connect and then power it up again. What we want to see is if we get any output on the TV at all - photos from you should be more conclusive.
Another thing I want to bring the attention to is Raspbian. As far as I understand, you had used this image from the Foundation’s website and after booting up your Raspberry Pi, you didn’t see any output on the monitor/TV.
Can you confirm this?
The last thing is about the acrylics and there are 2 matters that need to be discussed:
-
The minor chips or cracks.
-
The quality of the acrylic’s cutting.
Regarding the minor chips or cracks.
Regarding the minor chips or cracks, it’s not normal to have them. I’m telling you this as I have experience in the manufacturing process of acrylics, but it may also be that you’re referring to the rough edges a laser cut can do.
See, when an acrylic is laser cut, the beam of heat from the laser melts the edges and the material starts to protrude to the exterior. When the material cools down, the edges will feel rough and small parts of the protruded material could break and fall. Some people prefer to sand paper and others don’t do it. Also, the protrusion of the material gets bigger as the thickness of the acrylic increases.
I’m really curious to see what you’re referring at, so could you make some close-up photos of the acrylic where you think there are chips or cracks?
Regarding the quality of the acrylic’s cutting.
The laser cut should be as straight as possible and should look professional. When the laser is set to a higher power than normal for a given thickness of the acrylic, the cut may appear as it hasn’t been done by a machine, but by a human. Take this as a fact and not like this is the case for it - I’m just stating facts here.
Could you make some photos to show us what you’re referring at? And we’re in no way offended by these, how could someone be? Actually, when customers come back with feedback, we’re quite happy as this is an opportunity for us to better our products.
Cheers!


