Getting Started with GoPiGo OS Update Failure

Hi Everyone,
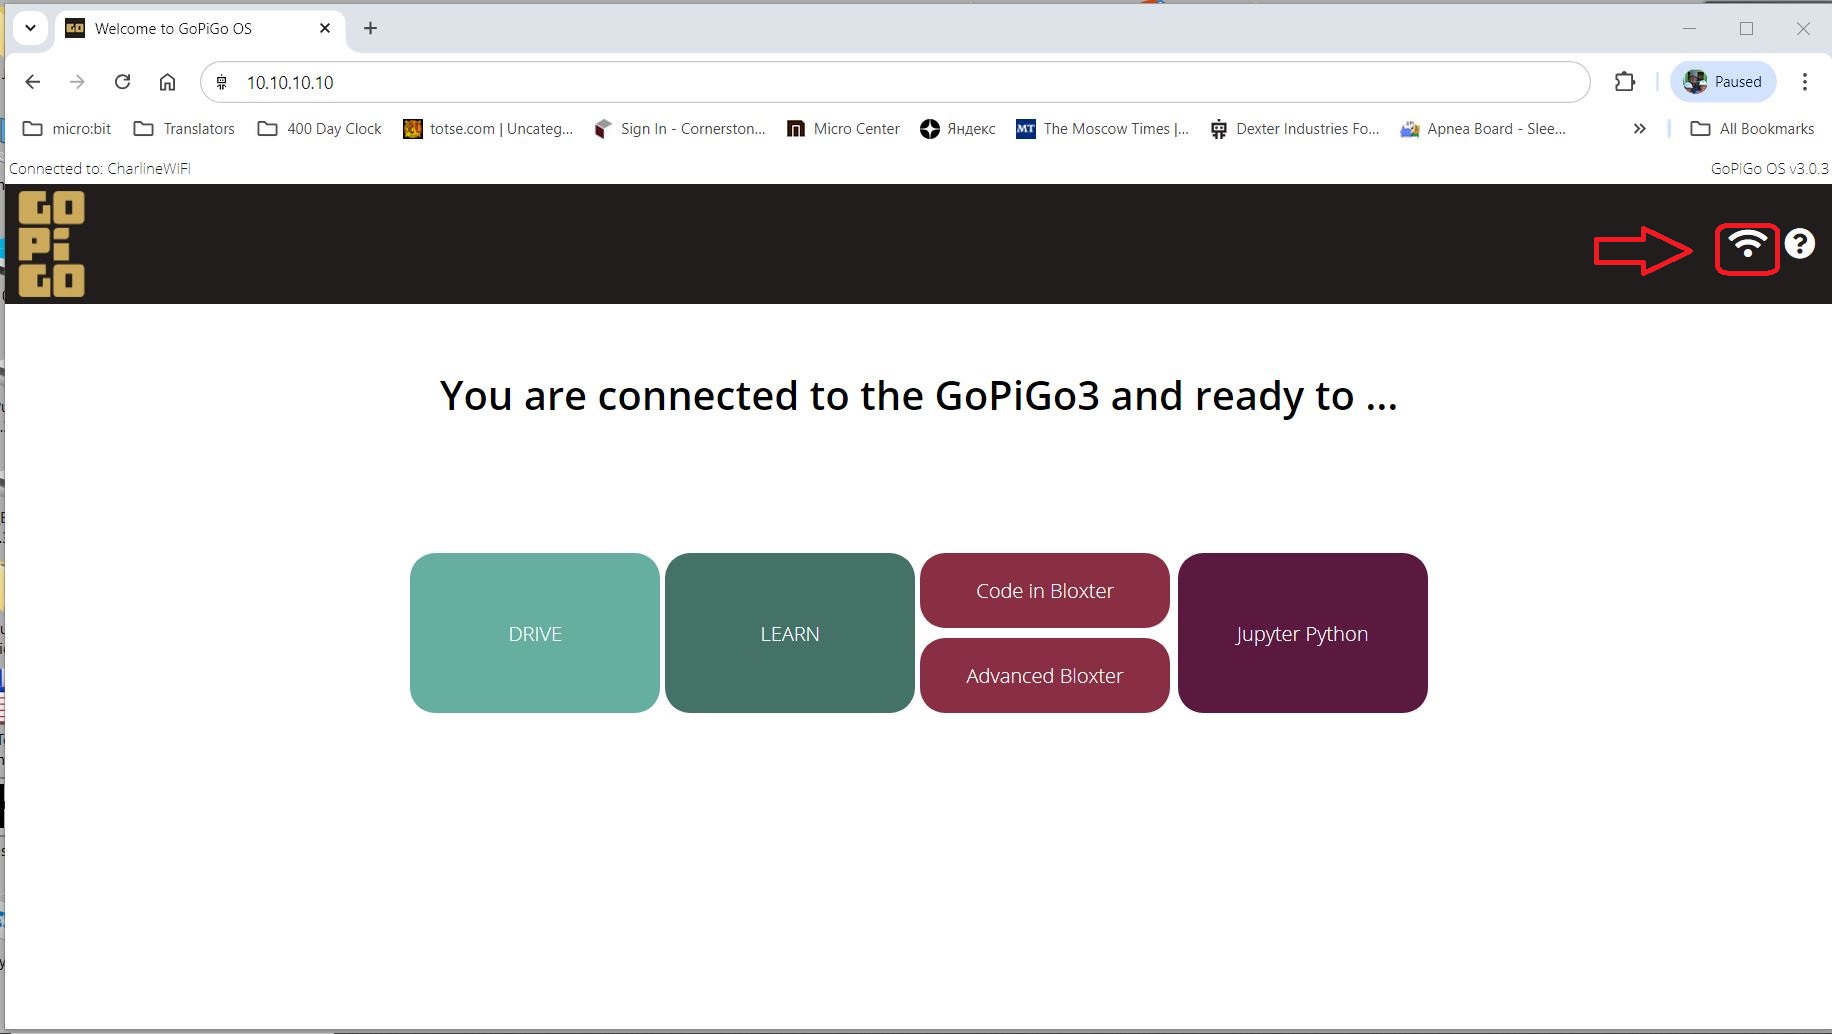
I am getting my GoPiGo’s ready for fall semester. I download and installed the GoPiGo OS 3.0.3 and have established a VNC connection.
sudo apt update
gives me the following messages.
Get:1 Index of /debian buster InRelease [38.6 kB]
Get:2 Index of /listing/uv4l_repo/raspbian/stretch stretch InRelease [38.6 kB]
Get:3 http://deb.nodesource.com/node_9.x buster InRelease [38.6 kB]
Get:4 Index of /raspbian buster InRelease [38.6 kB]
Err:1 Index of /debian buster InRelease
Clearsigned file isn’t valid, got ‘NOSPLIT’ (does the network require authentication?)
Err:2 Index of /listing/uv4l_repo/raspbian/stretch stretch InRelease
Clearsigned file isn’t valid, got ‘NOSPLIT’ (does the network require authentication?)
Err:3 http://deb.nodesource.com/node_9.x buster InRelease
Clearsigned file isn’t valid, got ‘NOSPLIT’ (does the network require authentication?)
Err:4 Index of /raspbian buster InRelease
Clearsigned file isn’t valid, got ‘NOSPLIT’ (does the network require authentication?)
Reading package lists… Done
N: See apt-secure(8) manpage for repository creation and user configuration details.
N: Updating from such a repository can’t be done securely, and is therefore disabled by default.
E: The repository ‘Index of /debian buster InRelease’ is no longer signed.
E: Failed to fetch http://archive.raspberrypi.org/debian/dists/buster/InRelease Clearsigned file isn’t valid, got ‘NOSPLIT’ (does the network require authentication?)
N: See apt-secure(8) manpage for repository creation and user configuration details.
N: Updating from such a repository can’t be done securely, and is therefore disabled by default.
E: The repository ‘Index of /listing/uv4l_repo/raspbian/stretch stretch InRelease’ is no longer signed.
E: Failed to fetch http://www.linux-projects.org/listing/uv4l_repo/raspbian/stretch/dists/stretch/InRelease Clearsigned file isn’t valid, got ‘NOSPLIT’ (does the network require authentication?)
E: Failed to fetch http://deb.nodesource.com/node_9.x/dists/buster/InRelease Clearsigned file isn’t valid, got ‘NOSPLIT’ (does the network require authentication?)
E: The repository ‘http://deb.nodesource.com/node_9.x buster InRelease’ is no longer signed.
N: Updating from such a repository can’t be done securely, and is therefore disabled by default.
N: See apt-secure(8) manpage for repository creation and user configuration details.
E: Failed to fetch http://raspbian.raspberrypi.org/raspbian/dists/buster/InRelease Clearsigned file isn’t valid, got ‘NOSPLIT’ (does the network require authentication?)
E: The repository ‘Index of /raspbian buster InRelease’ is no longer signed.
N: Updating from such a repository can’t be done securely, and is therefore disabled by default.
N: See apt-secure(8) manpage for repository creation and user configuration details.

Thanks for your help!

2 Likes

DO NOT UPDATE GoPiGo OS - Bad ju ju will come to you and your robot.

1 Like

Disagree. I update GPGOS because some of the utilities are woefully out of date, and a current kernel is a good idea.

Your problem is likely caused by your system clock being out of sync, or the robot not being connected to a live network.

I do not know if you are using an Ethernet or WiFi connection, so I will provide instructions for both.

The easiest way to configure the robot is to connect a local mouse and monitor to it.  You can also download the RealVNC PLAYER, (free, no trial or license needed), and configure it to connect to 10.10.10.10.

  • If the antenna LED is GREEN:

    • You will not be able to connect until you follow the connection steps below unless you are using a local keyboard and mouse.
  • If Ethernet, skip the WiFi steps and continue with the rasp-config steps.

    • Note that it’s a good idea to configure the WiFi for your local network anyway.  This way you can “untether” the robot and it will still connect.

Assumption:  You are connected via WiFi with the robot in Access Point mode.  (The robot’s antenna LED starts GREEN and turns BLUE when connected.)  The antenna LED is YELLOW if the robot is connected to an external network, and remains yellow after a reboot if configured properly.

  • If you are connected via RealVNC:
    • Click on the globe icon in the upper right of the screen. After a brief pause, the browser will open to the GoPiGo web page.  Continue based on the color of the antenna LED as noted below.

If the antenna LED is YELLOW:

  • Continue to raspi-config.

If the antenna LED is GREEN:

  • Use your computer’s WiFi connection to connect to the GoPiGo network.  There is no password, it should connect automatically.
  • The antenna LED should turn BLUE.  If it does not turn blue, check your WiFi connection to the robot and make sure it connects.
  • Once the antenna connection turns blue, open your web browser and connect to 10.10.10.10.
    • If you get any browser warnings that the connection is not secure, “accept the risk” and continue as this is the address of the internal GoPiGo web page.
    • If the browser INSISTS on forcing “HTTPS” mode, the web page will not connect.  You solve this by going to your browser’s settings and turn off “HTTPS” mode.
  • The web page will look like this.  Click on the "WiFi icon to go to the network configuration page.


  • This is the network configuration page.  Here you enter your WiFi network’s name and credentials - and then press the button.


  • If the antenna LED is YELLOW, you need to connect the browser to the new IP address for the robot.
    • The best way to discover that is to use a monitor plugged into the robot.  There will be a file on the desktop showing the connected IP address.
    • You can also log into your router, check the DHCP clients, and use the address assigned to “GoPiGo”.

Once you have the antenna as YELLOW, you need to go to the desktop either by a local connection with a monitor and mouse, or using a RealVNC connection.

Open a terminal window and execute the following code:
sudo systemctl disable start_as_access_point.service

The terminal window should respond with certain things being removed and/or stopped.

At this point reboot the GoPiGo robot by pressing the robot’s power button until it is completely off, then press it again to bring it back on-line.  The antenna LED should be YELLOW when it connects.

  • If it is GREEN, you did not stop the access point process properly.  You will need to go back to the original “If it is GREEN” configuration steps.
  • If it is YELLOW, reconnect to the robot and continue to the next message.

DO NOT REBOOT THE ROBOT YET!

1 Like

At this point you must:

  • Have a YELLOW WiFi network connection or have a working Ethernet connection.
    • Ideally, you have configured the WiFi so that you have a YELLOW antenna LED even if you are using the Ethernet.

Perform the following configuration steps:

  1. Open a desktop terminal window by clicking on the black box-like thing in the upper task bar.
  2. Type in, (or cut-and-paste), the following:
    sudo mousepad /etc/modules-load.d/modules.conf
    This will prevent an “unable to load module” error at boot time.
  • You should see text that looks like this
# /etc/modules: kernel modules to load at boot time.
#
# This file contains the names of kernel modules that should be loaded
# at boot time, one per line. Lines beginning with "#" are ignored.

i2c-dev
cuse
i2c-bcm2708
spi-dev
  • Comment out the “spi-dev” line by placing a “#” in front of it.  The resultant text should look like this:
# /etc/modules: kernel modules to load at boot time.
#
# This file contains the names of kernel modules that should be loaded
# at boot time, one per line. Lines beginning with "#" are ignored.

i2c-dev
cuse
i2c-bcm2708
# spi-dev

. . . and save the file when done.

  1. In the terminal window, execute the following:
    sudo mousepad /etc/systemd/system.conf
  • You should see mousepad open with a large file that looks something like this:
#  This file is part of systemd.
#
#  systemd is free software; you can redistribute it and/or modify it
#  under the terms of the GNU Lesser General Public License as published by
#  the Free Software Foundation; either version 2.1 of the License, or
#  (at your option) any later version.
#
# Entries in this file show the compile time defaults.
# You can change settings by editing this file.
# Defaults can be restored by simply deleting this file.
#
# See systemd-system.conf(5) for details.

[Manager]
#LogLevel=info
#LogTarget=journal-or-kmsg
#LogColor=yes
#LogLocation=no
#DumpCore=yes
[with much more text following]
  • Scroll down until you see the following:
#DefaultTimerAccuracySec=1min
#DefaultStandardOutput=journal
#DefaultStandardError=inherit
#DefaultTimeoutStartSec=90s
#DefaultTimeoutStopSec=90s  <=== this is the line you want to modify
#DefaultRestartSec=100ms
#DefaultStartLimitIntervalSec=10s
#DefaultStartLimitBurst=5
  • Go to the line that says
    #DefaultTimeoutStopSec=90s
    and edit it to remove the “#” and change the number to “30”.   It should look like this when you are done.
    DefaultTimeoutStopSec=30s
    . . . and save the file.
    (Note the lack of the “#” at the beginning.  This edit will prevent the pigpiod process from hanging and causing an abnormally long shutdown/reboot time.)  Note that the pigpiod process does not always hang, but it hangs often enough to be a serious problem when shutting down.

REBOOT THE ROBOT AND CONTINUE BELOW

At this point the antenna LED must be YELLOW.

Wait about five minutes until the system time updates to the correct network time - though the time-zone may be incorrect.  (It defaults to “NewYork” - Eastern Time - which is GMT -5 during the winter and GMT -4 during the summer.

Next:
We configure the GoPiGo3 using raspi-config.

1 Like

Updating the system via raspi-config:

  1. In a terminal window, execute the following:
    sudo raspi-config
    &nbsp.
    You should get a window that looks like this:

raspi-config main screen

Note that this is not a true graphical window and the mouse won’t work here.  Use the tab key to change position and the arrow keys to select from a list.  Enter accepts the choice and esc aborts.

First, select System using the arrow keys and Enter.  You should see the following:

raspi-config system screen

I normally select, and modify, the following options:

  • Hostname:
    I give the robot a unique name that indicates which robot I am talking to.  This is especially useful if you have more than one robot on the network at a time.
  • Boot / Auto Login
    I select "Graphical boot, automatic login as “pi”
  • Splash Screen
    I select “no”.  This allows you to see important system messages at startup if you have a monitor connected.

Select “Back” to return to the main screen.

You can select "Display options if you want to change the display resolution for whatever reason.  (I set mine to the native resolution of the local monitor I have connected.  You don’t have to set this unless you want.

Select “Localisation Options”  You should see the following:

Raspi-config localization options

Depending on where you live, you may want to change some or all of these.  It is currently set to the following defaults:

  • Locale: US English, UTF-8
    Note:  If you decide to change the system language, you may wish to disable US English.  I have never tried it as I speak American English so I don’t know what might happen if you do.
  • Timezone: “New York” (US, Eastern time with daylight savings time, (“summer” time), enabled.)
  • Keyboard: Standard 105-key US keyboard.
  • WLAN Country: US. (United States)

Note that the maintainer lives in eastern Canada so all the preferences are set to her liking.  Since most of the users are in either the US or Canada, this works out for most people.  Feel free to change it to whatever is convenient for you.

You can change as many of these as you need to make the system work for you.

Not that the rest of the settings are set to reasonable defaults and are set to allow the robot to function normally.  It’s better to leave them untouched unless you have a particular and specific need to change them  Please do not mess with the interface settings as they are set to allow the robot to function.

At this point you can exit raspi-config and reboot the robot.  (raspi-config will probably ask you if you want to reboot, if so, select “yes”

Next:  Update, reboot, and enjoy the robot!

2 Likes

I really appreciate the thoroughness of your answer. More information.
These are for community college NASA Fellowships.
The GoPiGo3 OS has a few too many guardrails, etc, External wireless antenna issues.
I have decided to try the path of CycloObsessive and the Setup GoPi5Go_Dave.
I have a Pi 4 and have tried the setup script with the 32-bit Bookworm. No errors. So far so good.
read_info.py works.
However, the motors won’t move.
Any tips?

3 Likes

At this point you should be able to update the system via

sudo apt-get update  <== this refreshes the list of available packages
sudo apt-get upgrade  <== This examines the system to see what needs to be updated.

If you get a bunch of errors during apt-get update, make sure you have a good network connection that’s connected to the external Internet and that the clock is set to the correct time.  You must resolve any network issues before you continue.

Apt-get upgrade will offer you a long list of things to update.  Allow it to continue.

Note that this will take a long time to complete with the time being longer or shorter depending on your network speed.&nbsp: Now is a good time to:
(One or more of the following)

  • Get a cup of tea or coffee and read.
  • Run errands for your wife/girlfriend.
  • Cut the grass.
  • Do laundry.
  • Finish homework for classes or attend that lab session you’ve been putting off forever.
  • Study for the exam that’s going to be 50% of your final grade.
  • Etc.

Once the update is complete, do the following two things:

sudo apt-get autoremove.  <== select "yes"
sudo apt-get clean

This cleans up the package cache which is a desirable maintenance thing periodically.

==============================

OPTIONAL (but highly recommended)

One of the things I recommend for systems like this, is to set up a periodic forced disk check, just in case something begins to go wrong.  It’s cheap insurance.

I am assuming that you’re using a SD card plugged into the Raspberry Pi directly.  If not, use “mount” in a terminal window to find out what the root device is.

My root device is set to:
/dev/mmcblk0p2 on / type ext4 (rw,noatime,discard)
(Yours probably won’t say “discard”.  That’s a further refinement that we can discuss later if you wish.)

In this case, “/dev/mmcblk0p2” is the device/partition the ext-4 filesystem is mounted on.  Yours should be virtually identical to mine if you are running a stock GoPiGo O/S image.

Execute the following command in a terminal window:

sudo tune2fs -c 5 -C 6 -i 5 -e remount-ro /dev/mmcblk0p2

Translation:

  • tune2fs is a utility that allows you to set various important parameters of the filesystem that define how it works.  For example, you can change the UUID if you need to, to prevent signature collisions.
  • -c 5  This sets the maximum number of times the filesystem can be mounted before forcing a fsck.  After five reboots, the filesystem will automatically check itself for any discrepancies that might have crept in.
  • -C 6  This sets the current mount count - that is, you are telling the system that the filesystem has already been mounted six times since the last fsck - and this will force a fsck the very next time the robot boots up.  (a good idea)
  • -i 5  This tells the system that, no matter how many times the filesystem has been mounted, if five days have passed without a fsck, do one now.
    This protects the system against “bit rot” if the system is left idle for days at a time.
  • -e remount-ro  This sets what happens if the filesystem fails a fsck in a way that cannot be repaired, or the system detects an error when the system is running.  This tells the system to remount the root filesystem read-only.

Note that these are very conservative settings designed to provide the maximum protection for the filesystem.

Also note that, especially for a school project or something else important, frequent periodic backups are essential as systems can go pear-shaped for seemingly unknown reasons.

At this point you can reboot the robot and prepare to have fun with it.

Next: Other things you can do.

2 Likes

The following things are ideas or suggestions that you can use to make your life easier, depending on your particular use-case.

The first and most important rule is that this is supposed to be fun.  If it stops being fun, and especially if you feel like throwing the robot against a wall, (:man_facepalming:), it’s time to take a break.

Especially if this is going to be a shared project, I would strongly suggest a GitHub repository for collaborative effort.

I would also suggest that everyone work on the robot remotely using something like Visual Studio Code.  This will allow a seamless collaborative effort among team members.  If each team member has his own robot, (and GitHub repo), Visual Studio Code is still a great idea as it make interfacing with the version control system repository, (that’s where GitHub comes in), almost trivially easy when fully set up.

Note that a discussion of both version control systems and Visual Studio Code is beyond the scope of this thread, I can refer you to a Stack Overflow article I wrote on this very subject, located here:

If you are interested in extended-length commit messages and descriptions at the original commit time, this might be useful:

Please, please, please remember that you are not alone!

Frustration and problems happen.  Share frustrations and problems here - we can help.

1 Like

NASA fellowship?  You lucky dog!

External wireless antenna issues on a Pi-4?  I have NEVER experienced that.  The only wireless issues I’ve experienced are when I’m a forgetful idiot and don’t enter the SSID or the passphrase correctly.

You’re way out of my league with that.  I usually suggest GoPiGo O/S unless there is a specific and pressing need for ROS(x).  @cyclicalobsessive would be your main contact person for that.

Are you using batteries?  What’s the battery voltage?

If the battery voltage at the controllers power connector is too low, the wheels won’t move.[1] [2]

Also, make sure the motor connectors are fully inserted.  Sometimes it takes a bit of effort for them to fully seat home.

========== Footnotes ==========

  1. Make sure you’re using the power connector on the GoPiGo controller board and not the Raspberry Pi’s power connector.

  2. If you are going to be spending a lot of time coding on the robot, battery power may not be adequate and may run out too quickly.
     
    I use a 12v laptop/NAS device power supply that looks like a brick and supplies several amps, (mine supplies 3.3 amps, but isn’t used for continuously driving the wheels).  Do not a “wall wart” as it needs to be well filtered and charger-type devices usually aren’t.  Use that to power the GoPiGo robot.
     
    If you need to test motion in a generalized way, put the robot up on a couple of pieces of wood to lift the wheels off the ground until you are ready to actually test it on the floor.

2 Likes

Interesting that you chose my Pi5 setup for a Pi4 - I have no idea if it works.

I did succeed on Pi4 for both Bookworm 32-bit desktop and Bookworm 64-bit desktop with:

2 Likes

I second this line of thought. Most often cause of “robot works, motors don’t move”

2 Likes

Very good info. Thanks. I have not spent more than an hour in the last two years on GoPiGo OS. Allowing updating is a major improvement over the now obsolete Dexter OS. I’m going to stay out of GoPiGo OS threads - really nothing to offer. I also do not like to shutdown Carl (My only bot that can run Dexter OS now).

2 Likes

This looks like what I am looking for. I only tried the Pi5 setup because I didn’t see this.
I will report back.

3 Likes

Dexter O/S?!!

Surely you mean GoPiGo O/S.  Dexter O/S is locked down so tightly that it can’t even burp.  Raspbian for Robots was better, but lacked useful features, (IMHO).

I have to confess fussing at Nicole about, somehow, being able to install the features of Dexter O/S into Raspbian for Robots, (and kept failing miserably, but I think Nicole admired my gumption).  I can’t say I was the specific cause, but not long thereafter when they released the original GoPiGo O/S, I got my wish.

@loringw
One of the things I do, (not having a Ph.D. in rocket science or robots), is use Bloxter as a sandbox for experiments if the application is something I haven’t messed with before, like the IMU unit.

What I’ll do is, (using the IMU as an example, or say I wire in a GPS), is fire up Bloxter, verify the sensors are actually sending messages, (you can do that in Bloxter without any code at all), and then experiment with trying to get reasonable readings out of them.

Once I get it behaving reasonably closely to what I expect, I “flip” to see the resultant Python code, copy-and-paste into a file, and then start working on it in pure Python.

The advantage of this to me is that:

  • It’s guaranteed to work instead of me banging my head wondering what I did wrong or if the sensor went pear-shaped.
  • I see what the actual, working code looks like.
  • And since it works like that, I have a reasonable foundation to build on.
2 Likes

Regardless of the operating system you ultimately decide to use, you would do well to find - and read - everything written by @cyclicalobsessive as he is a true wellspring of knowledge about both robotics and programming.

(One of these days I gotta’ find all his messages and posts, copy 'em all down, index them, and use them to publish a book.  It would be the definitive guide to the GoPiGo3 robot.)

His mistakes are both glorious and instructive and his successes are even more so.

Not so.  (IMHO)

IMHO your “nothing” is a lot more instructive than many people’s “something”.

2 Likes

Right - Was focused on replacing the two heavy 12v 9Ah sealed lead acids in my UPS to prepare for hurricane season.

2 Likes

cyclicalobsessive is the man!
On the bookworm setup script, I am not sure how to set the bme280 to use the hardware IC2. A bit beyond my paygrade.
I went with the setup_gopigo3_on_32-bit_Bullseye.sh
The setup script got stuck after

echo “Status of the new service”
systemctl status pigpiod.service

To solve it, I copied the rest of the script into a second setup file.

It works with the bme280.

I really appreciate the script to get my GoPiGo to work with a newer OS!

I live in Nebraska, we have hail, high winds, and tornados.

The NASA fellowships are typically my 2nd year students, as we are a community college. The idea with the GoPiGo is to do sensing for environment and navigation. We use cv2 for imaging.
I want to use a Lidar. I need a bit more research to find one that works with Python 3.9 on Buster. I found one that appears to work, YDLIDAR X4.

Thanks cyclicalobsessive for breathing more life into our GoPiGo3 fleet! (4 of them.)

3 Likes

I have a GitHub repository where I have my work with the GoPiGo3.

It contains some of the code and tutorials I have developed.

3 Likes

Yes - they tied that sensor tightly to software I2C through the I2C connectors or AD1/AD2. For Bookworm I only “fixed” the DistanceSensor() and EasyDistanceSensor() to use Hardware I2C.

You are the first taker on that GoPiGo3 on Bullseye repo - cool.

Interesting. Have you tried the status command on your completed configuration? I can’t remember what actually needs the pigpiod daemon. That package was really full featured but was not maintained as the new processors emerged.

I added an explicit update/upgrade/reboot step before the setup_GoPiGo3 step to the README and tested setting up on my “Desktop Pi4” (not installed on a GoPiGo3 robot). The script asked for some confirmations but always continued to completion. I don’t have an explanation for why yours did not. Glad you were able to workaround the problem.

It will be interesting to see how you all make out with that on the Pi4. I did some OpenCV line recognition and bright spot tracking - success but not impressive performance.

My Bullseye OpenCV, and PiCamera tests and performance results are nestled under:

I use the YDLIDAR X4 LIDAR but have only used it with Ubuntu. I added a separate 5v power off the GoPiGo3 battery for the LIDAR. Some folks on other robot platforms have gotten away with powering the X4 LIDAR through the Pi4 USB but I don’t know if the GoPiGo3 power supply has enough oomph.

It is really exciting to have you teaching with the GoPiGo3. Nothing beats getting experience with the reality of physical sensors. Simulated sensors in simulated worlds cannot touch the excitement of setting your robot loose before your eyes.

2 Likes

Absolutely!

STRONGLY agree.

I have had situations where the contacts between the GoPiGo controller board and the Raspberry Pi were questionable, and when the Pi wanted juice, the 5+ would droop to the point that I’d get the undervolt warning.

I solved that problem by wiring a 3A buck converter across the barrel connector on the GoPiGo controller and attaching the output to a USB connector I scavenged, plugging it into the Raspberry Pi’s power connector.

This shows both the buck converter and the circuit connection to make it automatically turn on and off with the robot.

There are some other posts, but I haven’t found them yet.

If you feel like engaging in some SMD component rework, you can recalibrate the state of charge lights on the TalentCell batteries by substituting three resistors.

Only if you feel confident soldering small parts and can get three 510Ω surface mount resistors per battery.

2 Likes