While it doesn’t bring back the battery voltage indicator, I am adding this block
It’s not in this version (it was literally born 5 min ago) but will be in the next one.
While it doesn’t bring back the battery voltage indicator, I am adding this block
It’s not in this version (it was literally born 5 min ago) but will be in the next one.
Can we have the patch to include it in this version?
One of the things that I would like to be able to do is create blockly program statement tiles for functionality that may not exist.
This may be more general than Chromium. On the Remote Camera Robot code, whenever you start/restart the streaming server, you have to reload the page with the video stream in both Firefox and Chrome before the video will work.
Assuming that you are using a similar streaming server here, I would expect a similar behavior.
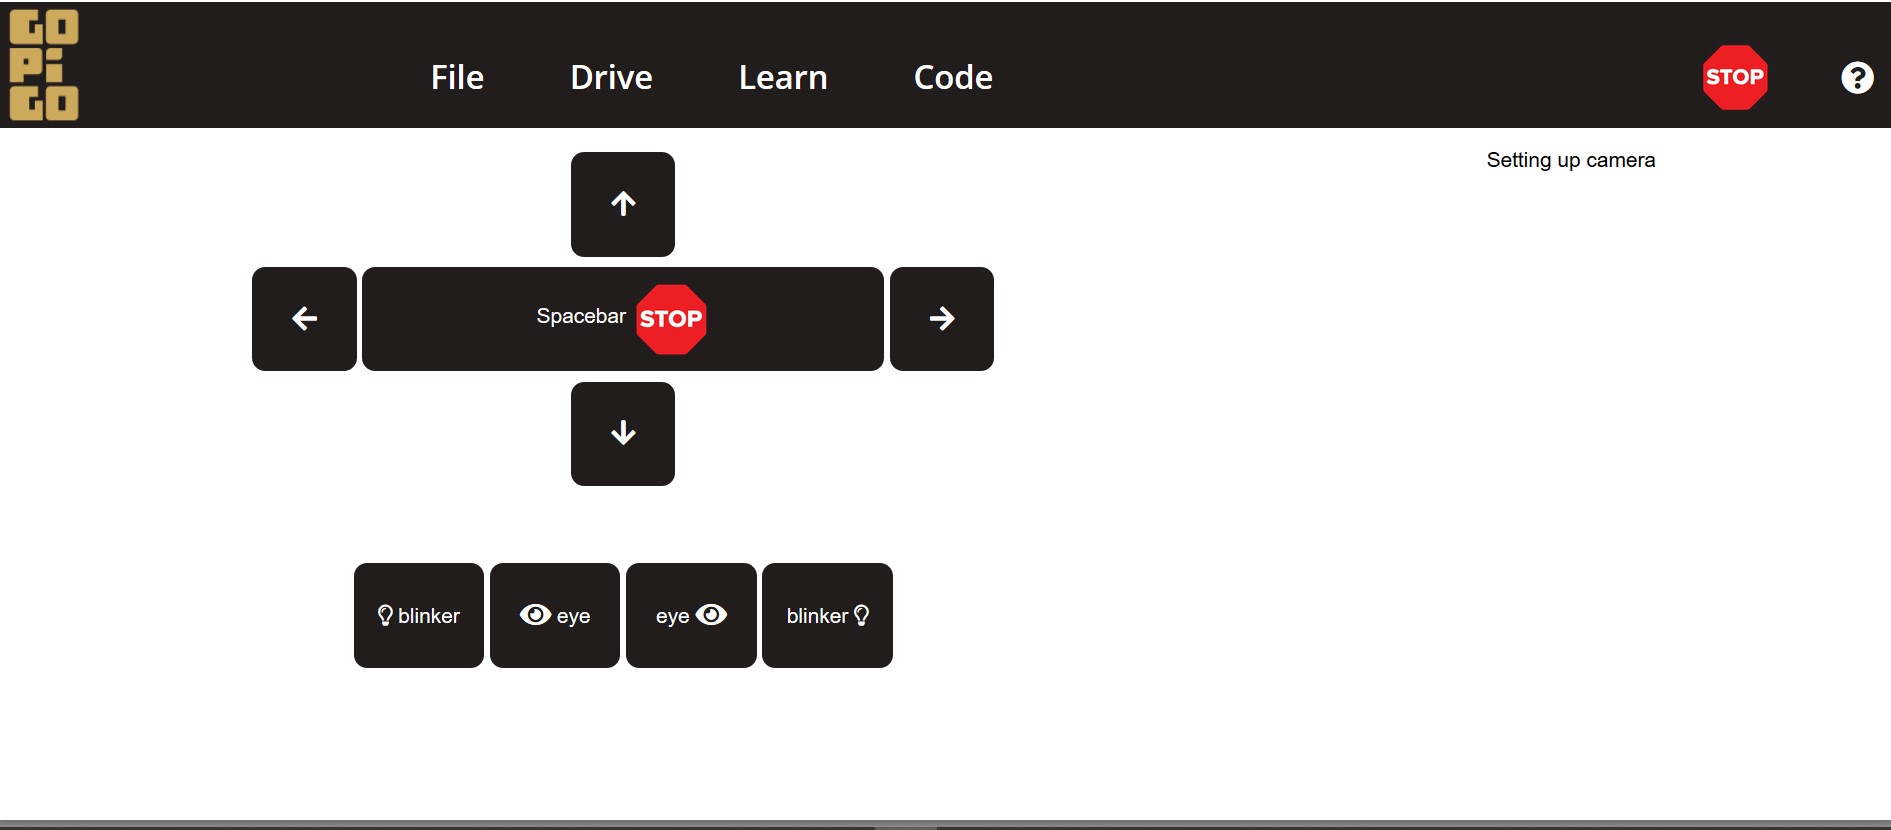
Got my new motor installed - decided to test it with the Beta.
I kept the Lidar disconnected so it didn’t cause problems, and temporarily mounted the IMU in back as indicated.
Drive screen - I’m on a laptop with Ubuntu 18.04 Bionic. When I connect to the GoPiGo wifi I get a “hotspot login” screen with everything showing, so I didn’t need to connect with Chrome. I did end up closing the login screen and using Chrome (not Chromium).
Drive screen works fine. Camera works. Control buttons on browser work, and arrow keys/space bar works. All the lights work.
File screen comes up fine. I didn’t try renaming the robot.
Learn - Bloxter
I have the IMU attached to AD2. The Bloxter program example runs fine after I calibrated the sensor - it prints the correct direction for 10 seconds. The calibration instructions suggest that the Sensor Control Panel will start showing IMU readings after enough data are gathered, but nothing is showing.
The camera worked fine when I was driving, but when I click the Camera icon on the Sensor Control Panel I go to 10.10.10.10/photos on a new tab with the message “If you’re not seeing any photos you need to make sure a USB key is inserted in the Raspberry Pi (green board) of your robot.” I do have the USB key that came with my robot in a USB port. I can sftp into the robot, and see the USB key, so the Raspberry Pi knows it’s there. So I’m not sure why I’m getting this message. USB is formatted in fat32 if that matters. And I do get the USB icon on the top bar (between the stop sign and the question mark).
Distance sensor “Don’t crash” program worked fine
Learn Python
Seems to take a long time for the Jupyter notebook screen to load and it’s not clear that anything is happening. I get the same directory error as cyclicalobsessive of course. The Jupyter notebook does open with the File Browser left sidebar open - don’t know if that was intentional, but might be confusing for newbies.
Code Bloxter and Advanced Bloxter seem to come up fine- didn’t really test the options.
Code Python pulls up the same Jupyter Notebook first lesson as “Learn -> Python” pulls up. I suspect that’s a known issue with the beta, but am mentioning it in case it isn’t.
If I used Bloxter primarily it looks pretty good (except for the camera/photos page and the fact that no data show on the sensor control panel).
Hope that helps. Happy to try anything specific you’d like tested. And happy to try the next beta. Otherwise it’s back to ROS now that I’ve got my motor fixed. 
/K
What happens if you remove the USB key and re-insert it? I think there’s a timing issue if the USB is already in when booting up. Something for me to look at, so thanks for the reminder.
When I remove the USB key the USB symbol disappears from the top bar. When I reinsert the key the logo shows up again after a few seconds. But I get the same error message then when I click the Camera icon and I get taken to the /photos page. This was after booting with the key in place.
I tried booting without the key. Got the same results after inserting the USB key. Tried with a different USB key - same. The USB icon does show/disappear as I insert/pull the USB key.
/K
Findings while testing with Charlie:
My system:
Windows 10 2004, 64 bit on a HP EliteBook 8570p Laptop with 16 gigs of RAM
Firefox 82.0.2 (64-bit) which is current as of this instant date.
Chrome 86.0.4240.183 (Official Build) (64-bit) which is current as of this instant date.
Microsoft Edge 86.0.622.63 (Official build) (64-bit) which is also current as of this instant date.
Internet Explorer 11.572.19041.0, update version 11.0.210 which is also current.
Charlie’s configuration:
Raspberry Pi:
Pi-4, 4gb, latest firmware.
Raspberry Pi Camera, V2, connected with a standard Pi ribbon cable.
V1 GoPiGo controller board, with v1.0 firmware.
Attached devices:
Dexter distance sensor, (with the eyes) in i2c port 1
Dexter “black-board” Line Following Sensor in parallel with the distance sensor on i2c port 1
Custom bumper contact switches configured as “Grove” normally closed switches on A/D-1
Dexter IMU sensor on A/D-2
Servos, used to control a pan-and-tilt mount for Charlie’s “head”, (the distance sensor)
Servo-1: “Pan” (left-and-right motion).
Servo-2: “Tilt” (up-and-down motion).
Software:
GoPiGo OS, version Beta-1, downloaded to Windows 10 and flashed to a Micro Center 64 gig SD card using Balena Etcher v1.5.73.
Preliminary Findings:
Note:
Unless specified otherwise, all tests were done using Firefox.
While running as a stand-alone device:
Discrepancies:
UI Discrepancies:
Functional Discrepancies on the “Drive” page;
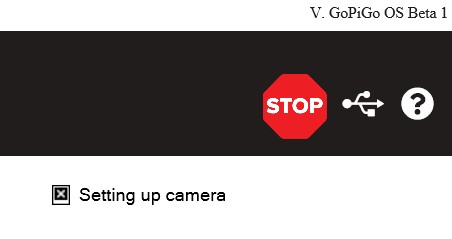
1.While using Firefox, the camera image on the “Drive” page never worked correctly.
When starting the page, the camera window would:
a. Display “Setting up camera”
b. Display a full-size image briefly than crop the bottom of the image to about 1/3 of the image, showing only the top 1/3
c. Display a full-size image briefly than crop the bottom of the image to about 1/2 of the image, showing only the top 1/2
d. Display a full-size image briefly than crop the bottom of the image to about 2/3 of the image, showing only the top 2/3
e. Occasionally show a full-size image. I do not know if the image was frozen on the full-size image as I had a great deal of difficulty getting a full-size image.
f. The image frame would be frozen after being cropped.
g. I did not test motion.
2. Using Chrome, the image worked as expected.
3. Using Microsoft Edge, there was no response at all in the picture’s frame area. No messages, no picture, nothing.
4. Using Internet Explorer 11, I was only able to get the “Setting up camera” message.
a. While using Internet Explorer 11, I had a “USB” icon show in the upper right-hand side task-bar, even though a USB device was not present.
Hardware discrepancies:
Illustrations:
I also saw that. Forgot to record it as I was busy trying to find the little button.
I am sure I only scratched the surface.
Unfortunately, I do not wish to test using a different, (3.n), Raspberry Pi board because I really don’t want to disassemble and reassemble Charlie any more than necessary.
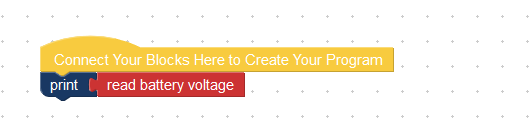
I really wish there was a battery meter in the task bar, (or at least a way of putting one there during testing), so that I can try to correlate errors with battery voltage. I know there’s a really good chance that these errors have absolutely NOTHING to do with battery voltage but. . . I have seen so many weird things happen due to low battery voltage, I’d really like that data point available, at least during testing.
@cleoqc,
May we please have a battery meter on the page, preferably in the task-bar, on both the “teaching” page and the desktop?
Perhaps this can be implemented as a “secret” feature, like SSH in DexterOS, by “touching” a filename somewhere?
Jim, Is it possible in the GoPiGoOS to run a battery voltage reading app via an ssh connection?
#!/usr/bin/python3

# battV.py    Read Battery Voltage (thread-safe)

# IMPORTS
import time
from datetime import datetime
import easygopigo3

def printStatus(egpg):
    vBatt = egpg.volt()  # use thread-safe version not get_battery_voltage
    print("{} Battery Voltage: {:0.2f}".format( datetime.now().date(),vBatt))


# ##### MAIN ######

def main():

    # #### Create a mutex protected instance of EasyGoPiGo3 base class
    egpg = easygopigo3.EasyGoPiGo3(use_mutex=True)
    try:
        while True:
            printStatus(egpg)
            time.sleep(5)
        # end while
    except KeyboardInterrupt:
        print("\nExiting battV.py")
        time.sleep(1)

if __name__ == "__main__":
    main()
copy it into battV.py
chmod +x battV.py
./battV.py (control-c to exit)
Or can you run a Jupyter console tab at the same time you are testing? Then you wouldn’t need to remote ssh in.
Yup!
It’s also possible to run the Jupiter code you suggested, wire a voltmeter, or a whole host of things. 
The point I’m trying to make is:
, had a battery meter - IF you could get the desktop working! 
@cleoqc,
Is there any kind of formal specification I can test against? As it is, I am doing shot-in-the-dark ad-hoc testing which is guaranteed to miss as many defects as it finds.
Is there any formalized bug tracking system I can enter bugs into, rather than posting mile-long messages here?
Additional issues found upon further testing:
Note:
This session, Firefox did NOT show the “Login to network” banner and camera video was full-size and not frozen. I do not know why. Repeated refreshes did not cause the original problem to recur.
Test: Change hostname: (Rename Robot)
Test: Use major controls from home screen.
Test: Working with lessons:
Test: Working with Bloxter.
Test: Working with the VNC Desktop
Respectfully submitted:
The diagram shown in the “Lesson” panel for the IMU shows the IMU facing the opposite way.
This puzzles me because you went through Hell and Half of Texas to determine how to make the IMU work properly - and you discovered that the chip-side of the board had to face forward.
I have not seen any canonical literature on which way the IMU chip and/or the IMU board should face. This is important as there might be a driver bug in the current release.
Not really - The IMU examples have always had the chips facing the other way. I was having some difficulty stringing the cable having enough length, and wanting the board to be as protected as possible, and as tight against the holder, and I really didn’t think the compass was going to work near the motors and the spinning encoder magnets, so I chose to use only gyros and accelerometers, with which I could do a reset to heading of zero when on the dock.
What I “went to hell” with was the fact that DI changed the default for all I2C sensors to software I2C which killed Carl’s reliability. (Thank you for the html tip!) I ended up figuring out how to run the Distance Sensor in hardware mode and tolerate the software I2C errors on the IMU to give Carl a time-between-failure greater than six months!
My test of the latest PiOS Raspbian for Robots pre-release showed the same fatal I2C errors returned. I did not attempt to debug what changed. Perhaps they got rid of the hardware I2C mode, or changed the string that specifies hardware mode, or perhaps the software I2C mode is different on PiOS, or who knows?
I cannot debug that one, and I am doubtful that DI/ModRobotics will since the mean-time-between-failure seems longer than one battery session; (MTBF appears to be around three days). Carl is probably doomed to remain on the Stretch version of Raspbian For Robots - but he has not complained that he needs any new OS features. He just needs my attention to implement finding the lines in the floor and returning accurately from across the room.
IMU orientation, and “robot frame” references are community chosen. DI chose a different reference than ROS, and DI chose an IMU orientation that required a remap from the IMU hardware default orientation of horizontal with the arrow pointing forward.
When I started working with that OccuGrid example I found on YouTube, the frame reference difference bit me over and over, in so many functions that I eventually got tired of contorting my mind. I’ll get back to it some day, but frame reference corrections are endemic to robot motion computations, and we just have to wrangle them to our particular combination of hardware and code.
Maybe you are right - this might be a change from the compass bot example.
I have not played with the compass bot so I can’t speak to that. Eventually I will get there, but I already have two three major projects on my plate:

 )
)The big problem with the GoPiGo is that there are SO MANY interesting things to do that it’s easy to get lost in a maze of “Wow! Let me peek at [insert interesting thing to mess with]!” to the point that you get nothing done!
Note that items 2 and 3 swap back and forth as I get frustrated with the current project.
P.S.
<strike> - </strike> work to create strike through text
Additional Update:
I have researched this problem and - in the words of development managers everywhere - “It’s not a bug, it’s a feature!”
No kidding, and I B.S. you not, it is an actual, honest to aggravation feature in later versions of Firefox.![]()
It is sufficiently annoying, and has the potential to affect other users, so I created a separate article on how to deal with it.
Viz.:
(Previous) Update:
I have determined that, on my system running Windows 10, while using the Firefox browser, the following functional states can exist.
This appears to manifest itself when an external internet connection does not exist, for whatever reason.
Note that my Firefox session has other tabs to external sites open. That may be part of the problem. If so, that may end up being a Firefox bug.
Can someone else try to confirm this behavior with Firefox open with more than one active tab to an external web site, and a tab open to the robot in stand-alone host mode?
Update:
Note:
Since there is a LOT of testing to do, and this will generate voluminous amounts of data, I am considering creating a separate test document outlining my findings and uploading it both here and to the MR support e-mail.
Pros: It will keep this thread from becoming twenty miles long and - essentially - unmanageable.
Cons: A lot of interesting, and potentially important, test data will be hidden in a document that most people will be unwilling to download and read as it is likely to be quite long.
After thinking about this, I am considering the idea of creating the document(s) noted above and posting an (ahem!) “Executive Summary” to the list. Anyone who is interested can ask for additional clarification.
What say ye? Opinions would be gratefully appreciated.
Additional test data:
Test: Basic Scratch functionality:
Test: Bloxter Lessons.
Respectfully submitted.