How to jumper-select configuration/boot options for the Raspberry Pi

Update:
(. . .and kind-of like a step backwards.  OK, maybe sideways. . .)

One of the things I discovered while trying to multi-boot Charlie is that the contents of the /boot partition are distinct, different, and tightly bound to the version of Raspbian, Raspbian for Robots, and/or GoPiGo O/S you’re running in the /rootfs partition.  They may LOOK totally identical, bot whoo-boy are they different!

Using the /boot files from a different release, or even a different update level of the same version, can cause all kinds of strange behaviors.

So, the problem becomes how to boot more than one operating system and yet maintain the correspondence between the /boot partition needed to load the base files, and the / (root) partition that it is associated with.

One answer appears to be a utility called PINN - a NOOBS-like boot manager than can manage more than one operating system at a time, maintaining the correspondence between the root partition and its associated boot partition.

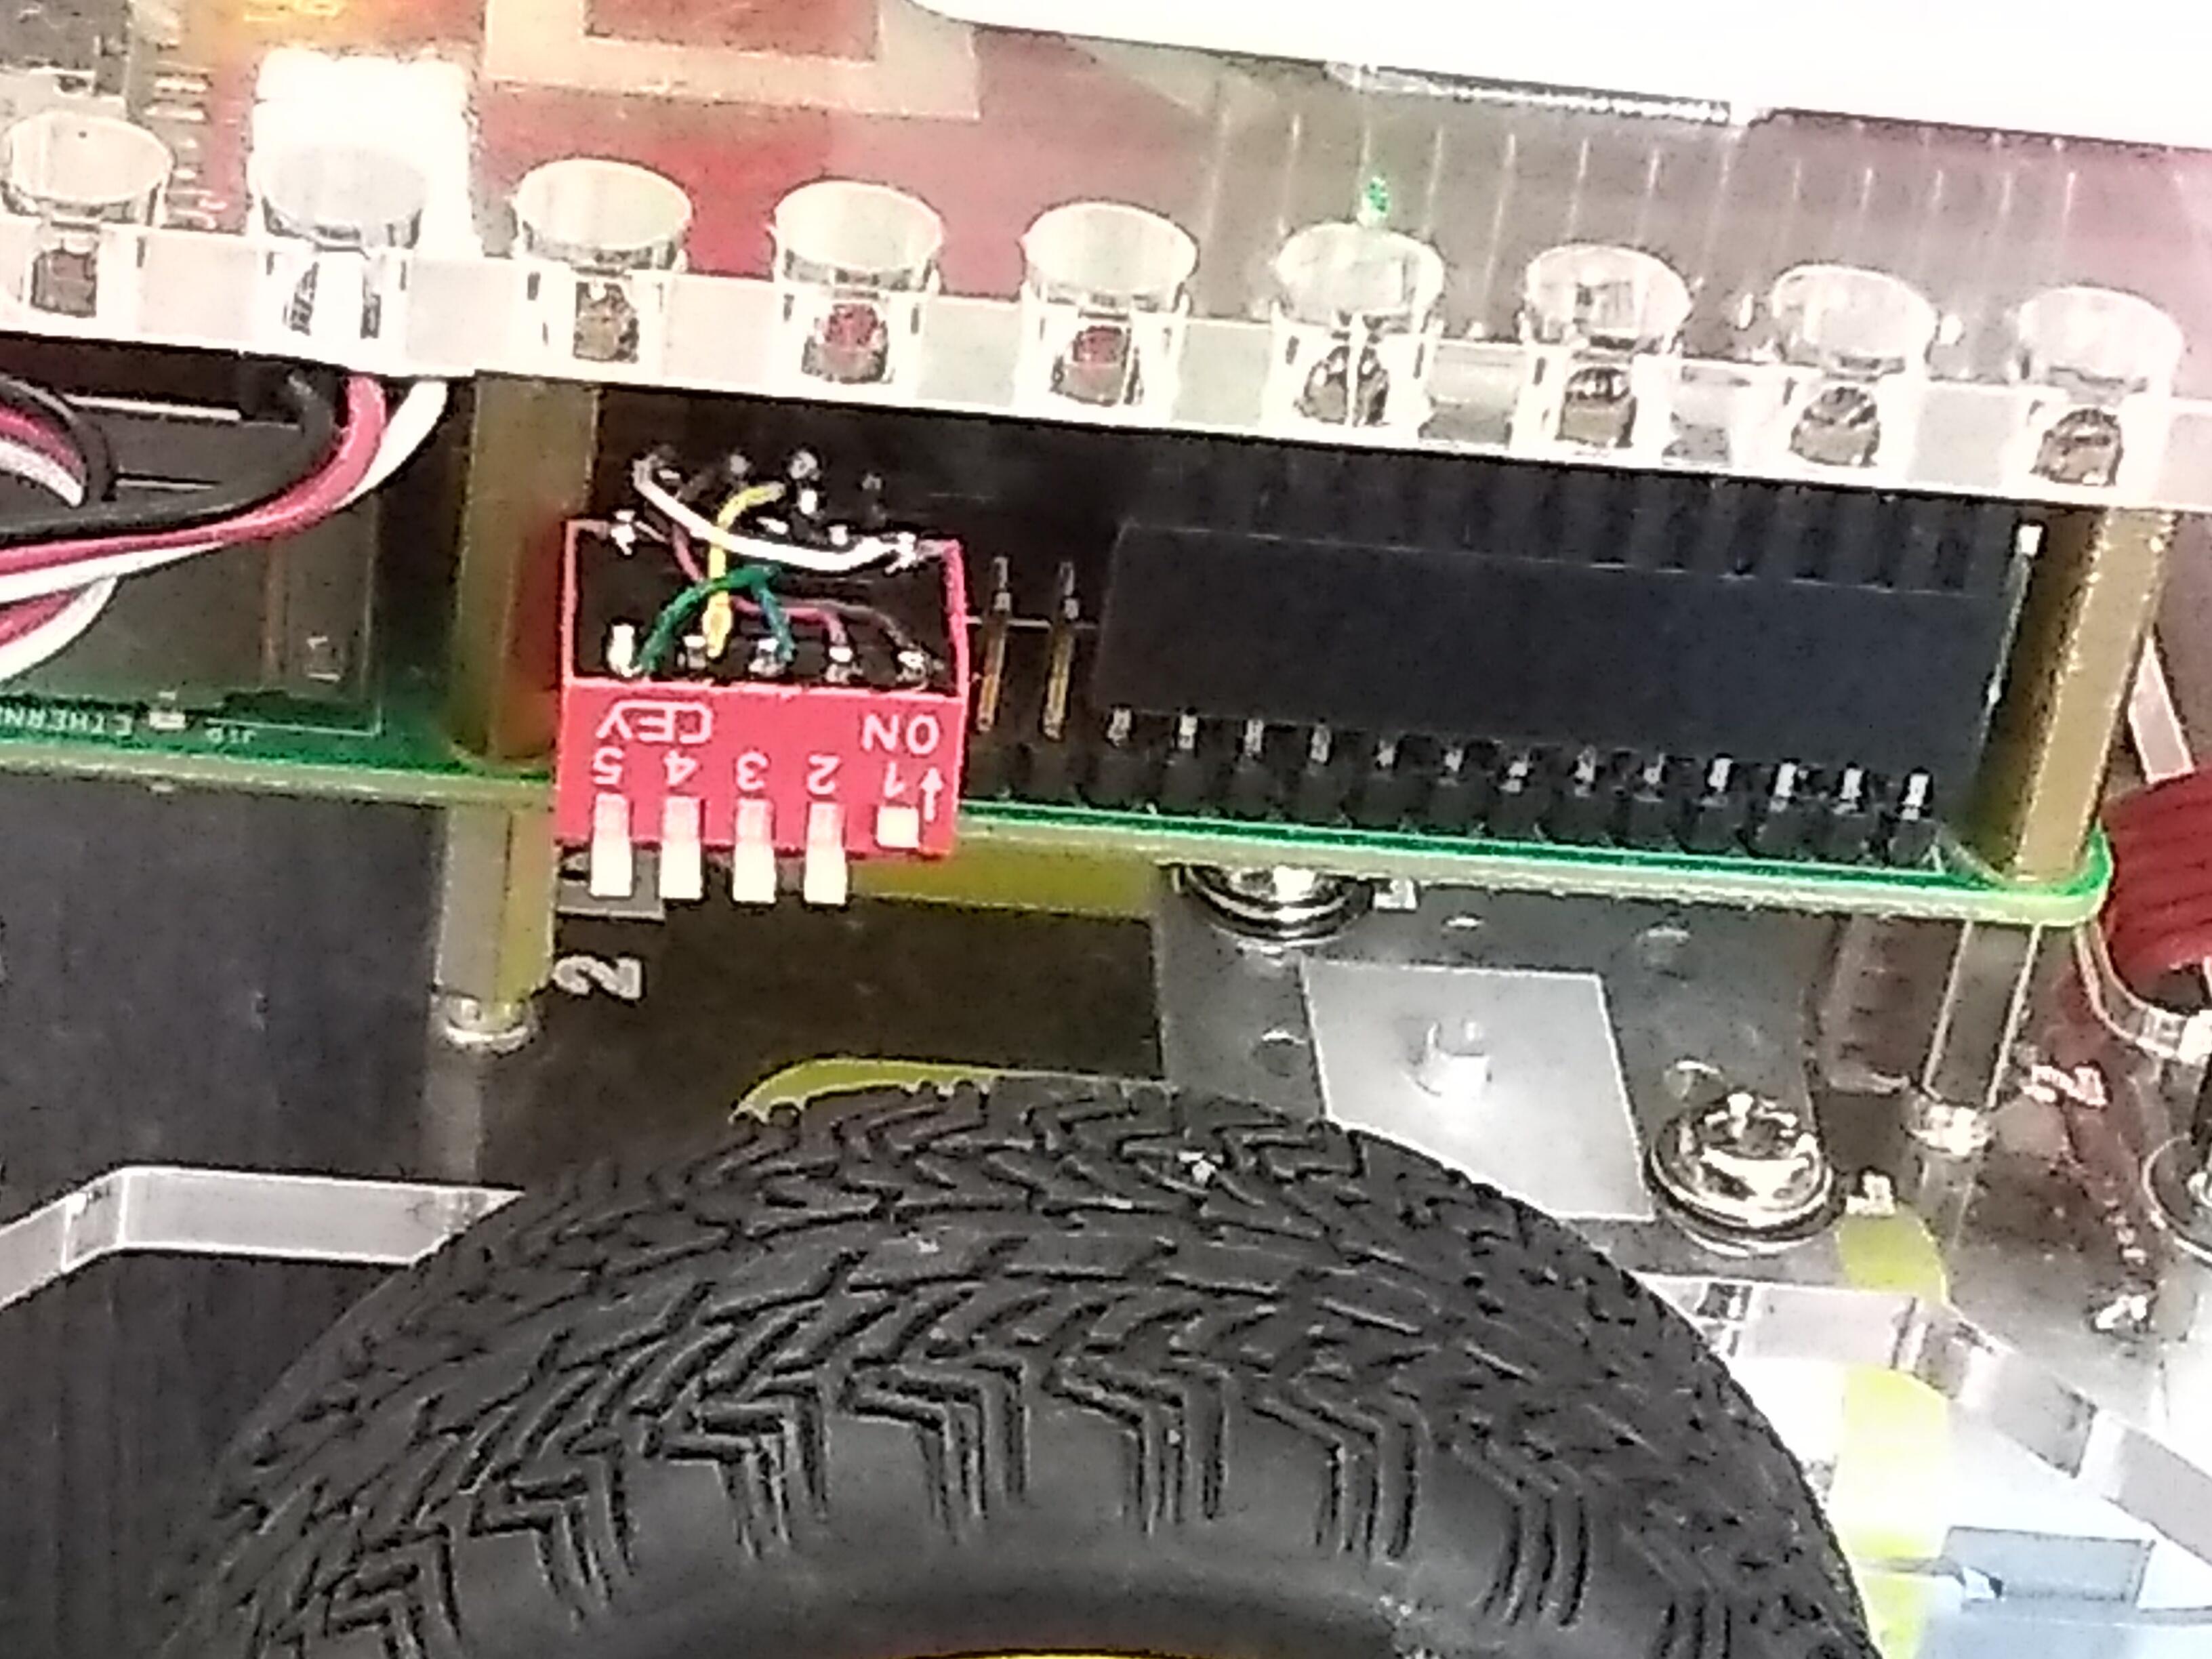
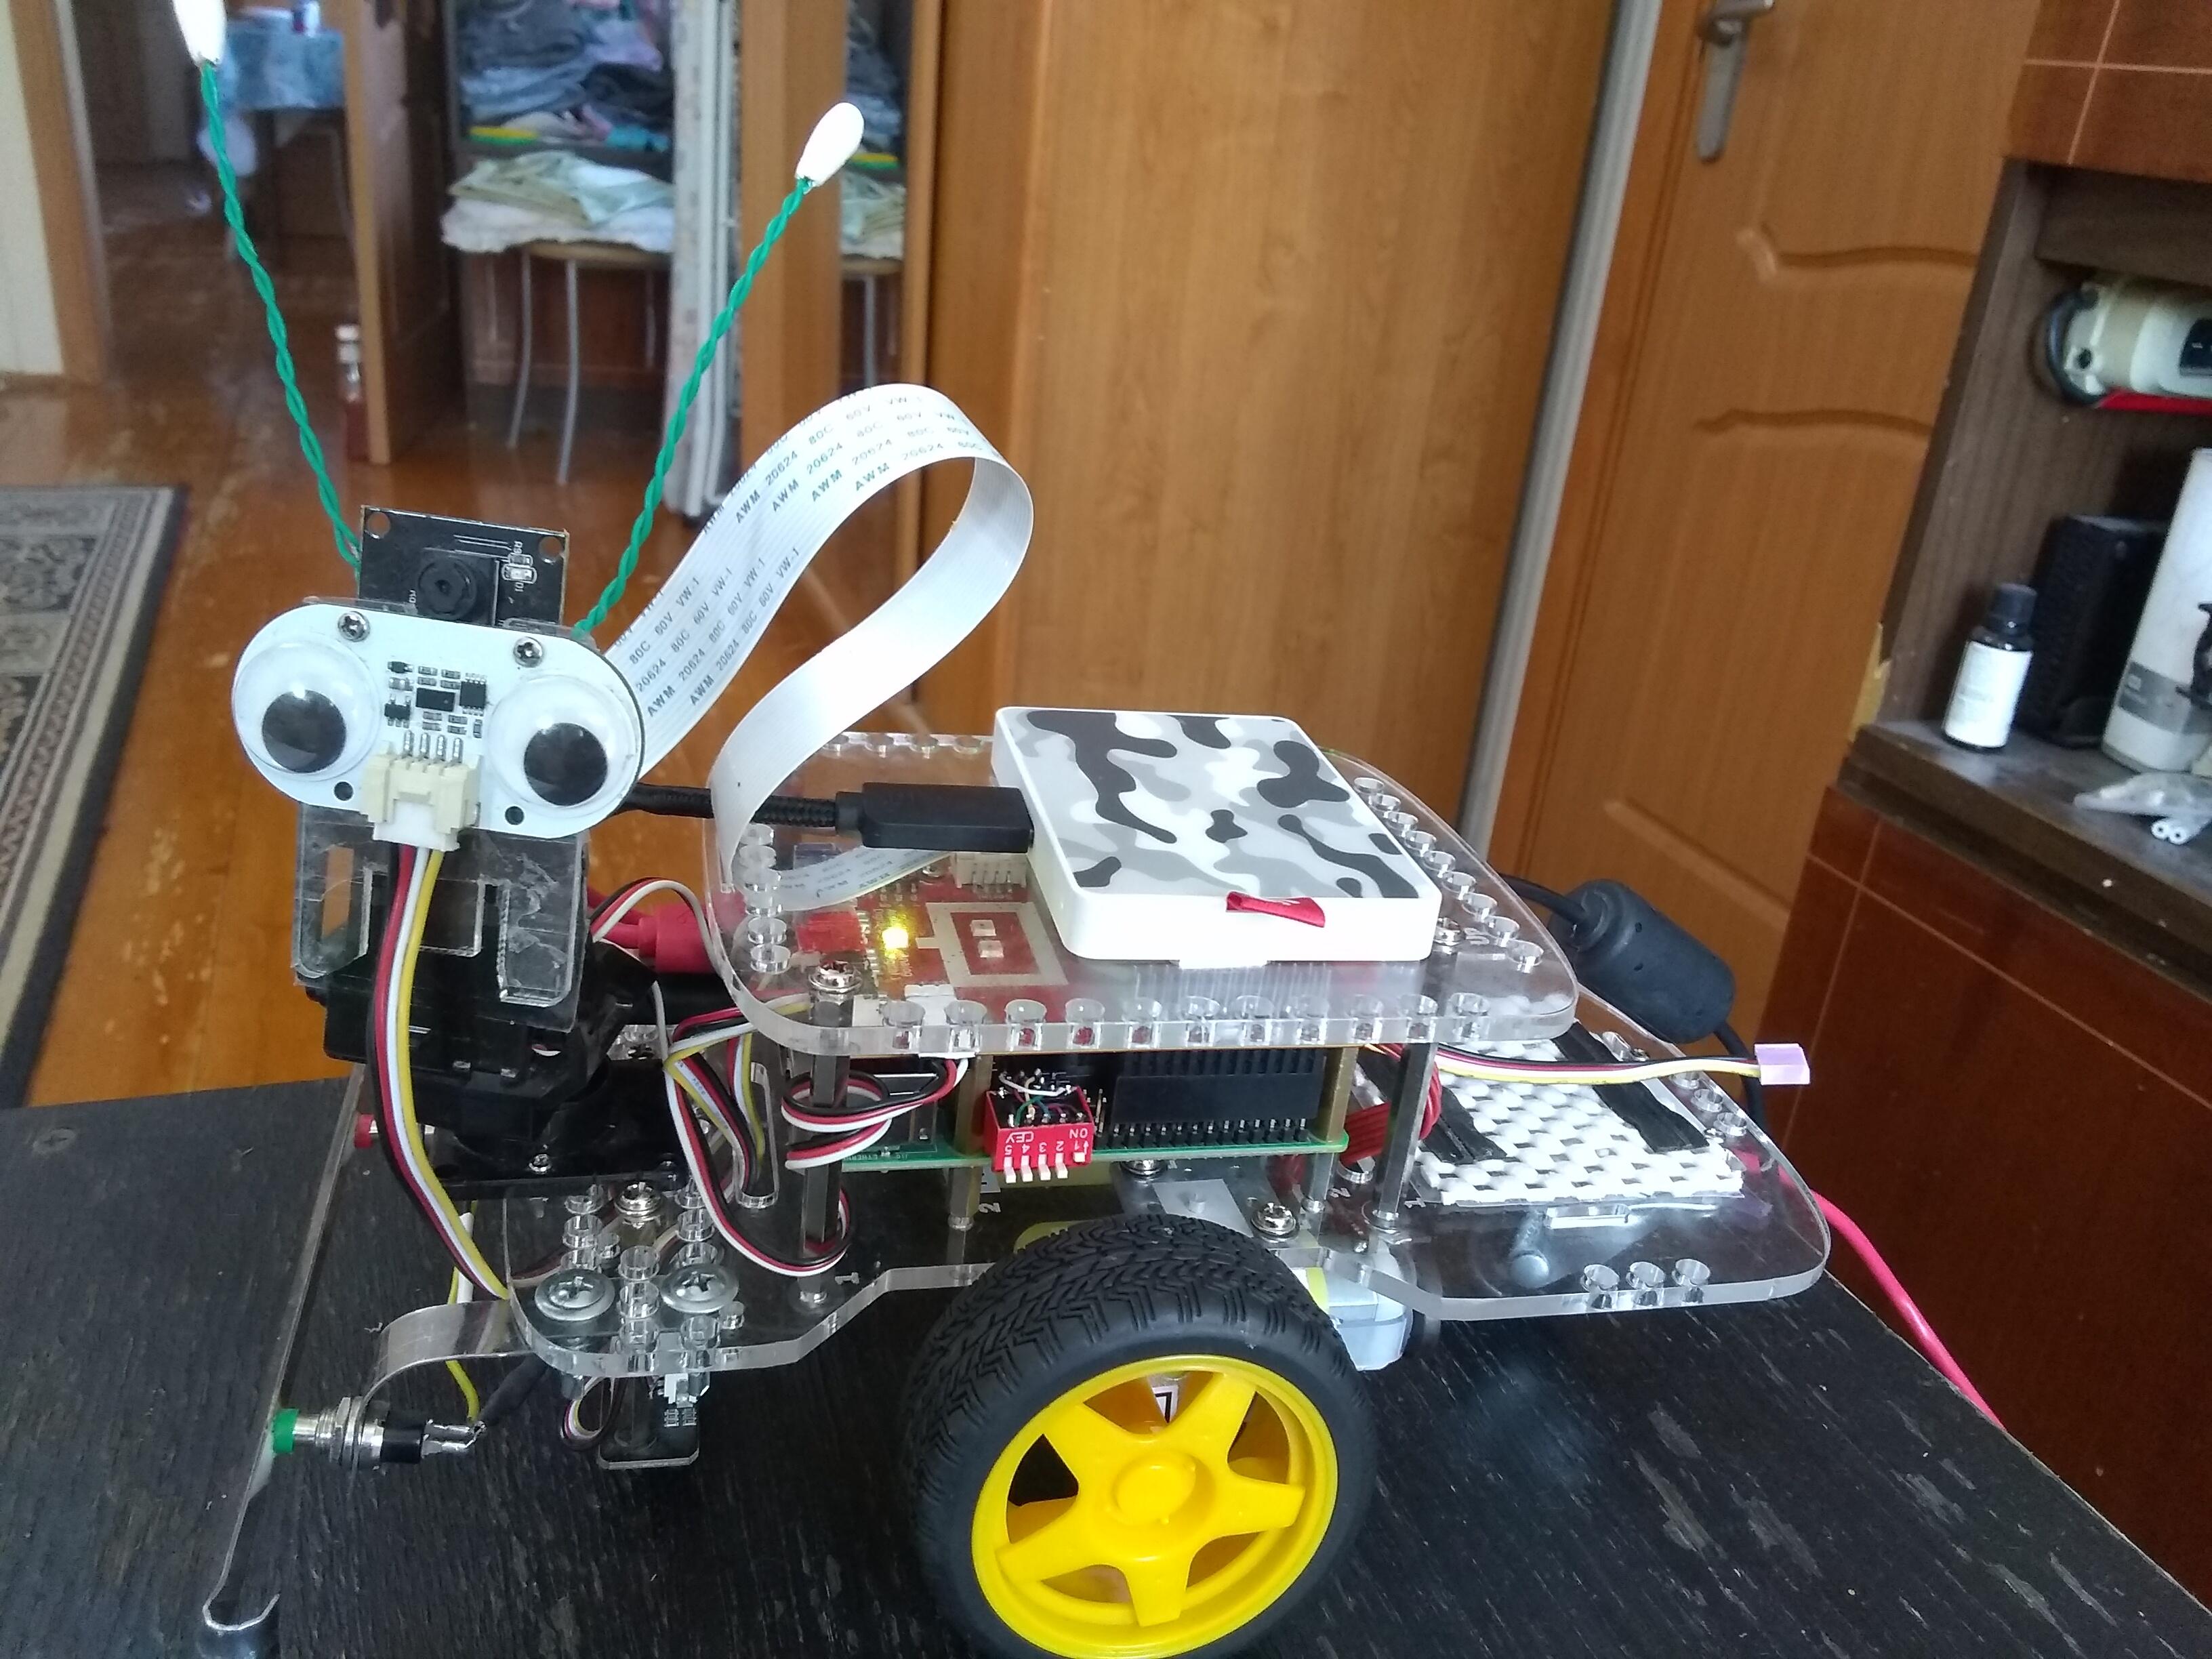
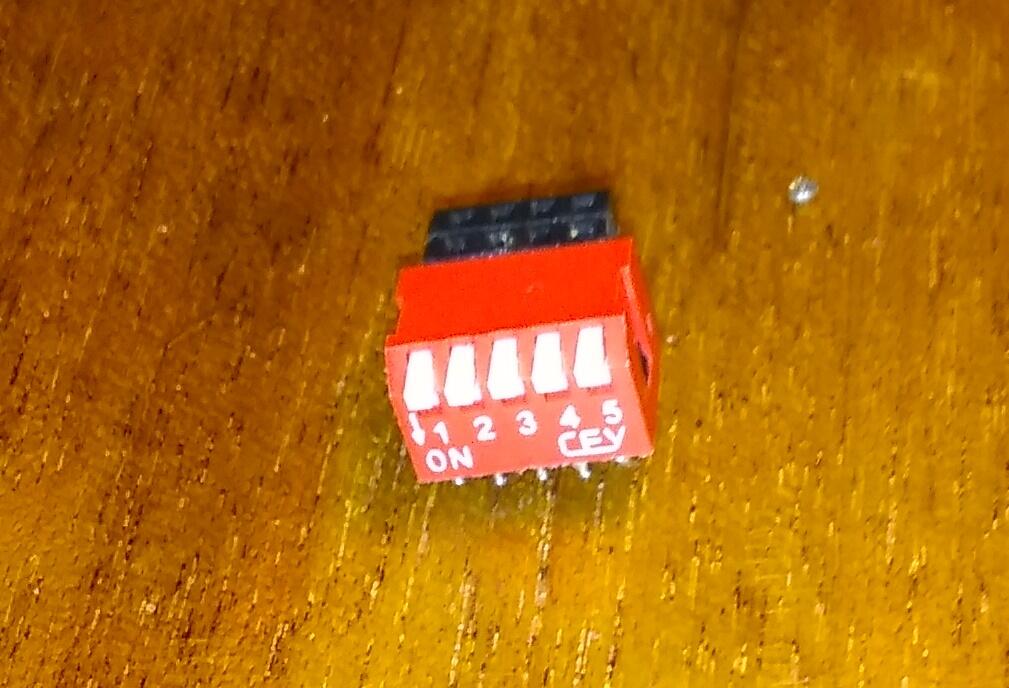
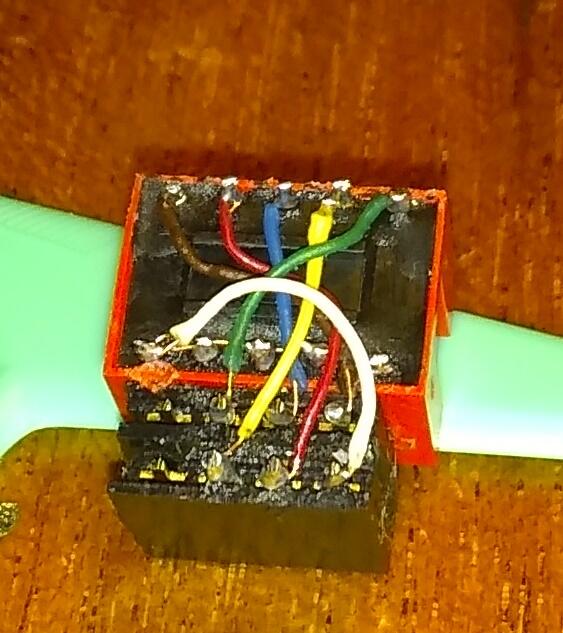
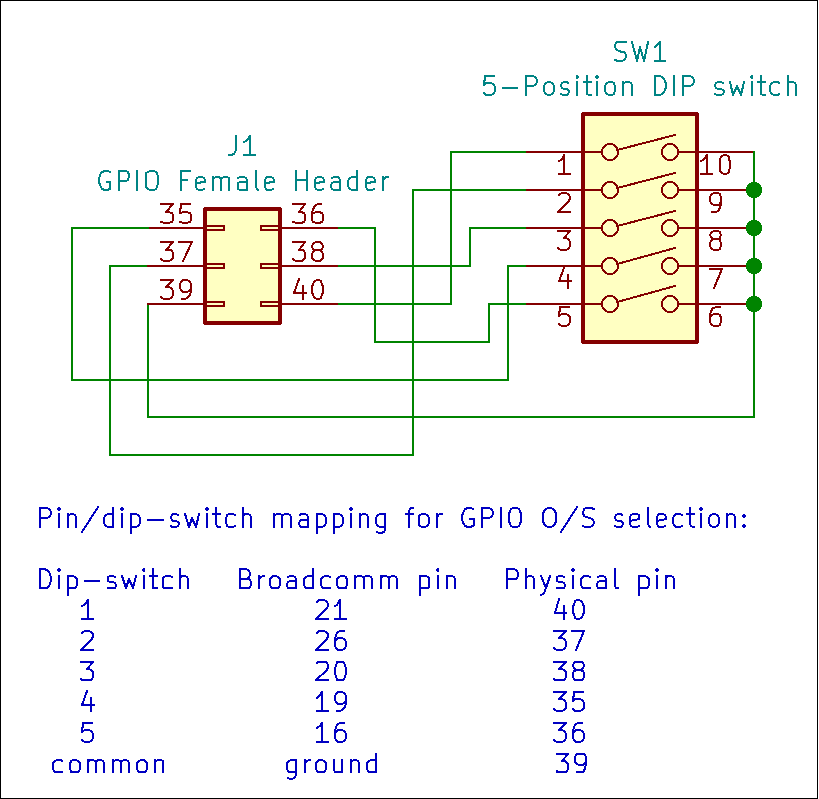
The maintainer of PINN has been very helpful in helping me understand what PINN both can, and cannot, do.  He’s also been helpful with my efforts to hardware-select the O/S to boot at power-on via jumpers/dip-switches.

Right now I have three operating systems installed on Charlie that I’m booting using PINN:

  • Raspbian for Robots, 2019-12-12, modified for my on-'bot development.

  • GoPiGo O/S 3.0.0 with a few tweaks, primarily head movement to let me know when Charlie’s ready, and some minor network customizations.

  • Raspbian O/S 64 bit beta 2020-08-20 to fuss with.
     

Advantages of using PINN:

  • The maintainer of PINN, (and several knowledgeable associates that help him), are available on a special, sticky, thread within the Raspberry Pi fora.

    • He responds very quickly to questions and is incredibly responsive to user requests and suggestions.  IMHO this is one of the biggest advantages - as program and utility maintainers are usually harder to find than honest politicians!
       
  • PINN maintains the association between the individual /boot and /rootfs partitions, and keeps them separate and distinct from other operating system partitions, so that the operating systems boot correctly and work correctly.

    • Additionally, it maintains the association between /boot and /rootfs when that O/S is running so that updates - especially kernel updates - update the correct /boot partition image.
       
  • It allows you to select the O/S to boot when the robot starts up, WITHOUT having to keep track of, and fiddle with, tiny micro-SD cards.
     

Disadvantages of using PINN:

  • Setting up “non standard” and/or “custom” O/S images, (i.e. Anything other than the pre-built images available on line), is a royal pain because you basically have to install the image, get it running and then re-package it into the special compressed tarball format that NOOBS/PINN can install.  This is a non-trivial process, (especially if you’ve never done it before), with a lot of subtle, (and not-so-subtle), “Gotcha!”'s that you need to be aware of.

    • What adds insult to injury is that the documentation is not a monolithic whole.  Instead it is scattered over several different forum threads, no less than two different GitHub repo’s and a Wiki.
       
    • As a consequence, getting access to, (and keeping everything open in a browser), becomes a juggling act.  Most of the pain I encountered with creating the tarballs, installing PINN, and installing the special image files to the PINN bootable media was caused by incomplete and/or contradictory instructions among all these sources.
       
  • Some of the “Gotcha!”'s are absolutely fatal to the process and result in an unusable tarball.

    • For example, you need to run a special command on your installation - before making the initial tarball - to clear out each and every single “socket” file that might be in your system install.
       
    • Not only does tar complain bitterly about sockets - if you ignore the warnings, continue to compress the tarball without removing them, and then attempt to install it, you’ll end up with either a non-working system or one that is seriously schiz in weird ways.
       
  • You need to install a different version of tar as, allegedly, the pre-installed GNU-tar doesn’t handle certain file attributes properly.  So, you need to install BSD-tar on whatever, (Linux), machine you’re building on.

  • You need to build on Linux.  I can’t speak for the Mac systems, but Windows won’t cut it - unless you have Linux in a virtual machine.

  • It takes a long time to spin the images and robust hardware is a necessity.  You can do it within a virtual machine - or even on a Pi - but it’s going to take much longer and you’ll definitely need extra cooling for the Pi.

    • In my case, using a HP EliteBook 8570 with a native install of Linux Mint, 16+ gigs of memory, a blazing fast - and expensive! - SSD and a smokin’ hot i7 processor, it takes about 30 to 40 minutes to tar up the root partition off of the SD card and almost exactly two hours to xz-compress it locally on the system’s SSD.
       
  • Rinse-and-repeat for each additional operating system install:

    • Boot up on the Pi and make sure it’s working and configured properly.
    • Move the boot media to the build environment.
    • Tar and compress the /boot and /rootfs partitions to segregated directories on the build machine.  (Kiss at least 2+ hours good-bye!)
    • Create, (by hand), the necessary install metadata.
       
  • By the time you’re finished you’ve hozed the entire day.
    I’m sure that “practice makes perfect”, but it’s a long, fiddly, process that’s just begging to be automated somehow or other.

  • PINN’s standard configuration expects a keyboard, mouse, and monitor to be attached to the system to access the boot menus.

    • Supposedly you can access PINN “headlessly” using either VNC or SSH, but I have not tried that yet and cannot comment on it.
       

Is it worth it?  I’m not sure yet.  However I haven’t found any other way to multi-boot a Raspberry Pi that’s any simpler or easier.

In PINN’s defense I have to say that I have set up many multi-boot scenarios on a number of different systems in the past, some of which were hair-raisingly complex.  (Anyone want to try multi-booting a Digital Equipment Alpha 500?  Me neither.  It’s a pain with a capital OUCH!)

And. . . .

I can honestly say that setting up a multi-boot environment on ANY system, (including my 64 bit laptop), isn’t a trivial experience either and is also fraught with danger and pain-points.  So, comparing it to any other multi-boot environment I’ve set up, it’s no more complex than most and is actually simpler than some others I’ve tried on a PC.

The bottom line is that if you are continuously swapping operating system images, (sometimes multiple times per day), as I do, it might become worthwhile.  If you only swap O/S images occasionally, then it’s definitely something you may wish to avoid absent some compelling reason.

What say ye?

1 Like

Update:

I have been working with PINN and - eventually - I was able to get it to offer me one of three installed operating systems.

However, both the steam-pressure and the frustration meter are rapidly approaching the safety-valve release point.

Every time I try to do something else in PINN, be it the supposed VNC or SSH connections into the boot loader, or backing the installation up, or whatever else, I run into problems.

When I post the question, invariably the answer is to refer me to yet another document located God Only Knows Where.  How the heck am I supposed to keep track of all of this - I wonder if the maintainer himself has any idea where half of this is. . .

I’ve found another way to multi-boot that skips all the complexity of PINN.

Viz.:
https://www.spket.com/blog/raspberry-pi-4-usb-dual-boot/

This article only talks about dual-booting but can easily be extended to multiple OS’s.

===============================

The next big problem is backups.

All the backup solutions I have found assume one of two things:

  1. Your boot media is small and you can clone it to another small device.
  2. Your boot media is a “classic” Raspberry Pi installation with two partitions.

Anything other than that and you’re hozed.  I’m still looking for backup methods for a multi-partition install.

Errrr!

Honestly Jim, why are you putting yourself through all this?

  • Perhaps “cutting up your RPi4” would lower the steam pressure?
    • The RPi4 uses a lot more battery at idle than needed, adding stress on your batteries
    • Using your old Pi3B (or Pi3B+ was it?) in Charlie would free up the RPi4 to a separate case
      that either wouldn’t need frequent card changes, or would make the card changes more convenient?
    • I really hadn’t heard that you had an application that was using all that RPi4 memory or processing capacity. Why mess with it?
    • Even when/if you succeed at creating the perfect multi-boot system, aren’t you going to find that you need to reboot and update so often that combining two or more environments just slows you down?

I just don’t get why you are investing so much energy into creating a beautiful unicorn.

I have repeatedly touted the reason I chose GoPiGo3 was because there were others running the same platform, others to ask and learn from. Perhaps I am being a rabbi trying to pull a straying congregant back to the fold. I see your pain and wish I could help, but your war is in a galaxy too far from my world.

2 Likes

That’s what they asked Hillary as he was trying to re-re-re-climb Mt. Everest or the Wright Brothers at Kitty-Hawk.

The problem I face is when I try to do something in R4R, most of the time it doesn’t work.  Or, I want to try something to see how “they” do it.

So, I end up swapping R4R and GoPiGo O/S to try something in Bloxter.

Actually, what I’d really like to do is install Bloxter into my R4R image.  Unfortunately, the folks at Modular Robotics are not quite ready to hand over “the keys to the castle” just yet so - though I am absolutely sure it’s a trivial thing to do - I’m not being given the information on how to do it.

Since I can’t have my cake and eat it too, I want to put both cakes into the same oven, so to speak.

Additionally, with a 500 gig SSD sitting on my device, it really begs for more than just one operating system.

Don’t worry about being “a rabbi”, we all need a spiritual advisor sometimes.

As I see it, we complement each other.  You come up with clever software solutions and I come up with clever hardware solutions to run them on.  :wink:

2 Likes

Update:

Multi-booting and backing up the images is finally solved.

After careful consideration of many different options, I ultimately decided on using PINN as the boot manager, subject to change if it becomes unreasonable later on.

As far as backups go, PINN actually makes things easy for you. Once you have the PINN format images, you can install them direct to the media, with as many copies and as many times as you want.

Once you have the media built and configured the way you want, you can use PINN to back up each individual operating system install. Later on, you can re-install them on different media, in a different order, with different disk signatures, and PINN ties up all the loose ends.

Next steps, install the boot scripts to allow booting by jumpers on the GPIO pins.

2 Likes

Additional update:

Famous last words!

After considerable research, numerous mistakes, massive angst, and a considerable amount of work, I believe I am finally within reach of my goal.

Just in case anyone else wants to take advantage of my research, I have created an article on how to install and use PINN, including PINNified images of Raspbian for Robots and GoPiGo O/S 3.0.

You can find that article here:

More when I know more.

Update:

The Finish Line!

I have, finally, succeeded.

To recap:
The original requirements were to find a way to boot multiple operating systems on my 'bot, such that:

  1. It had to be entirely headless - that is, it must not depend on ANY display device or keyboard.  (i.e. Needing a monitor for an operating system select menu is NOT acceptable, though a keyboard/display for initial configuration would be OK.)
  2. It is desirable to use GPIO pins, connected to either ground, (preferably), or +3.3v to select the operating system to run.  Ideally it would use some kind of hardware selection process - a dip-switch for example - to select the O/S to boot.
  3. There should be a way to boot to a “recovery” process.  It would be acceptable for the recovery process to require a monitor and keyboard.
  4. It should be as simple and easily maintained as possible.  Ideally, it would be something I could post here and have people who don’t really want to know about the finer details of operating systems or partitioning would be able to use it.

As I have mentioned before, there were several possibilities.  Out of those possibilities I eventually selected PINN.

  1. Though the “first-cost” development process was significantly greater, ultimately the recurring cost to maintain it and the initial cost to install for subsequent installations is so much less as to be virtually trivial - no more difficult than flashing an SD card for use in the 'bot.

    • The creation of the special “PINNified” images to use with PINN isn’t necessarily easy, but isn’t too bad once you’ve done it once or twice.
    • Once the images are created, creating the bootable media is almost trivial.
       
  2. The PINN forum and PINN’s developer, procount, were breathtakingly helpful, beyond what I could hope or think.  He was with me every step of the way - offering advice, suggestions, implementing bug fixes virtually in real-time, adding essential features, and so on.  This is as much his effort as it is mine.  Other members of the forum, especially Lurch, were also very helpful.

    • Direct access to those who are subject matter experts was essential for the success of this project.
       
  3. Once the PINN boot manager and the PINNified images are installed, it becomes trivially easy to back up individual operating systems to external media.

  4. The ability to script a modified behavior for PINN is an invaluable tool as it allows the generic nature of PINN to be customized and tailored to a particular need that might not be commonly used.

=============================

All that being said. . . .

First:

The software.

The software comes in two main parts - a customized config.txt that PINN itself boots with and a specially crafted pinn_init.sh script.

The config.txt for PINN:

The first part of the config.txt, configures the GPIO pins that are going to be used to select the operating system to boot, like this:

gpio=21=ip,pu

This takes Broadcomm GPIO pin 21, (physical pin 40), and sets it as an input, (ip), and attaches an internal pull-up resistor to it, (pu). This causes the pin to stay at a logical “1” until pulled low by a connection to physical pin 39, (ground).

This is done four more times for each of the pins I wanted to use for my OS selections.  In my case I used the last six pins because:

  1. They weren’t being used by the GoPiGo controller board, nor any other software that the GoPiGo uses.
  2. I happened to have a five-position dip-switch laying around.  :wink:

Of course, you can use any pins you want, so long as they are not being used for anything else either at boot-time, (or any other time while the device is running), because they stay tied to ground if selected.

The last two parts of the config.txt are required for PINN to boot properly and are not modified.

The next part is the special pinn_init.sh script that does “the heavy lifting” so to speak.

First there are some essential “functions”:

The gpio_export function uses the mini-Linux that PINN boots to enable access to the GPIO pin passed as an argument by exporting the pin itself, ($1) and the signal direction as specified in the config.txt file, (in)put.

This is done one at a time for each pin being read,

The next function, gpio_unexport,

releases the pin, ($1), after we’re done with it

The next function, gpio-value,

is what actually reads the value of the GPIO pin in question.

So, the logic flow is essentially like this:

  1. Decide what pin we want to read.  That becomes the argument ($1).
  2. “Export” the pin so we can read it from within the script.
  3. Read the value of the pin, either a logic 1 or a logic zero, and return it so we can capture that value.
  4. “Un-export” the pin so it’s not being tied up.

Now that these functions have been defined, we can make use of them to choose what we want to do.

In a “standard” PINN installation, each operating system has two partitions just like Raspbian; a “boot” partition and a “root” partition.  Each installed operating system’s boot partition, (the one we’re interested in), is the even numbered partition, starting with partition number six.  So if there are three operating systems installed, their respective boot partitions will be partitions six, eight, and ten.

PINN boots the desired operating system by booting through the associated boot partition.  It does this by using a special command “rebootp”.  (i.e. “rebootp 6” causes PINN to force a reboot with partition six as the target boot partition.)

I create a loop that iterates through each pin, and associates that pin with a partition - the first pin in the list is associated with partition 6, the next with partition 8, and so on.  Since, (for whatever reason), I pre-increment the partition, I start with it set to four.

In the “for x in [set of things]” statement
for n in 21 26 20 19 16; do
we iterate over each GPIO pin we want to use in turn.  Note that here order is important because each pin is associated with a boot partition in turn, starting with partition six.

The “if” statement works almost like a switch-case construct - it checks a pin to see if it’s zero and if it is, it immediately boots to the associated operating system.  If not, it goes back to check the next pin and repeats that until either a pin reads zero, or it runs out of pins to check.

It’s important to note that this script does not check to see if there is actually an operating system to boot, (or if the partition even exists!), so if you select a partition that doesn’t exist, it will lock up the 'bot and require a power-cycle.  You can avoid this by only listing pins that are associated with valid partitions - or - using complex “sed” and “awk” expressions to parse the list of installed operating systems.  I chose the former to avoid the complexity of sed and awk, as they are virtually unreadable and difficult to understand.

At the very end is the default case:  If no operating system is selected it “falls through” and boots PINN as a recovery option.  PINN, of course, requires a monitor, keyboard and, (optionally), a mouse.

Obviously this script could be made more robust with better error checking, etc., but I opted for simplicity and ease of use instead of several lines of Egyptian Hieroglyphics for the more complex logic.

Next: Hardware

1 Like

Congrats! What an impressive body of work. I look forward to seeing how this continues to progress.
/K

1 Like

Now that we’ve talked about the software used to implement the multi-boot process, the next topic is the physical hardware.

In this case I wanted to use a five-position dip-switch, (like the kind you find on the back of modems, set-top boxes, etc.), to select the O/S to boot without having to have a monitor attached or remove and replace a fiddly little microSD card. . .


Here’s a close-up of the dip-switch installed on Charlie with switch 1 selected, (pushed upward), to boot the first of four operating systems automatically.


Here’s Charlie with the dip-switch installed.  You can also see his brand new 500gb SSD sitting on top.
 

I was lucky to find a dip-switch with “piano” switch keys that can be easily flipped from one position to another.


Here you can see the header I glued to the switch.

You can see from the first picture that the switch is “upside down” with respect to Charlie’s Raspberry Pi board.  That’s deliberate as you can see in the picture of the wiring below.
 

And how I wired it. . . (sloppy, sloppy, sloppy. . .)


I wired it upside down so that the wiring would be short and (somewhat) neat. If I put the switch facing the other way, the two sets of solder point contacts would be facing opposite directions.  Yea, yea, I know, I could have whipped-up a slick PC board for it, but. . .

Here’s a schematic I drew that details how I wired it and what the switches represent.


What’s happening here is that when a particular switch is set to “on”, (the flipped position), the switch closes, causing that switch’s pin to be tied to the common ground at physical pin 39, creating a logical “zero” there.

If you remember from the previous post that the GPIO pins were configured not only as inputs, (so I can read their state), but also with internally supplied pull-up resistors.  The internally supplied pull-up resistors cause the associated pin to be forced to a 3.3v state - a logical “one”. Since these pull-ups are “soft”, (high values of resistance), the pin can be tied to ground without damaging the Raspberry Pi itself.

Here is an example of how pull-up resistors work:


In this case, R7 and R8 are 43,000 ohm resistors tied to the logical “high” voltage for that circuit, in this case 4.3 volts.  (The Raspberry Pi uses 3.3v instead of 4.3.)  Since the resistance is connected to “nothing” if the circuit is open, the voltage there is also 4.3v, (or 3.3v for the Pi), a logical “1”.

When a switch is closed, that pin is tied directly to ground, (or zero volts), which causes the voltage at that pin to drop to zero volts too - a logical “0”.  The current through that resistor is so very small, (about 80 μA at 3.3v), it can be tied directly to ground safely.

=======================

This details the way I decided to implement this particular project.  Of course, you can use different pins, connected in different ways, depending on your needs.

Before I end this, I want to mention a few important things for those who may not be familiar with how to wire things to integrated circuits.

  1. Pins, like those on the Raspberry Pi, cannot handle large amounts of current - and when I say large, I mean anything larger than a couple of milli-Amperes.  Excessive current, (more than a few mA), will destroy the internal circuitry for that particular pin.  Even something as innocent as an LED will draw too much power from a pin.  This is why books that talk about wiring things up to the Pi always use a resistor in series with a LED.

  2. In my case what I am doing is OK, because:

    • I have defined the pins as inputs which means they don’t supply power.
    • Internal, software defined pull-up resistors are designed to be pulled to ground without damage.  That’s what they do.
    • I know that I am not doing anything else with those pins, even after the Raspberry Pi has fully booted and is running its own software.
    • I am confident that Dexter/Modular Robotics isn’t doing anything else with those pins, as the GoPiGo board only uses the first 26 pins.
       
  3. If you decide to do something like this on your own, with your own design, using your own circuit, attached to your own pins, it is absolutely essential that the pins you choose are never used as outputs.

    • Even if you define a pin as an input in your config.txt, after the Raspberry Pi has booted, the pins can be used for whatever the programmer wants - even as outputs.
    • Because of this, you have to know what the pins you choose are being used for after your Raspberry Pi finishes booting.
       

None of this is rocket-science, but when messing with electronics it’s important to know what you’re doing.  One of the nice things about the Raspberry Pi is that it’s (relatively) inexpensive.  So, if you blow one up, it’s not the end of the world.  However a little bit of research goes a long way.

Lastly:
I hope this has inspired you to go forth and do great things.

If you have any questions about this - or any other electrical/electronic aspect of your robots - please don’t hesitate to ask!

1 Like

Very impressive. Of course with 5 pins you can have 32 different boot configurations. That might be enough for a while :slight_smile:
/K

1 Like

True.

However I don’t think I will need 32 operating system versions on-hand any time soon. :wink:

Not to mention that I’d have to read ALL the switches and build a binary number from strings, then go nuts on it.

Right now they’re being used as “select bits”. The first “0” found boots that O/S, regardless of what any subsequent switch is set to.

One thing I am thinking about is using the last, unused, switch to select either a 32 bit or 64 bit kernel for those O/S’s that support it.  I’m not sure how I would do that, though I have an idea. . . .

I had assumed (I should learn not to do that) that the pins could be read as essentially T/F values (0 or 1), So it wouldn’t take much longer to read all of them than to read them sequentially and then stopping on the first one flipped. Even if you can’t read them that way, would still be straightforward. In pseudo-code something like

Flags = 0
If pin 1 = "on" then Flags += 16
If pin 2 = "on" then Flags += 8
If pin 3 = "on" then Flags += 4
If pin 4 = "on" then Flags += 2
if pin 5 = "on" then Flags += 1

This will quickly get you a value from 0 - 31 that you then compare against for your settings. Even if you only are using 4 or 5 choices initially it can help you make sure more then one switch isn’t thrown inadvertently.

/K

Damn it all!  I didn’t think of that method, I was going to build a binary number concatenating strings, but your method is much more straightforward.  Not to mention easier to read and makes more sense.

Happy to help. That’s the value of a forum community - the sharing of ideas.

And obviously you could list the switches in whichever order makes sense for the physical lay-out. Or have 3 pins define one variable and the other two pins define another; or 4 and 1. Lots of options.

Have fun.
/K

1 Like

As if my head weren’t spinning fast enough already!

Actually, one of the things I was considering, as I mentioned above, is using the last pin as a “mode” switch.

For example:
Positions 1-4 select one of four O/S’s to boot.
Position 5 selects either the standard 32 bit kernel or the optional 64 bit kernel, on every O/S except the Raspbian 64-bit image.

How I would do that?
Positions 1-4 would be selected as they are now via PINN.
Position 5 would not be read at boot-time by PINN, but would become part of the OS’s individual config.txt files after PINN has booted into them. I would place a conditional section that would select the 64 bit kernel, depending on the position of switch 5.

“Da bitch part”, (as they said in Blazing Saddles), is figuring out a way to make the display non-ambiguous.

I’d want some kind of an overlay on the screen that would tell me what kernel mode I’m in. . . Gnarly, but I’m sure it’s doable. If they can get to the moon, land, take off again, and get home safely with no more computing power than a pocket calculator, I’m sure I can figure out a way to do a screen overlay! :wink:

This is why when I do something, even if I think it’s so bizarre that people will wonder what drugs I am taking - or so outrageous that no one in their right, (or left!), mind would even consider it. . . I always want to put it here.

(P.S. I put it up on the PINN sticky, and posted it on the Raspberry Pi forums too.)

I have discovered that some of the odd-ball, one-off, “since I have nothing better to do” projects end up having serious implications. It appears that dozens of people come out of the woodwork and say, “I’ve been trying to figure that out since [choose geological epoc]!!”

Sheesh!

1 Like

Another update!

This has been accomplished.

What I did:

  1. Removed, (commented out), the configuration for the last pin in the PINN partition’s config.txt. (PINN’s partition is the first one)

  2. Removed that pin from the selection list in the pinn_init.sh script in the PINN partition so that the GPIO pin associated with switch 5 is no longer being used.

  3. Created a customized variant of the config.txt script that is put into each of the boot partitions for each operating system (except for the Raspbian 64 bit experimental O/S, which is already 64 bit.)

Here are the relevant parts:

# For more options and information see
# http://rpf.io/configtxt
# Some settings may impact device functionality. See link above for details

# Enable monitoring switch #5 on pin 36, (Broadcomm pin 16)
gpio=16=ip,pu

As mentioned before, this allows us to read the signal on physical pin 36, (Broadcomm pin 16), to see if it is is a zero or a one.
 

[all]

# If switch 5 is set, use 64 bit kernel
[gpio16=0]
arm_64bit=1

And this is what does the work.

Any statement within square brackets is a conditional statement.  For example, the part of the config.txt that says [pi4] is ONLY read if the board is a Pi-4 board.  Later on, there’s an [all] block that “ends” the [pi4] block by indicating that this applies to all versions of Raspberry Pi.

Of course, the beginning of the config.txt, since it doesn’t have a qualifier, applies to everybody.  However, once you DO qualify by type, you need to remember to “un-qualify” by adding the [all] block for anything else that follows.

This particular section, [gpio16=0], checks to see “if” pin 16 is a zero (switch selected) or not.  If the switch IS selected, (pin 16 is a logical zero), then it sets the kernel “bitness” to 64 bits by enabling the experimental 64 bit kernel.

In fact, you can do that with any available GPIO pin you want, and use it to do whatever you might need it to do.  For example you could use a dedicated/unused GPIO pin to select between a built-in display and an external HDMI display - or to enable or disable something else.

There’s a lot going on “under the hood” so to speak, and there’s a lot of fun to be had there.

Here’s the entire config.txt file I use.  It has a few other tweaks like enabling the overlay for the Adafruit real-time clock circuit I have installed.

config.txt (2.5 KB)

1 Like

Update:

It turns out that this idea has more aspects than a cat has hair!

Note:
These results are after I started a new experiment where I hand-copy, (via rsync), the data to separate root partitions and the boot partitions to subdirectories in the main boot partition.  This is an alternative to PINN, which uses a simpler organization that is easier to understand.

Viz.: Raspberry Pi 4 USB dual boot

==================

The Raspberry Pi is NOT particularly well designed for a multi-boot environment, being particularly sensitive to its boot and root partition configurations.  Anything other than a plain-vanilla two-partition SD card boot is risking “interesting” behaviors and run-time artifacts that don’t appear in the standard SD card install - even using the exact same files.

It also appears that the boot-time documentation over at Raspberry Pi is, by their own admission, woefully inadequate.  They “talk around” it, but never really say things straight out.

I posted a bug-comment over on the Pi forums, (https://www.raspberrypi.org/forums/viewtopic.php?f=28&t=311192), and it spawned a bit of discussion.

Not the least of which is that the config.txt file is actually read and processed twice - once by the binary-blob loader, (bootloader.bin or the installed firmware on the Pi-4), and then read again when the associated start[x].elf is loaded.

What that means is that certain directives cannot be in a second-stage config file, (that is, aything referenced by an “include” directive), and one of them is start_x=1 that enables the camera.

There are certain other directives that can only be in the first-stage boot.  (i.e.  NOT in an “included” file.)

One of the Fountains of Wisdom over at Raspberry Pi had this to say:

Elsewhere in that thread:

I am still trying to determine what specific boot files, (executables, overlays, etc.), need to be included in the first-stage boot directory before passing control off to the second-stage of the boot process.  I am also trying to figure out what executables and/or overlays, (etc.), get skipped when in a second-stage boot directory.

I ended up solving the problem of having certain things in the config.txt file work on the first pass, other things work on the second pass, and nobody really knows for sure who is what or where, (who’s on first?), by combining all my config files into one unified whole.  I took all the separate config files for each O/S, diff’d them, and filtered out those things that were critically O/S specific from those things which were generic.

I put all the O/S specific stuff in the individual GPIO select statements, and left the rest as is.  I am also discovering that, (to some extent), order is important because later statements can override earlier statements, so you have to pull out defaults and set them first - so that later statements can override them as needed.

Here’s what my, (latest?  :wink:), config.txt looks like.

# Universal multi-boot config.txt
# Version 1.0 - 2021-05-05.
#  Changed:
#  *  Included all separate config files into this one and filtered out the
#     O/S specific data
#  *  Modified the system crontab on all O/S's to remove OS specific filenames.
#     The system crontab now copies the master config.txt file,
#     (in the root of the boot partition), to the individual
#     second-stage boot sub-directory for that O/S on boot-up.
#     It also copies the individual O/S config.txt back to the master
#     once a minute in case it gets changed by something/someone else.

# For more options and information see
# http://rpf.io/configtxt
# Some settings may impact device functionality. See link above for details

#==========================================
# These lines enable GPIO Multi-Boot capability
# Setup GPIO pins, set as inputs, (ip), pulled high, (pu).
#
# Pin/dip-switch mapping for GPIO O/S selection:
# Dip-switch   Broadcomm pin   Physical pin	    Function
#    1		   21		   40		Raspbian for Robots (see switch 5)
#    2		   26		   37		GoPiGo O/S (see switch 5)
#    3		   20		   38		Raspbian 32-bit (see switch 5)
#    4		   19		   35		Raspbian 64-bit
#    5		   16		   36		"Bitness" selector. Selected = 64-bit kernel
#						"Bitness" is selected in the individual O/S
#						config.txt file. (e.g. R4R_config.txt, etc.)
#  common	 ground		   39

gpio=21=ip,pu
gpio=26=ip,pu
gpio=20=ip,pu
gpio=19=ip,pu
gpio=16=ip,pu
#=============================================

#=============================================
# These lines do O/S selection based on the dip-switch position
# as noted above
#
# Enable experimental 64-bit kernel if dip-switch 5 is flipped.
# I do this first so that it doesn't cause issues.
[gpio16=0]
arm_64bit=1
[all]

# O/S #1 is raspbian for robots
[gpio21=0]
os_prefix=R4R_boot/
[all]

# O/S #2 is GoPiGo O/S 3.0.0
[gpio26=0]
os_prefix=GPG_Boot/
[all]

# O/S #3 is Raspbian 32 bit
[gpio20=0]
os_prefix=Raspbian32/
[all]

# O/S #4 is Raspbian 64 bit
[gpio19=0]
os_prefix=Raspbian64/
arm_64bit=1
[all]
#
#==============================================

#  The rest of this is the "generic" config.txt

# uncomment if you get no picture on HDMI for a default "safe" mode
#hdmi_safe=1

# uncomment this if your display has a black border of unused pixels visible
# and your display can output without overscan
#disable_overscan=1

# uncomment the following to adjust overscan. Use positive numbers if console
# goes off screen, and negative if there is too much border
#overscan_left=16
#overscan_right=16
#overscan_top=16
#overscan_bottom=16

# uncomment to force a console size. By default it will be display's size minus
# overscan.
#framebuffer_width=1280
#framebuffer_height=720

# uncomment if hdmi display is not detected and composite is being output
# This is necessary for headless VNC mode.
hdmi_force_hotplug=1

# uncomment to force a specific HDMI mode (this will force VGA)
hdmi_group=2
hdmi_mode=39

# uncomment to force a HDMI mode rather than DVI. This can make audio work in
# DMT (computer monitor) modes
#hdmi_drive=2

# uncomment to increase signal to HDMI, if you have interference, blanking, or
# no display
#config_hdmi_boost=4

# uncomment for composite PAL
#sdtv_mode=2

#uncomment to overclock the arm. 700 MHz is the default.
#arm_freq=800

# Uncomment some or all of these to enable the optional hardware interfaces
dtparam=i2c_arm=on
#dtparam=i2s=on
dtparam=spi=on

# Uncomment this to enable infrared communication.
#dtoverlay=gpio-ir,gpio_pin=17
#dtoverlay=gpio-ir-tx,gpio_pin=18

# Additional overlays and parameters are documented /boot/overlays/README

# Enable audio (loads snd_bcm2835)
dtparam=audio=on

# Enable Adafruit RTC modules
# Uncomment the line that corresponds to
# the module, (clock chip), you're using
#dtoverlay=i2c-rtc,ds1307
#dtoverlay=i2c-rtc,pcf8523
dtoverlay=i2c-rtc,ds3231

[pi4]
# Enable DRM VC4 V3D driver on top of the dispmanx display stack
dtoverlay=vc4-fkms-v3d
max_framebuffers=2
[all]

dtoverlay=vc4-fkms-v3d
start_x=1
gpu_mem=128
dtparam=i2c1=on
enable_uart=1
gpio=8=op,dh

My ultimate goal is to not only successfully multi-boot, (which I have done), but to multi-boot accurately enough that I can confidently write bugs against it.

2 Likes

Turns out that there’s an even simpler way: Dex’s eyes.

I’m sure I posted this somewhere, but I forgot where.

What I did was modify my startup script to include:

    # check to see which kernel is being run
    os_version = os.popen('uname -m').read()
    print("os_version is", os_version)
    if os_version == "aarch64\n":
        logging.info("Operating System Kernel Version is 64 Bit\n")
        logging.info("Eyes are Blue\n")
        gopigo3_robot.left_eye_color = (0, 0, (brightness + 5))  # set eyes blue if 64 bit
        gopigo3_robot.right_eye_color = (0, 0, (brightness + 5)) # add ofset because blue is not as bright
    else:
        logging.info("Operating System Kernel Version is 32 Bit\n")
        logging.info("Eyes are Green\n")
        gopigo3_robot.left_eye_color = (0, brightness, 0)  # otherwise, set to green if 32 bit
        gopigo3_robot.right_eye_color = (0, brightness, 0)

    gopigo3_robot.open_eyes()  # enable eyes.

. . . and I get either green, (32 bit OS), or blue (64 bit OS) when I boot either GoPiGo OS or Raspbian for Robots.

“brightness” is a variable set at the beginning of the python script and is set to 10 - the same, (apparent), brightness as the other LED’s.

Of course if I, (or anything else), does something with Dex’s eyes, there goes my nice indicator! :wink:

2 Likes

Update:

I remember a time when I was taking freshman Calculus - the professor had filled the blackboard, (yes, real slate blackboards), with something that looked like it zoned in from Mars - a mangled mess of formulae and operations that would cross Einstein’s eyes!

He than said “It is intuitively obvious that. . . [something or other]”, did a few squiggles, and the entire jumbled mess collapsed in on itself like a black hole, leaving a trivial answer - something like 3 and a half.

That just happened here.

Both Procount and I have been fighting this monster since, ah, well, I don’t remember. But it was before Christmas! Maybe even since last whenever?

Yesterday, another individual, (cleverca22), while digging through the code for things like the binary blob, (the firmware files, etc.), discovered a (somewhat) hidden directive: “boot_partition=” that only works in a special kind of config.txt file called “autoboot.txt”.

“boot_partition=[x]” causes an immediate jump to that partition:

  • It must be a FAT32 partition.
  • It must contain valid boot files as if it were the first partition.
  • It must have an associated root partition.
     

Once it makes that jump, the Raspberry Pi forgets that it even booted anywhere else - it treats that partition as if it were the only boot partition in the world and has a high ole’ time.

Important notes:

  1. This assumes a PINN/NOOBS partition layout.  I suspect this was part of what was created to support NOOBS in the beginning.
  2. The PINN/NOOBS partition layout has, (among other things), pairs of partitions that represent each operating system, one FAT-32 partition representing the boot partition of the pair, and another ext4 partition that is the root partition of the pair.
     

The “boot_partition=” directive takes a partition number that represents the boot partition of the pair and executes it directly.

The result is that it absolutely trivializes the process, taking it from a mangled mess and reducing it to something simple enough for a wannabe punter like me to understand.

I detail my results on the PINN sticky here:
https://www.raspberrypi.org/forums/viewtopic.php?f=63&t=142574&p=1863389#p1863370

Now all I have to do is clean up all the mess I made when I tried cramming all of this into something that works! :wink:

To give you an example of how stupidly simple this is - here is the autoboot.txt file that replaces many, many kb of pinn_init.conf files:

#  autoboot.txt file to automatically boot based on a GPIO pin selection

# Setup GPIO pins, set as inputs, (ip), pulled high, (pu).
#
# Pin/dip-switch mapping for GPIO O/S selection:
# Dip-switch   Broadcomm pin   Physical pin
#    1		   21		   40
#    2		   26		   37
#    3		   20		   38
#    4		   19		   35
#    5		   16		   36
#  common	 ground		   39

gpio=21=ip,pu
gpio=26=ip,pu
gpio=20=ip,pu
gpio=19=ip,pu
gpio=16=ip,pu  # reserving this pin for O/S bitness selection

# GPIO pin 16 is tested within the individual O/S config.txt files and enables the 64 bit kernel if low.

[gpio21=0]
# Raspbian for Robots
boot_partition=6
[all]

[gpio26=0]
# GoPiGo O/S
boot_partition=8
[all]

[gpio20=0]
# Raspberry Pi O/S (32 bit)
boot_partition=10
[all]

[gpio19=0]
# Raspberry Pi O/S (64 bit)
boot_partition=12
[all]

And that’s it.  100% of it.  Nothing else to do.

No boot delay while PINN boots and runs a complicated script.

It goes through the selection process like chlorine triflouride goes through cement, and it doesn’t even pause long enough to say “Hello!” before booting the selected O/S.  :wink:

1 Like

I’ll bet it felt like you were doing this:
tenor

And then someone showed you:
tenor (1)

:robot:
/K

2 Likes