My "New" Remote Camera Robot Project

I have no idea what they used, or that this even existed.  Maybe these folks had deep enough pockets to afford the kind of development effort that this would require?

In order to avoid capturing the low-level USB/Joystick communications, I’m using the gamepad interface in the browser.

I know I’ve said this before, but what really burns my biscuits is how completely disconnected from reality the W3C people seem to be.

That could be done, but that would mean re-inventing the wheel for every platform that a gamepad/joystick would be used on, with all the code-signing and driver development efforts that would require.  IMHO it would be simpler to find a way to get a certificate to pass - or turn lead into gold, or get the world’s leaders to play nice in the sandbox, or. . . .

One way that I have been thinking about is to write some routine, like nipple.js or whatever, that captures joystick inputs outside the browser context (the way nipple.js captures mouse events), and then send them to the browser as mouse and/or keyboard messages - or some other kind of message that the browser could use that is not dependent on the gamepad API.

However, that in and of itself would be a non-trivial task as each platform, (Windows, Mac, Linux, Android, iPad, etc.) handles the joystick at the API level differently.  Despite my best efforts, I have not yet found a use_joystick application or module that I can use cross-platform.

2 Likes

I thought they used ROS
/K

2 Likes

(The most used remote robot control, most versitile, and quite possibly easier than cracking SSL safeguards - somewhat at least.)

2 Likes

Well. . . .

I have nginx running as a reverse proxy on Charlie and it’s serving up the web stuff just fine - no certificate errors and the joystick works like a charm in both firefox and chrome.

The only nut left to crack is how to let the insecure video stream out at the same time.  Supposedly, nginx can handle redirects to more than one server instance at the same time.

===================

Update:

Success!

I forgot one tiny detail, to specify that the incoming connection for the video connection was ALSO secure - it has to be because the connection to the base URL is secure.  (Silly me, that pesky “ssl” parameter!)

Even though nginx re-directs the incoming port request (at 5001) to an insecure connection (at port 5002 - they have to be different!), I need to specify that the incoming request from the browser will also be secure.

I now have a secure connection, binding at the standard ssl port 443, that includes both the joystick and video components of the web site.

Next steps: Figure out why I am getting bizarre results from some of my calculations!

2 Likes

Additional update:

I created a question, and then updated it with what I discovered about securing connections to the GoPiGo robot.

You can read about it here:

I am going to post details in a separate thread.

2 Likes

More progress to report!

Issue:
Aside from the actual movement calculations, (which I need to refine), I was experiencing two very puzzling problems:

  1. The x_axis value was being returned as a two-decimal-place precision number and the y_axis value was being returned as the string representation of a two-decimal-place precision number.  (i.e. The difference between 0.00 and “0.00”.)

  2. The primary trigger, once pressed, would never appear to return to zero once released.  The “on screen” value always faithfully followed the button action but the data sent to the server never changed unless something else happened - like a key-press.

Problem #1:
While researching ways to debug JavaScript in the browser in realtime, I ran across one tasty little tidbit:

Apparently there is a “magic word” for JavaScript, (like the #! in shell scripts), “// @ts-check”.  If you put this on the first line of a JavaScript file, it “magically” enables additional type-checking and linting of the file in browsers and in VS Code - and they become really picky about good programming style - like declaring variables instead of just using them, and - if necessary - creating them of the correct type before use.

That little tidbit helped me find the first problem.

Here is a code snippet that describes where the x and y axes get assigned their values:

gopigo3_joystick.x_axis = Number.parseFloat((jsdata.axes[0]).toFixed(2));
[linter error] >>>gopigo3_joystick.y_axis = Number.parseFloat(jsdata.axes[1]).toFixed(2);

. . . and I’ve been staring at that code for the entire week, getting nothing but a headache to show for my troubles.

Enabling the advanced type checking flagged the second line as trying to assign a string to “gopygo3_joystick.y_axis” - but the first line was just fine.

If you look carefully, you will notice that the second line is missing a pair of outer parenthesis.  It doesn’t throw an error, it just “casts” the value as a string instead of a number.  It wasn’t until after I set the theme in VS Code to “high contrast dark” and used the extra type checking that I saw this subtle mistake.

Problem #2:

Here is the relevant section of the code:

function is_something_happening(old_time, gopigo3_joystick) {
    if (gopigo3_joystick.trigger_1 == 1 || gopigo3_joystick.head_enable == 1) {
        if (old_time != Number.parseFloat((gopigo3_joystick.time_stamp).toFixed())) {
            send_data(gopigo3_joystick)
            old_time = gopigo3_joystick.time_stamp
        }
    }
    return;
}

The purpose of this block of code is to regulate and limit the data being sent to the server so that only “something interesting” is sent.  The definition of “something interesting” is:

  • A key-press.  Key-presses generate their own event and trigger their own data being sent.
  • A joystick event, but ONLY if an enabling trigger is pressed.
    • A “joystick event” is indicated by a change in the time_stamp, so I capture an initial time_stamp value when the joystick is first initialized.
    • “Enabling trigger” = trigger_1 or head_enable.
    • This keeps the robot from running around if someone accidentally hits the joystick.

Since you folks are much smarter than I could ever hope to be, I am sure you already see the problem.  It took me weeks to find it. . .

The definition of an “interesting” event depends on an enabling trigger being pressed - but what happens when the trigger is released?  The trigger’s value is no longer "1", and as a consequence the trigger-release action is never captured!

The solution is to capture:

  • If the trigger is pressed.  (Trigger = 1)
  • If the trigger’s state changes from “1” to “0”

I am banging my head on the floor in total and abject humiliation.

2 Likes

Another update:

Using what I have learned about debugging withing the browser, I have (finally) achieved the major milestone of having the browser:

  • Communicate accurate information to the robot.
  • Communicate it in a timely manner without stalling the browser in a tight loop.
  • And do this by only communicating if there is something interesting to say - to avoid flooding the connection with useless and repetitive messages.

To effectively accomplish this, I had to create the equivelent of a “joystick activity event” that will only send information if there is something of interest to send, and remain silent otherwise.

I implemented this with the following code:

First:  The important data structures used by the script.

These structures are essentially Python dictionaries in JavaScript form.

//  Formal definition of "gopigo3_joystick"
//  gopigo3_joystick is the structure that contains all the joystick elements of interest to the GoPiGo robot
//  This collects them together in one place so they can be used, changed, monitored, and ultimately
//  transmitted to the robot as a serialized parameter string.
var gopigo3_joystick = {
    controller_status: 'Disconnected',
    motion_state: 'Waiting for Joystick',
    angle_dir: 'None',
    time_stamp: 0,  // a large integer that, (sometimes), becomes a float (shrug shoulders)
    x_axis: 0.00,  //  x-axis < 0, joystick pushed left - x-axis > 0, joystick pushed right
    y_axis: 0.00,  // y-axis < 0, joystick pushed forward - y-axis > 0 , joystick pullled back
    head_x_axis: 0.00,  //  head x and y axes mirror the joystick x and y axes
    head_y_axis: 0.00,  //  if the pinky-switch, (head motion enable), is pressed
    force: 0.00,  //  force is the absolute value of the y-axis deflection
    trigger_1: 0,   // Partial primary trigger press (motion enabled)
    trigger_2: 0,   // Full primary trigger press  (faster speed - not yet implemented)
    head_enable: 0  // Pinky-switch press  (enable joystick to move head)
};

//  Formal definition of old_event_context
//  old_event_context allows values for old_time_stamp and old_trigger_state to persist across functon calls
var old_event_context = {
    old_time_stamp: 0,
    old_trigger_state: 0
};

The old_event_context structure is used because JavaScript cannot pass more than one item back in a return statement unless it one “object” that contains multiple values.

Later on in the code, the main gopigo3_joystick structure is used to capture the important attributes of the joystick in question and make them available in a way that can be sent to the robot.

is_something_happening is my implementation of a “joystick event”, set up such that data is sent only if there is something that needs to be sent.

//  is_someting_happening is my attempt to create a joystick "event" when "something interesting" happens.
//  "someting interesting" = any joystick movement if either enabling trigger is pressed
//  or, if a previously pressed trigger has been released.
//  Otherwise, no data should be sent.
function is_something_happening() {
    if (gopigo3_joystick.trigger_1 == 1 || gopigo3_joystick.head_enable == 1) {  //  Has an enabling trigger event happened?
        if (old_event_context.old_time_stamp != Number.parseFloat((gopigo3_joystick.time_stamp).toFixed())) {  // and, has the timestamp changed?
            send_data()  //  then, send data to the robot and. . .
            old_event_context.old_time_stamp = Number.parseFloat((gopigo3_joystick.time_stamp).toFixed())  //  Save current time_stamp to compare to future changes
            old_event_context.old_trigger_state = 1  // record trigger was pressed
        }
    }
    else if (old_event_context.old_trigger_state == 1) {  // current trigger value MUST be zero here - old_trigger_state = 1 means a trigger has changed
        send_data()  // send the trigger release event
        old_event_context.old_time_stamp = gopigo3_joystick.time_stamp  //  Save current time_stamp to compare to future changes
        old_event_context.old_trigger_state = 0  // record the fact that the trigger was released
    }  //  else. . . there's nothing interesting to say so we just return.
    return;
}

I took the opportunity to “refactor”, (reorganize and make variable usage more consistent), while I was doing this.

Having done all of this, the robot is now provably getting correct data, only when necessary, by examining the received data and verifying that the data is both correct and that the timestamp only changes when there is something to say.

Next Steps:
Improve the robot’s motion.

Corollary question:
Are there updated API documents? All the stuff I see dates from the early pre-Cambrian epoch.

1 Like

Since the API docs are auto-generated from the code, I tend to check the code first.

At the bottom of the GoPiGo3 read the docs dot io API page, the commit matches the current master GoPiGo3 commit even though the copyright states 2018. Perhaps the API docs are up to date as well.

2 Likes

. . . but they are incomplete.

the egg file that sources the gopigo3 library files is labeled “gopigo3-1.3.0-py3.7” and is located at /home/pi/.local/lib/python3.7/site-packages/ - and I am assuming the version is 1.3.0.  How do I determine if this is the most current version?

@cleoqc
What is the best way to verify and/or update the particular GoPiGo3 library files contained within the GoPiGo O/S itself ?  Since they’re not standard packages, using aptitude, (apt/apt-get), to update them won’t work.  I hesitate to just blindly curl a set of files in, as I don’t know if they get installed in the correct places, or if they are the correct ones to use with the GoPiGo O/S.

2 Likes

While messing with the robot speed control routines in my project, I have made an interesting discovery:

Viz.:
If set_motor_dps speed is set less than about 20, the wheels move in a series of jerks timed about once a second, with the motion per jerk being proportional to the speed value.  After 20 dps, the wheel motion is more-or-less smooth.[1]

Viz.:  (executed from the python 3.n shell in Thonny)

Python 3.7.3 (/usr/bin/python3)
>>> import gopigo3
>>> from easygopigo3 import EasyGoPiGo3
>>> gopigo = EasyGoPiGo3()
>>> gopigo.set_motor_dps(gopigo.MOTOR_RIGHT, 3)
>>> gopigo.set_motor_dps(gopigo.MOTOR_RIGHT, 10)
>>> gopigo.set_motor_dps(gopigo.MOTOR_LEFT, 10)
>>> gopigo.set_motor_dps(gopigo.MOTOR_RIGHT, 20)
>>> gopigo.set_motor_dps(gopigo.MOTOR_LEFT, 20)
>>> gopigo.set_motor_dps(gopigo.MOTOR_LEFT, 15)
>>> gopigo.set_motor_dps(gopigo.MOTOR_RIGHT, 15)
>>> gopigo.stop()
>>> gopigo.set_motor_dps(gopigo.MOTOR_RIGHT, 20)
>>> gopigo.set_motor_dps(gopigo.MOTOR_LEFT, 20)
>>> gopigo.stop()
>>> 

Additional important findings concerning robot speed control:

Use of the set_speed() category of commands, (as well as the functions that depend on it; i.e. forward(), backward(), left(), right(), (etc)), simultaneously with the set_motor_dps() category of commands, (set_motor_dps(), etc.), results in unpredictable behavior as it appears that these two categories of commands are, (or should be), mutually exclusive.

Apparently the robot tries to satisfy both the set_speed() and the set_motor_dps() commands simultaneously, instead of allowing the last command entered to supersede any previous robot motion command.[2]

Example:

Originally I used set_speed() along with forward() or backward() for motion directly forward or backward; whereas for turns I used set_motor_dps() with each wheel receiving a calculated speed value.  The result of this was that the transition from turning to straight travel was “buggy” at best with sudden speed changes, or the robot not responding to changes in speed at all.  (i.e. The transition from turning to straight motion was accompanied by a sudden burst of speed - or a slow-speed turn continued as slow speed motion regardless of the joystick position.)

When I started using set_motor_dps() for all motion, (with directly ahead/behind using the same speed value for both motors), the control action became much smoother.

Has anyone else experienced this?

@cleoqc
Is this expected behavior?

===============

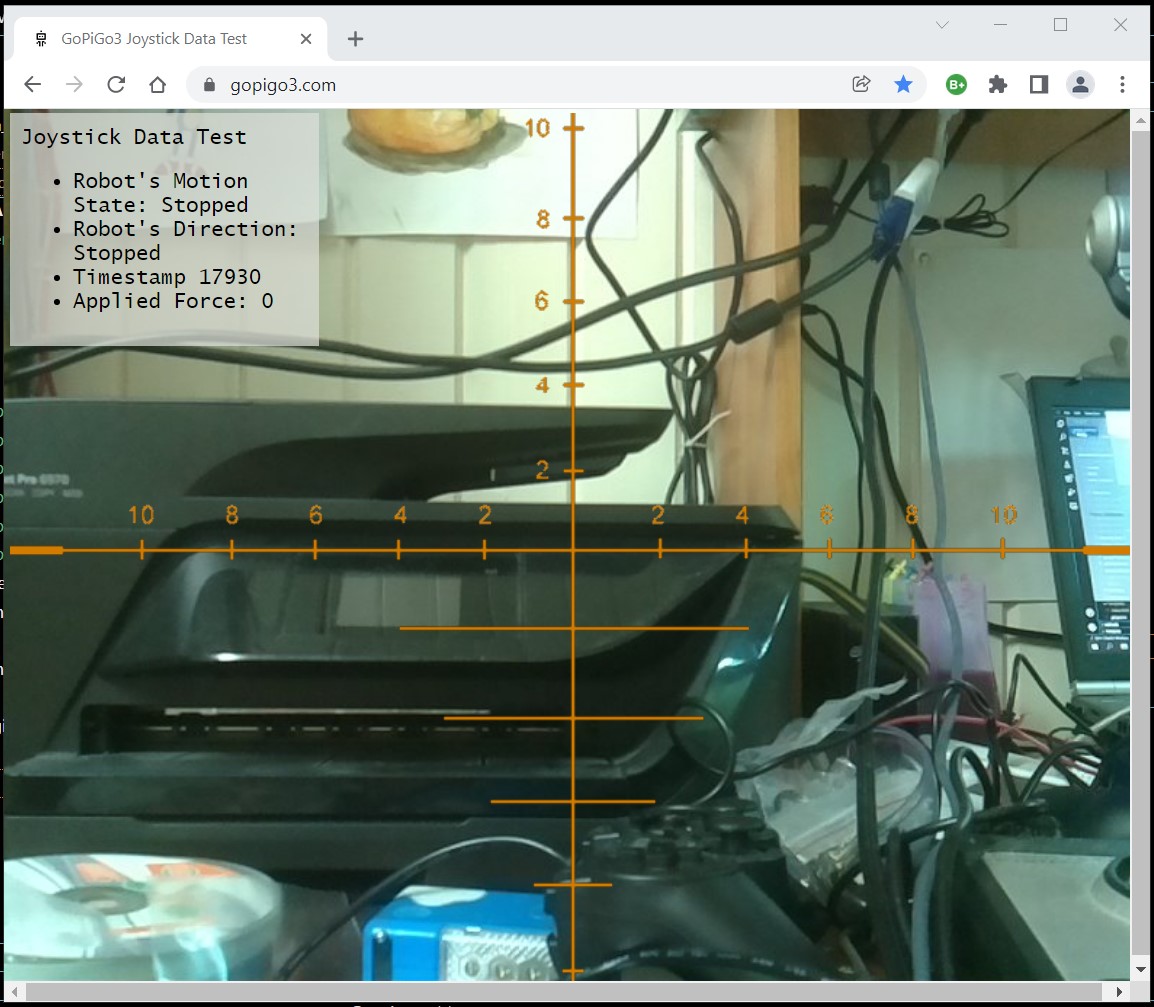
One detail I am still researching is what appears to be “command caching” or “command queuing”.

If I do something for longer than about 30 seconds, the instructions get “stored up” somewhere and after I release the joystick, things keep playing for a non-trivial amount of time afterwards.

I don’t know if this is happening within the Python server on the 'bot or within the browser.

Any ideas?

-----------------------
Footnotes:

[1]  Speeds up to 15 dps experienced jerkiness. Speeds of 20 dps or greater did not jerk.  I did not experiment to determine the exact value that jerking stopped at.

[2]  IMHO, this is a bug.
These two categories of commands should automatically supersede each other.  Either that or there should be a documented way, (aside from physically stopping the robot or restarting the code), for one set of commands to relinquish command authority to the other set.

1 Like

When you are directly setting motor DPS speed requests (a GoPiGo3() base class method), you are taking responsibility for the resultant speed.

When you are using the derived EasyGoPiGo3() class methods [forward, backward, …] (with the exception of the steer method), you are letting the higher level class be responsible for the chosen speed (DPS = smaller of speed variable and NO_LIMIT_SPEED).

The transition from you choosing the speed to EasyGoPiGo3 choosing the speed is always going to be “visible” unless you introduce acceleration control.

One of the GoPiGo3/EasyGoPiGo3 simplifications is not having acceleration control in the motor control methods, to ramp the speed from one command to the next at a chosen acceleration to prevent jerks and face plants from stopping too quick or instantaneous reversing direction. This would also introduce the need for stop(uncontrolled=True) to allow an uncontrolled stop as in the current stop() method.

Acceleration control typically requires putting the motor speed control in a separate thread to ramp the speed from current speed to target speed, which would further complicate the API design and make multi-process control of GoPiGo3 even more challenging.

2 Likes

Makes sense.

I looked at the steer() methods and decided they weren’t for me and I chose the set_motor_speed methods as they allowed finer speed control and simplified the calculations.

  • Using the derived class methods for steering required calculating percentages and such, and with the screwy way Python does rounding, I had no end of trouble with division by zero.

  • Using the set_motor_dps() method, all I had to do was calculate a simple speed differential which collapsed nicely into addition and multiplication.

requested_speed = int(round_up(max_speed * force))  # where force = abs(y_axis)
differential_speed = int(round_up(requested_speed - (requested_speed * x_axis)
set_motor_dps(outside_wheel, requested_speed)
set_motor_dps(inside_wheel, differential_speed)

and we’re done!

Acceleration control hasn’t been that big a problem because Charlie isn’t that tall - so face-plants aren’t a problem.  Acceleration ramping is done by the mechanical aspects of the joystick and the relative speed of the command frames sent.

I handle speed control by establishing a max_speed variable and capping speeds at that value.  Since everything speed related is calculated as a fraction of max_speed, there’s no problem.

Just in case, I added this:

if computed_speed > max_speed:
   computed speed = max_speed

Another thing I did was to implement “sensible rounding” (4/5 rounding away from zero for both positive and negative numbers), because what The Python Powers That Be assume is “correct” rounding, (to the next largest positive, (or less negative), number), caused me no end of trouble.

Viz.:

# Implement "correct" (away from zero) rounding for both
# positive and negative numbers
# ref: https://www.pythontutorial.net/advanced-python/python-rounding/

def round_up(x):
    if x > 0:
        return (x + 0.5)
    return (x - 0.5)

This is an interesting project that has taught me a lot, but I still want “headache remedy company” stock!

P.S.
At the bottom of the page in Suggested Topics, the first one offered was “ROS, ROS2: Why joint_state_pub and robot_state_pub?” - and the answer was immediately obvious:

After messing with this stuff, you are going to NEED a trip to the pub!  :wink:

2 Likes

Update:

I am working on implementing “Turbo-Speed” mode and I discovered a few interesting things:

  1. set_motor_dps() is an easygopigo3 class.
  2. The maximum speed for set_motor_dps() is set by set_speed().
    In other words, if set_speed is set to 300, and set_motor_dps is set to 1000, the robot will only go up to a dps speed of 300.
  3. set_speed(1000) is a pretty good speed.  You’re not going to win a top-fuel drag race at that speed, but it’s a pretty good clip.
  4. set_speed(9999) isn’t any faster than set_speed(1000).
  5. set_speed(500) is plenty fast as a turbo speed - maybe even a bit greedy.
2 Likes

Wow - Carl’s max DPS (for straight travel) is 360. Dave’s is 450 DPS but stops will faceplant.

2 Likes

Then again, Charlie isn’t nearly so top-heavy as your two 'bots. :wink:

That high center-of-gravity will kill you every time!

1 Like

Update: Another major milestone!

  1. Joystick control is now smooth enough to be usable.
    Essentially, this makes the software usable for its intended purpose as I am able to control the device using the joystick and achieve a reasonable degree of navigation accuracy.
    • I reduced the x_axis sensitivity by a factor of 2 by dividing all the x_axis values in half.  Actually, I’m multiplying by 0.5 as multiplying by a fraction, (instead of dividing), avoids all the side effects of division - like inadvertant zero denominators.
    • I introduced a small dead-zone by ignoring any x_axis values less than ±0.02.
    • I temporarily disabled rounding.  I may end up removing it entirely.
    • I re-introduced the “throttle.js” helper script.  This script replaces the jquery $.post method, (wraps it), and both introduces a programmable delay as well as supressing duplicate messages.
       
  2. I have enabled “turbo” mode and have made two settings avaiable as constants in the code:
    • “Turbo” speed:
      This is the maximum allowable speed that can be used when both the primary trigger switch is fully pressed[1].  This is mainly used for “get me there” movement over distances.
    • “Normal” speed:
      This is a reduced speed that is engaged when the primary trigger is pressed half-way.  This allows for greater precision of movement, but can take much longer based on the value set.
       
  3. I have implemented the “motor power-off” feature I discussed in another topic as a part of the easygopigo3 stop() method.[2]
    • I may modify it by adding a short timer, (something like 0.25 or 0.50 second), to allow the robot to fully stop before releasing the power-lock on the motors - as immediately releasing the motors may cause the robot to keep moving due to intertia,
       
  4. I have “tagged” this “version” within my GitHub repo.  At this point, I am considering making a full-fledged “dot” release, (< 1.0) to really draw a line in the sand.
     

Next-steps:

  1. Implement “standard” gamepad contoller support, selectable on launch.

  2. Implement parameter passing at launch to allow for user-selection of things like speeds or joystick type.

  3. Implement joystick controlled head-movement.

Stretch goals:

  1. Collision detection:
    Use of the bumpers to detect collision with an external object.

    • Add a rear bumper to detect when the robot has backed into something.
       
  2. Collision avoidance:
    Use of the distance sensor to stop/slow the robot when within “x” distance of an obsticle.

  3. Status reporting:

    • Reporting status to the e-ink display.
    • “Push” notifications to the on-screen display.

Additional ideas for improvements are welcome.

P.S.
Voice isn’t likely to happen soon.  My wife thinks that a robot wandering around, apparently unsupervised, is scary enough.  She’s not interested in it talking to her too!

--------------------
Footnotes:
[1]  The primary trigger has two “clicks” - half-pressed and fully pressed.  In a “normal” fighter-sim I suspect the first, (half-way), squeeze is “radar lock” and fully squeezed is “Nuke 'em Bruce!”

[2]  I have also sent this as an enhancement request to the support e-mail. Later on I may submit this as a pull-request.  I have hesitated to clone the entire darn GoPiGo3 repo just for the occasional pull-request, but since it appears I’m doing non-trivial work there, maybe I should get with the program?  :wink:

1 Like

Apparently, there is a absolute, drop dead, “Are you outta’ your mind?!!!” maximum, maximum speed which is set to 1000.

Running Charlie at a DPS setting of 1000 sounds like a dragster whining it out in a lower gear.

One technical question I will probably broach is the question of how much power can the motor drivers handle safely?  It stands to reason that - at some point - increasing speed/power demands will eventually let out all the “magic smoke” from whatever is driving the motors.

Of course, I could always add heat-sinks and a fan. . . :wink:

1 Like

Update:

The control of the robot is now stable enough that I was able to let the granddaughters drive Charlie around some.  That I considered it stable enough to actually let someone else drive Charlie is, (IMHO), a significant milestone.

I have created a “Visual Effects” fork to experiment with visual effects in the browser - embedding data, graphical overlays, etc.

The first challenge is purely fun - I want to overlay a graticule image over the live video feed as shown below:


(No comments about the messy desktop, please.)

The initial challenge was to find an acceptable graphic, remove the unnecessary elements, (a large circle), make all the lines a uniform color, and render the background transparent.  I ended up doing it pixel-by-pixel on an enlarged image in Paint. (Inkscape did a lousy job of converting the graticule to a vector image.)

The current problem is keeping the graticule image centered even when the window size changes.  I’ve found a few articles on that and I am experimenting - with the CSS this time.

Eventually, (if I can figure it out), I want to put live data, like battery voltage or distance to an object, as data on the screen.  Little movable “pippers” that would slide along the axes, (like the displays shown from military aircraft cameras), wold be ultimately cool too.

There are some gamepad related issues I’m trying to “suss-out”, like having a configuration file on the server that has the joystick mapping, and find out some way to send that to the browser.

More to come!

2 Likes

Really cool work.

As far as the graticule lines “below the horizon”, perhaps a pattern of decreasing space between the lines away from the bottom and nearing the horizon would give a horizontal visual feeling to the pattern beneath the horizon, and putting the horizon at 1/3rd or less up also?

graticle

or

I also saw that there are some CSS Crosshair generators online - perhaps one of them would give you some hints to code what you want to see.

For the horizontal in your graticle, you could label the 2, 4, 6, 8, 10 with the angle off center in degrees (compute from the spec FOV)

2 Likes

At risk of sounding like a Pythonista, the graticule is a “decorator” - it doesn’t have a real function.

It’s there because I want to experiment with overlays and data-streams from the server to the client.

2 Likes