My "New" Remote Camera Robot Project

When you are directly setting motor DPS speed requests (a GoPiGo3() base class method), you are taking responsibility for the resultant speed.

When you are using the derived EasyGoPiGo3() class methods [forward, backward, …] (with the exception of the steer method), you are letting the higher level class be responsible for the chosen speed (DPS = smaller of speed variable and NO_LIMIT_SPEED).

The transition from you choosing the speed to EasyGoPiGo3 choosing the speed is always going to be “visible” unless you introduce acceleration control.

One of the GoPiGo3/EasyGoPiGo3 simplifications is not having acceleration control in the motor control methods, to ramp the speed from one command to the next at a chosen acceleration to prevent jerks and face plants from stopping too quick or instantaneous reversing direction. This would also introduce the need for stop(uncontrolled=True) to allow an uncontrolled stop as in the current stop() method.

Acceleration control typically requires putting the motor speed control in a separate thread to ramp the speed from current speed to target speed, which would further complicate the API design and make multi-process control of GoPiGo3 even more challenging.

2 Likes

Makes sense.

I looked at the steer() methods and decided they weren’t for me and I chose the set_motor_speed methods as they allowed finer speed control and simplified the calculations.

  • Using the derived class methods for steering required calculating percentages and such, and with the screwy way Python does rounding, I had no end of trouble with division by zero.

  • Using the set_motor_dps() method, all I had to do was calculate a simple speed differential which collapsed nicely into addition and multiplication.

requested_speed = int(round_up(max_speed * force))  # where force = abs(y_axis)
differential_speed = int(round_up(requested_speed - (requested_speed * x_axis)
set_motor_dps(outside_wheel, requested_speed)
set_motor_dps(inside_wheel, differential_speed)

and we’re done!

Acceleration control hasn’t been that big a problem because Charlie isn’t that tall - so face-plants aren’t a problem.  Acceleration ramping is done by the mechanical aspects of the joystick and the relative speed of the command frames sent.

I handle speed control by establishing a max_speed variable and capping speeds at that value.  Since everything speed related is calculated as a fraction of max_speed, there’s no problem.

Just in case, I added this:

if computed_speed > max_speed:
   computed speed = max_speed

Another thing I did was to implement “sensible rounding” (4/5 rounding away from zero for both positive and negative numbers), because what The Python Powers That Be assume is “correct” rounding, (to the next largest positive, (or less negative), number), caused me no end of trouble.

Viz.:

# Implement "correct" (away from zero) rounding for both
# positive and negative numbers
# ref: https://www.pythontutorial.net/advanced-python/python-rounding/

def round_up(x):
    if x > 0:
        return (x + 0.5)
    return (x - 0.5)

This is an interesting project that has taught me a lot, but I still want “headache remedy company” stock!

P.S.
At the bottom of the page in Suggested Topics, the first one offered was “ROS, ROS2: Why joint_state_pub and robot_state_pub?” - and the answer was immediately obvious:

After messing with this stuff, you are going to NEED a trip to the pub!  :wink:

2 Likes

Update:

I am working on implementing “Turbo-Speed” mode and I discovered a few interesting things:

  1. set_motor_dps() is an easygopigo3 class.
  2. The maximum speed for set_motor_dps() is set by set_speed().
    In other words, if set_speed is set to 300, and set_motor_dps is set to 1000, the robot will only go up to a dps speed of 300.
  3. set_speed(1000) is a pretty good speed.  You’re not going to win a top-fuel drag race at that speed, but it’s a pretty good clip.
  4. set_speed(9999) isn’t any faster than set_speed(1000).
  5. set_speed(500) is plenty fast as a turbo speed - maybe even a bit greedy.
2 Likes

Wow - Carl’s max DPS (for straight travel) is 360. Dave’s is 450 DPS but stops will faceplant.

2 Likes

Then again, Charlie isn’t nearly so top-heavy as your two 'bots. :wink:

That high center-of-gravity will kill you every time!

1 Like

Update: Another major milestone!

  1. Joystick control is now smooth enough to be usable.
    Essentially, this makes the software usable for its intended purpose as I am able to control the device using the joystick and achieve a reasonable degree of navigation accuracy.
    • I reduced the x_axis sensitivity by a factor of 2 by dividing all the x_axis values in half.  Actually, I’m multiplying by 0.5 as multiplying by a fraction, (instead of dividing), avoids all the side effects of division - like inadvertant zero denominators.
    • I introduced a small dead-zone by ignoring any x_axis values less than ±0.02.
    • I temporarily disabled rounding.  I may end up removing it entirely.
    • I re-introduced the “throttle.js” helper script.  This script replaces the jquery $.post method, (wraps it), and both introduces a programmable delay as well as supressing duplicate messages.
       
  2. I have enabled “turbo” mode and have made two settings avaiable as constants in the code:
    • “Turbo” speed:
      This is the maximum allowable speed that can be used when both the primary trigger switch is fully pressed[1].  This is mainly used for “get me there” movement over distances.
    • “Normal” speed:
      This is a reduced speed that is engaged when the primary trigger is pressed half-way.  This allows for greater precision of movement, but can take much longer based on the value set.
       
  3. I have implemented the “motor power-off” feature I discussed in another topic as a part of the easygopigo3 stop() method.[2]
    • I may modify it by adding a short timer, (something like 0.25 or 0.50 second), to allow the robot to fully stop before releasing the power-lock on the motors - as immediately releasing the motors may cause the robot to keep moving due to intertia,
       
  4. I have “tagged” this “version” within my GitHub repo.  At this point, I am considering making a full-fledged “dot” release, (< 1.0) to really draw a line in the sand.
     

Next-steps:

  1. Implement “standard” gamepad contoller support, selectable on launch.

  2. Implement parameter passing at launch to allow for user-selection of things like speeds or joystick type.

  3. Implement joystick controlled head-movement.

Stretch goals:

  1. Collision detection:
    Use of the bumpers to detect collision with an external object.

    • Add a rear bumper to detect when the robot has backed into something.
       
  2. Collision avoidance:
    Use of the distance sensor to stop/slow the robot when within “x” distance of an obsticle.

  3. Status reporting:

    • Reporting status to the e-ink display.
    • “Push” notifications to the on-screen display.

Additional ideas for improvements are welcome.

P.S.
Voice isn’t likely to happen soon.  My wife thinks that a robot wandering around, apparently unsupervised, is scary enough.  She’s not interested in it talking to her too!

--------------------
Footnotes:
[1]  The primary trigger has two “clicks” - half-pressed and fully pressed.  In a “normal” fighter-sim I suspect the first, (half-way), squeeze is “radar lock” and fully squeezed is “Nuke 'em Bruce!”

[2]  I have also sent this as an enhancement request to the support e-mail. Later on I may submit this as a pull-request.  I have hesitated to clone the entire darn GoPiGo3 repo just for the occasional pull-request, but since it appears I’m doing non-trivial work there, maybe I should get with the program?  :wink:

1 Like

Apparently, there is a absolute, drop dead, “Are you outta’ your mind?!!!” maximum, maximum speed which is set to 1000.

Running Charlie at a DPS setting of 1000 sounds like a dragster whining it out in a lower gear.

One technical question I will probably broach is the question of how much power can the motor drivers handle safely?  It stands to reason that - at some point - increasing speed/power demands will eventually let out all the “magic smoke” from whatever is driving the motors.

Of course, I could always add heat-sinks and a fan. . . :wink:

1 Like

Update:

The control of the robot is now stable enough that I was able to let the granddaughters drive Charlie around some.  That I considered it stable enough to actually let someone else drive Charlie is, (IMHO), a significant milestone.

I have created a “Visual Effects” fork to experiment with visual effects in the browser - embedding data, graphical overlays, etc.

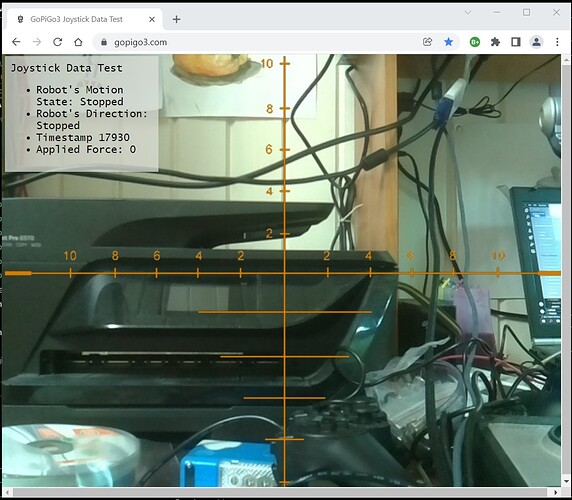
The first challenge is purely fun - I want to overlay a graticule image over the live video feed as shown below:


(No comments about the messy desktop, please.)

The initial challenge was to find an acceptable graphic, remove the unnecessary elements, (a large circle), make all the lines a uniform color, and render the background transparent.  I ended up doing it pixel-by-pixel on an enlarged image in Paint. (Inkscape did a lousy job of converting the graticule to a vector image.)

The current problem is keeping the graticule image centered even when the window size changes.  I’ve found a few articles on that and I am experimenting - with the CSS this time.

Eventually, (if I can figure it out), I want to put live data, like battery voltage or distance to an object, as data on the screen.  Little movable “pippers” that would slide along the axes, (like the displays shown from military aircraft cameras), wold be ultimately cool too.

There are some gamepad related issues I’m trying to “suss-out”, like having a configuration file on the server that has the joystick mapping, and find out some way to send that to the browser.

More to come!

2 Likes

Really cool work.

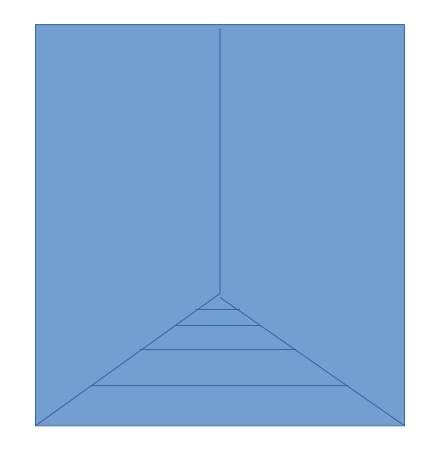
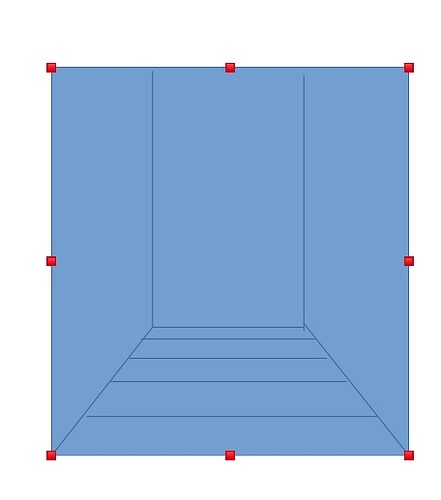
As far as the graticule lines “below the horizon”, perhaps a pattern of decreasing space between the lines away from the bottom and nearing the horizon would give a horizontal visual feeling to the pattern beneath the horizon, and putting the horizon at 1/3rd or less up also?

graticle

or

I also saw that there are some CSS Crosshair generators online - perhaps one of them would give you some hints to code what you want to see.

For the horizontal in your graticle, you could label the 2, 4, 6, 8, 10 with the angle off center in degrees (compute from the spec FOV)

2 Likes

At risk of sounding like a Pythonista, the graticule is a “decorator” - it doesn’t have a real function.

It’s there because I want to experiment with overlays and data-streams from the server to the client.

2 Likes

Update:

Major Goal Achieved!!!

Good news for a change. . . .

I have successfully implemented a “controller configuration file” into the New Remote Camera Robot, which allows me to define the axes and buttons that map to the various control functions of the robot.

Viz.:

File: gamepad_config.json
(These are the values for the Saitek X52 HOTAS joystick)

{
	"Drive_LR": 0,
	"Drive_FB": 1,
	"Head_LR": 2,
	"Head_UD": 3,
	"Drive_Enable": 0,
	"Turbo_Enable": 14,
	"Head_Enable": 5
}

These items represent controller axis/button ID’s as defined by:
(taken from the JavaScript file - these numbers are the associations for the “standard” gamepad.)

//  The file should look somthing like this: (order may not be important)
// {
//     "Drive_LR": 0,  (number of the axis you want to be L/R (x) axis on the controller)
//     "Drive_FB": 1,  (number of the axis you want to be F/B (y) axis on the controller)
// 	   "Head_LR": 2,  (number of the axis you want to be the head's LR (x) axis on the controller)
// 	   "Head_UD": 3,  (number of the axis you want to be the head's U/D (y) axis on the controller)
// 	   "Drive_Enable": 6,  (number of the button you want to be the "motion enable" button on the controller)
// 	   "Turbo_Enable": 4,  (number of the button you want to be the "turbo-mode enable" button on the controller)
// 	   "Head_Enable": 5  (number of the button you want to be the "head-motion enable" button on the controller)
// }

The modifications to the base JavaScript browser side code look like this:

This is the part that actually loads and parses the config file into a JavaScript object structure.  (Think Python dictionary)

// Global variables
var server_address = window.location.protocol + "//" + window.location.host + "/robot";
var get_request_address = window.location.protocol + "//" + window.location.host;
var joystick_data = [];
var js = [];

//  Load the configuration file from the server and create a formal tree structure
//  The file should look somthing like this: (order may not be important)
// {
//     "Drive_LR": 0,  (number of the axis you want to be L/R (x) axis on the controller)
//     "Drive_FB": 1,  (number of the axis you want to be F/B (y) axis on the controller)
// 	   "Head_LR": 2,  (number of the axis you want to be the head's LR (x) axis on the controller)
// 	   "Head_UD": 3,  (number of the axis you want to be the head's U/D (y) axis on the controller)
// 	   "Drive_Enable": 6,  (number of the button you want to be the "motion enable" button on the controller)
// 	   "Turbo_Enable": 4,  (number of the button you want to be the "turbo-mode enable" button on the controller)
// 	   "Head_Enable": 5  (number of the button you want to be the "head-motion enable" button on the controller)
// }
//  Ref: https://stackoverflow.com/questions/21450227/how-would-you-import-a-json-file-into-javascript

var gamepad_config;

var oReq = new XMLHttpRequest();
oReq.onload = reqListener;
oReq.open("get", get_request_address + "/static/gamepad_config.json", true);
oReq.send();

function reqListener(e) {
    gamepad_config = JSON.parse(this.responseText);
}

And this is the modified code that actually reads the joystick values.  Note the substitution of “gamepad_config” variable names for the original hard-coded axis/button ID’s.

//  Collate data collects all the data, normalizes it, packages it,
//  and prepares it for transmission to the 'bot'
function collate_data(jsdata) {
    gopigo3_joystick.time_stamp = Number((jsdata.timestamp).toFixed(0));
    gopigo3_joystick.x_axis = Number.parseFloat((jsdata.axes[gamepad_config.Drive_LR]).toFixed(2));
    gopigo3_joystick.y_axis = Number.parseFloat((jsdata.axes[gamepad_config.Drive_FB]).toFixed(2));
    gopigo3_joystick.force =  Math.abs(gopigo3_joystick.y_axis);
    gopigo3_joystick.trigger_1 = Number((jsdata.buttons[gamepad_config.Drive_Enable].value).toFixed(0));
    gopigo3_joystick.trigger_2 = Number((jsdata.buttons[gamepad_config.Turbo_Enable].value).toFixed(0));
    gopigo3_joystick.head_enable = Number((jsdata.buttons[gamepad_config.Head_Enable].value).toFixed(0));

Saying that I am jumping up and down is a masterpiece of understatement!

I have tried this with both the Saitek X52 joystick and the Logitech gamepad controller, and it works a treat!

Yippee!  Yippee!  Yippee!
(Jumping all around like a crazy man. . .)

Next Steps, communicate robot status to the browser.

2 Likes

Congrats! Glad to hear the good news.

1 Like

Congratulations!!

How does this work in practice - do you choose a different config file depending on which device you have hooked up?

/K

1 Like

There is a configuration file that I change depending on which controller I am using.  (i.e. I edit it to change the button assignments.)

1 Like

Do you remember where they are?

1 Like

No but Google Search of “CSS Crosshair Generator” and “cursor as image css” is what I did, and found some that gave the CSS as a copy paste.

2 Likes

Turns out that this is not it - this creates a cross-hair mouse cursor, or a cross-hair cursor to use in a game to help you aim better.  Nice try though, thanks!

In my case, I’m going to end up needing a graphical graticule overlay - which I already have - and somehow animate a cursor around it.

Thanks!

1 Like

Perhaps this will give you some ideas - PiCamera Graphical Overlays

2 Likes