@rpmteacher
@RobertLucian
If you only want to detect if you’re getting near something, a distance sensor is the way to go. However, if you want a collision/impact sensor, you can do what I did and add a bumper with buttons to detect impacts.
Creating a bumper / impact sensor for the GoPiGo isn’t horridly difficult, but it does require time, patience, soldering skills, and a bit of imagination.
I describe my “bumper” project here, (https://forum.dexterindustries.com/t/the-bug-mobile-aka-charlie-rides-again/5923), where I used a normally closed push button, (rather than the normally open configuraton that the Grove button used), by reversing the sense of the logic - moving the pull-up resistor to the “other side” of the circuit.
A normally closed button is a better choice because a normally open button requires a fair amount of button travel - and impact pressure - to guarantee enough of a contact to actuate the sensor input. Conversely, a normally closed button requires just enough button travel to loosen the contact washer and break the circuit momentarily to signal an impact.
How to do it:
Parts needed:
- One or more Normally Closed push-buttons.
Ideally they should have a metal shank, and require relatively little pressure to open.
- One fractional watt 10k resistor. If you want more than one sensor, connected to more than one input, you will need additional resistors.
- One “Grove connector to open wires” component. They come in various lengths. For a front bumper, six inches will be more than enough, including enough wire to dress it out of the way.
- For a rear bumper, you might need more length, (I haven’t measured it yet), but you should be able to use the second, unused, input, another button, another resistor, and add it to the same connector.
- This way you can have both front and rear impact sensors use only one connector on the edge of the board; saving the other connector for other stuff.
- This has the additional advantage of being able to use the Dexter O/S “blocky” editor to detect button presses for both sensors since you’re using D1 and D2 instead of a different input.
- Some thin shrink-sleeveing - whatever color you wish and a heat source to shrink it.
- Soldering iron, flux, solder, and all the rest of the kit that goes with soldering.
This is a schematic of a normally-closed push button wired into a Grove connector1.
The wiring of the buttons shown below uses the same logic level, (a logical “1”), to indicate a button-press so no program changes are required.
The connections shown in blue are not a part of the original Grove button, but show additional connections you can make to add an additional bumper or button to your 'bot.
For example, if you wanted to add a “start” button to your bot, you could use the second connection and program the bot not to begin until that button is pressed. (I cheat. I use the bumper as the “start” button - the program doesn’t begin until I tap the bumper!)
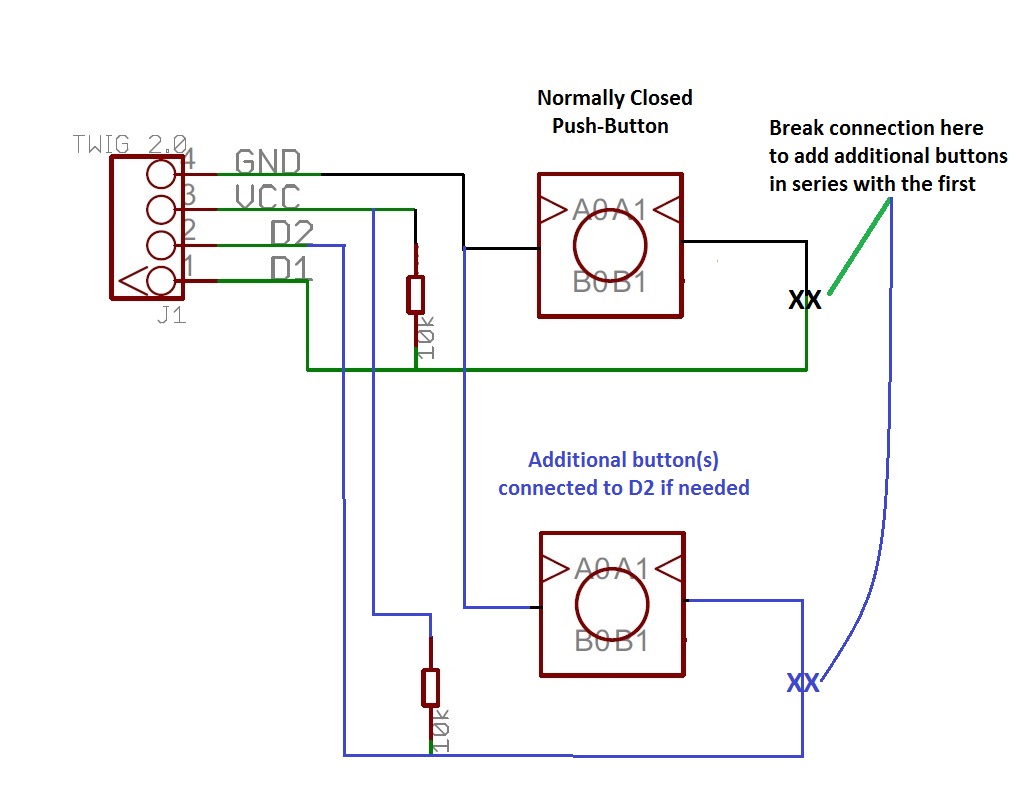
In my case, I used two push-buttons connected to D1, wired in series, for the two sides of my 'bot’s front bumper.
The “normal” case has a button or buttons wired to detect impact on one side, going to one input. (My 'bot uses D1.) If, for example, you wanted to wire a rear impact sensor, you use the connections shown in blue to add an additional set of sensors.
Here’s a picture of my 'bot with a front bumper installed. The piece in front of it is one of the ten-cent barbecue skewers that I used to make the bumper.
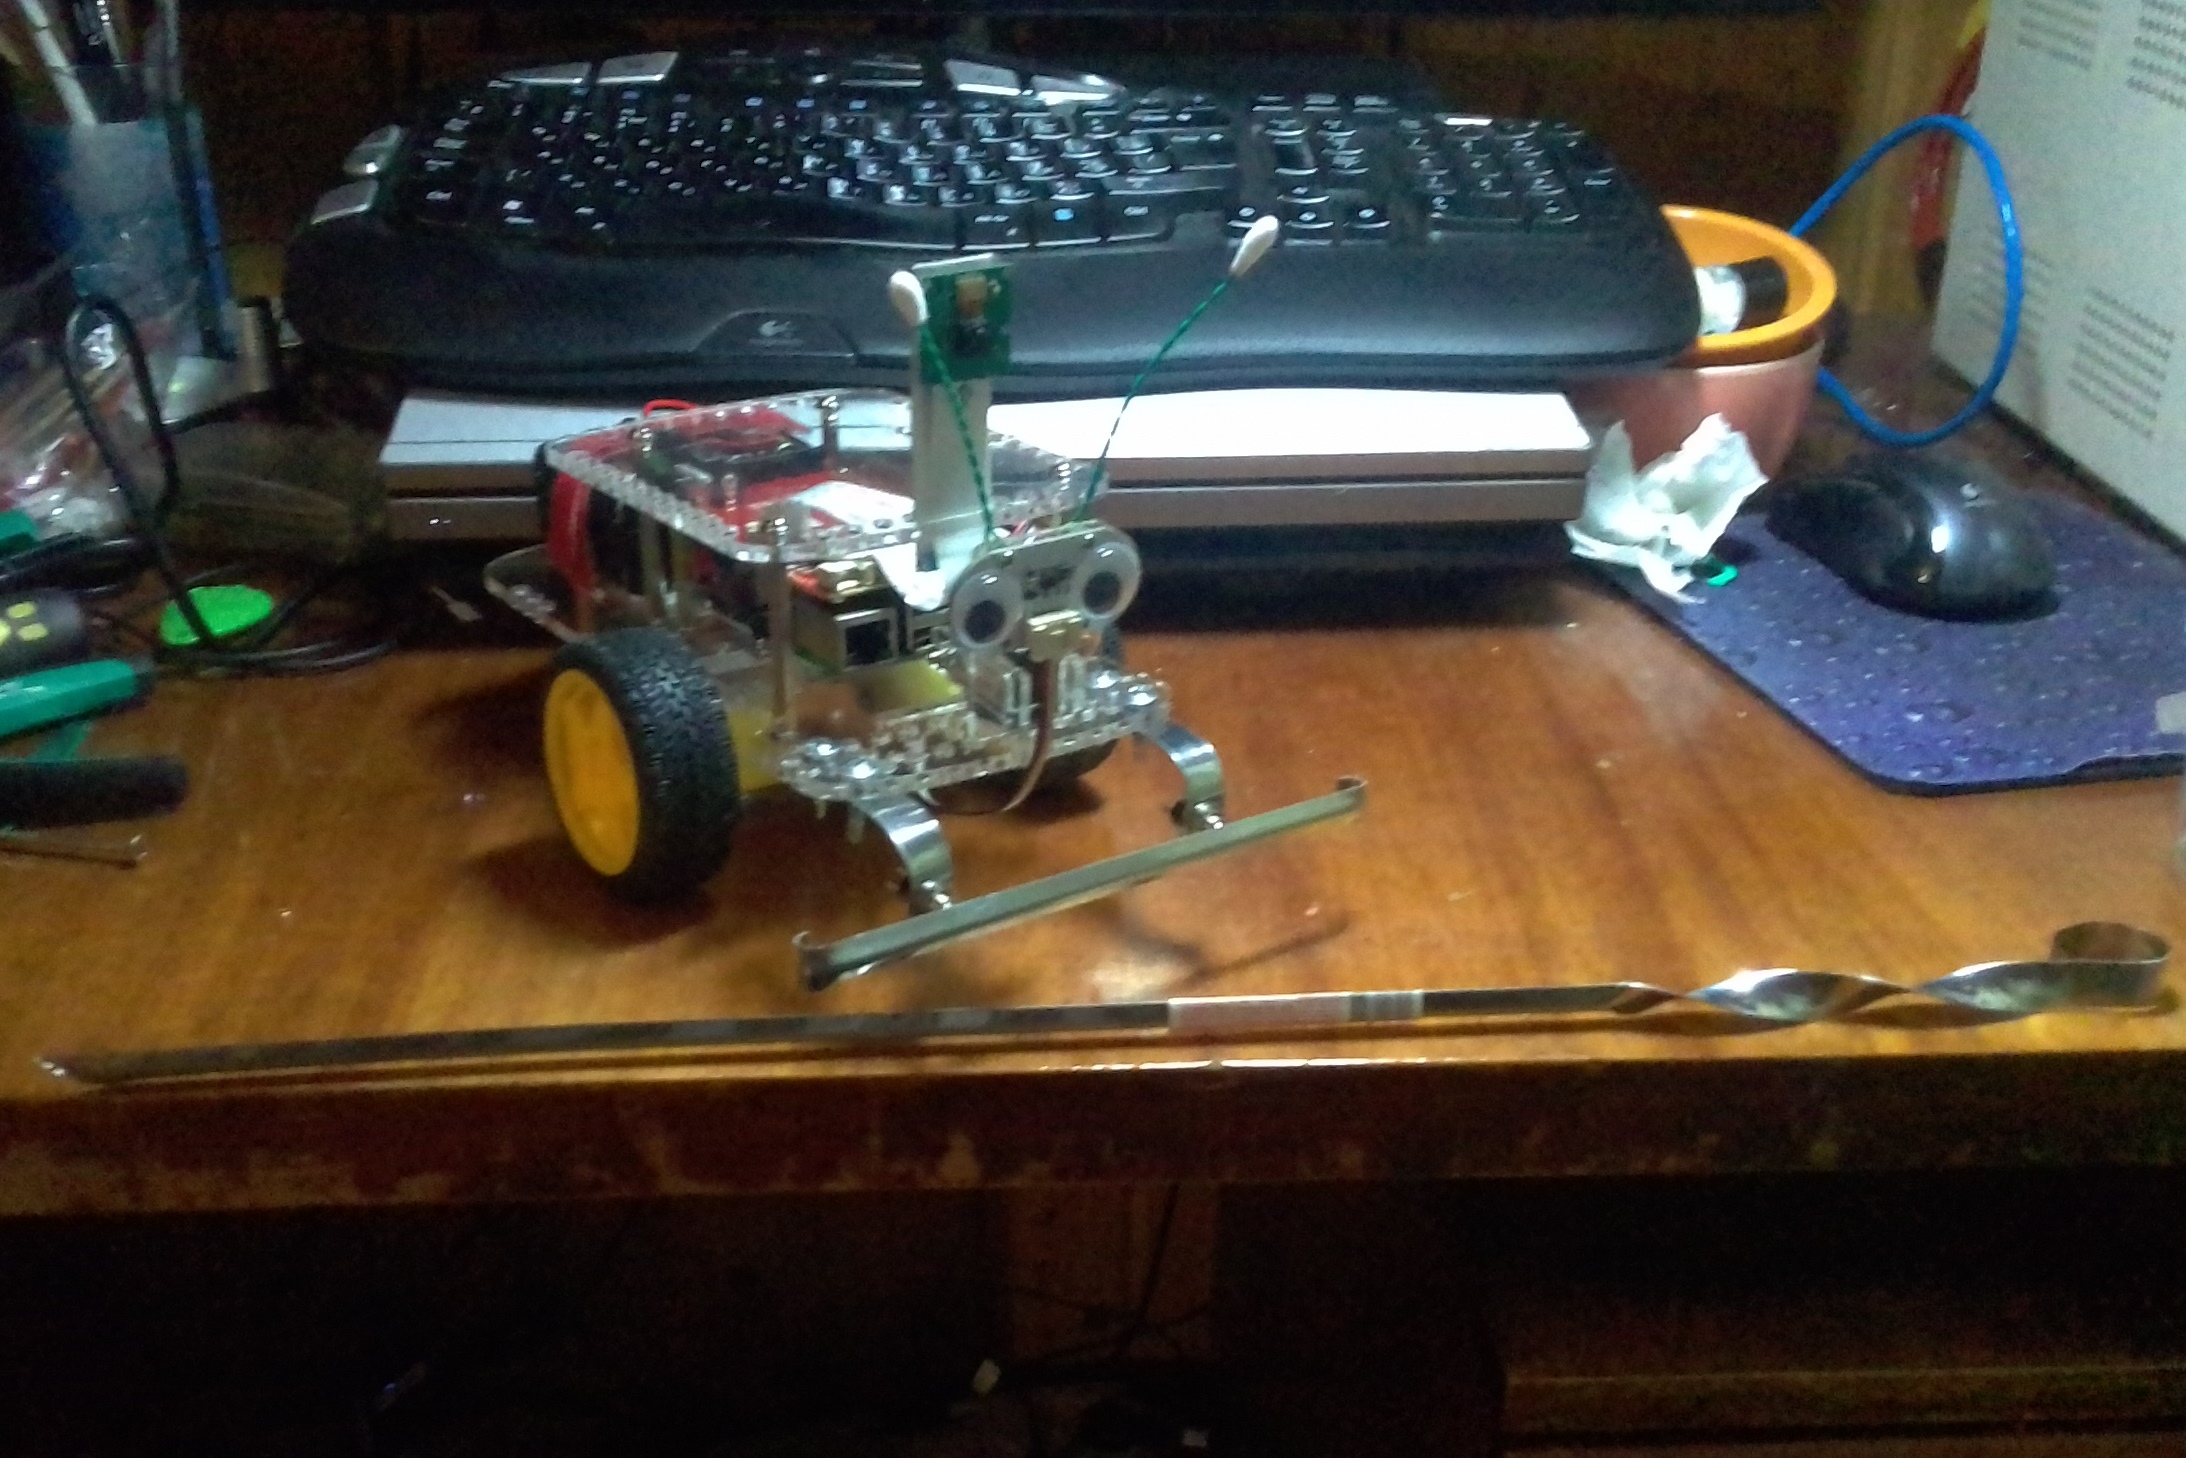
I wired all the components using the button’s lugs for support, covering everything with shrink-sleeving. Since my phone’s camera is terrible, I was not able to get good pictures of the buttons wired up.
Important Note!
If you want to add additional buttons for the same sensor, (i.e. more buttons on the same bumper), you use only one input and wire the buttons in series, breaking the connection where noted above. You use the second input only if you want a different bumper detecting impact on a different side of your 'bot.
Hope this helps.
Jim “JR”
- The original schematic for a normally-open Grove Button is within the zip file located here. (https://github.com/SeeedDocument/Grove_Button/raw/master/resources/Grove_-_Button_v1.0_Source_File.zip)
I modified it by reversing the connections and using the resistor as a pull-up to avoid connecting VCC direct to the input pin.