Gotta scratch that itch!

One of the open source community’s maxims is “scratch(ing) the itch”.

If you have a need and it doesn’t exist yet, (or what exists doesn’t work for you), make your own!

Both @KeithW and @cyclicalobsessive have typified this working to get ROS working on their respective GoPiGo 'bots.

Me?

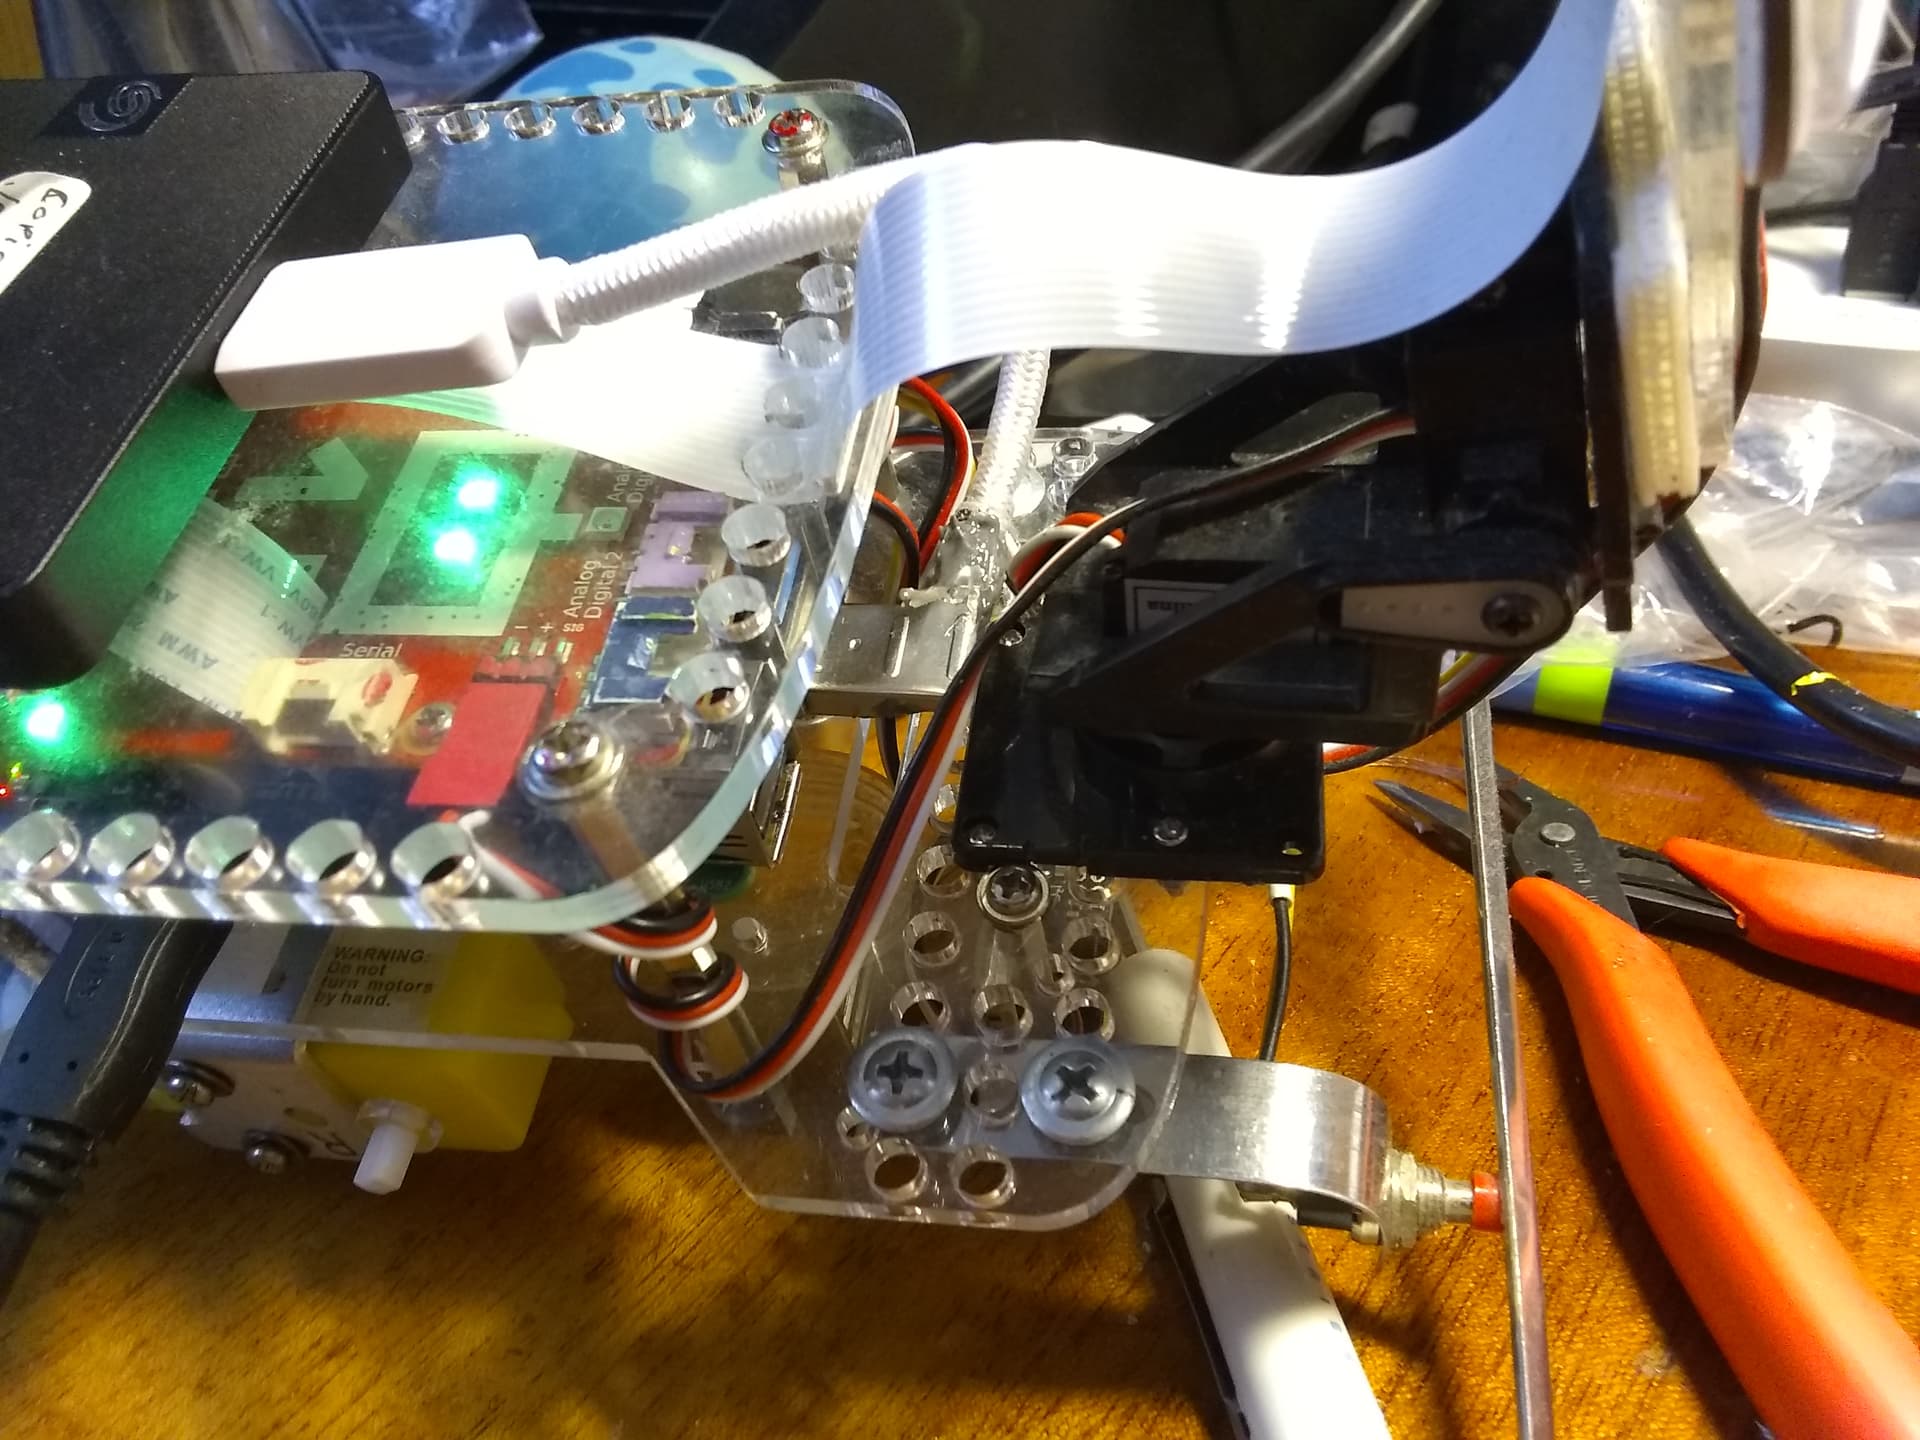
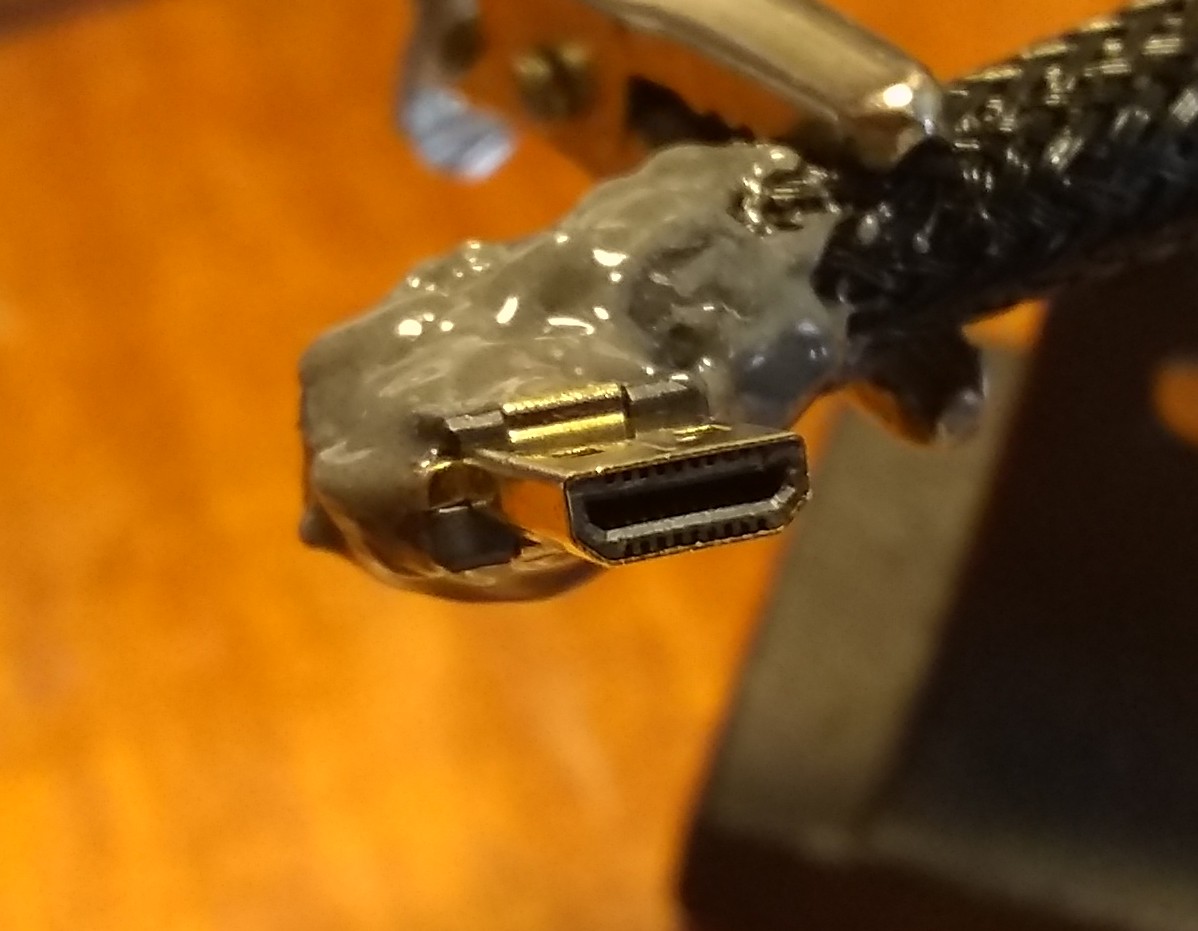
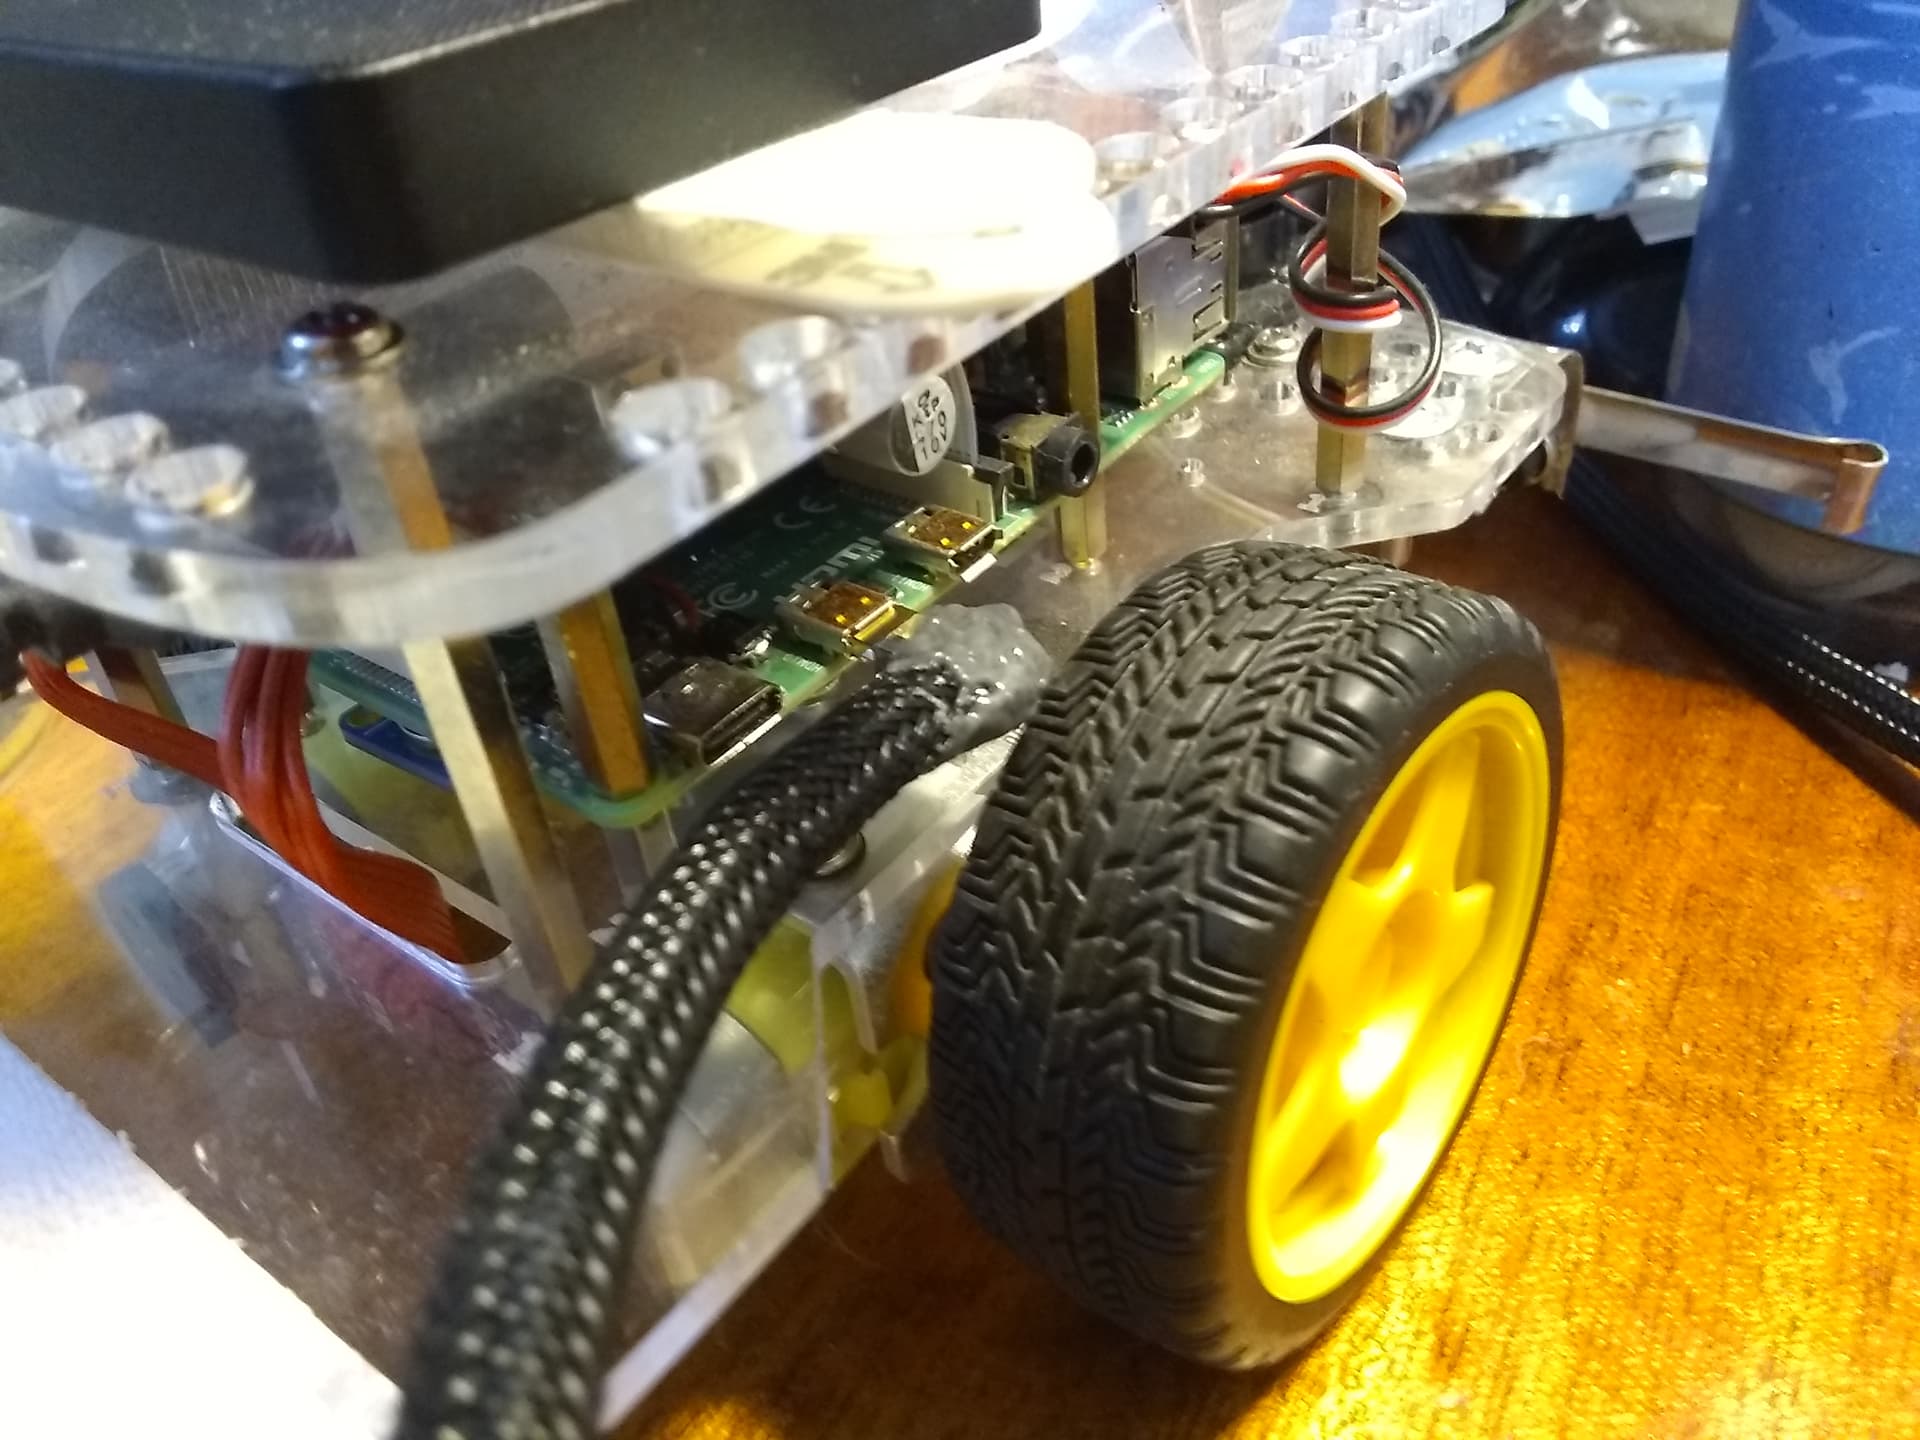
I needed a right-angle USB-3 connector for Charlie so that I can plug his SSD into a USB-3 connector on my Pi.

The problem is that the pan-and-tilt sits in front of the USB-3 ports and a standard connector is too long

I can, and have, plugged it into a USB-2 connector, but I want to save those for keyboards, mice, and other goodies.

You can buy 'em, but they’re expensive, (here), and take over three months to arrive - AND they’re too big.

So, here’s my itch-scratcher.

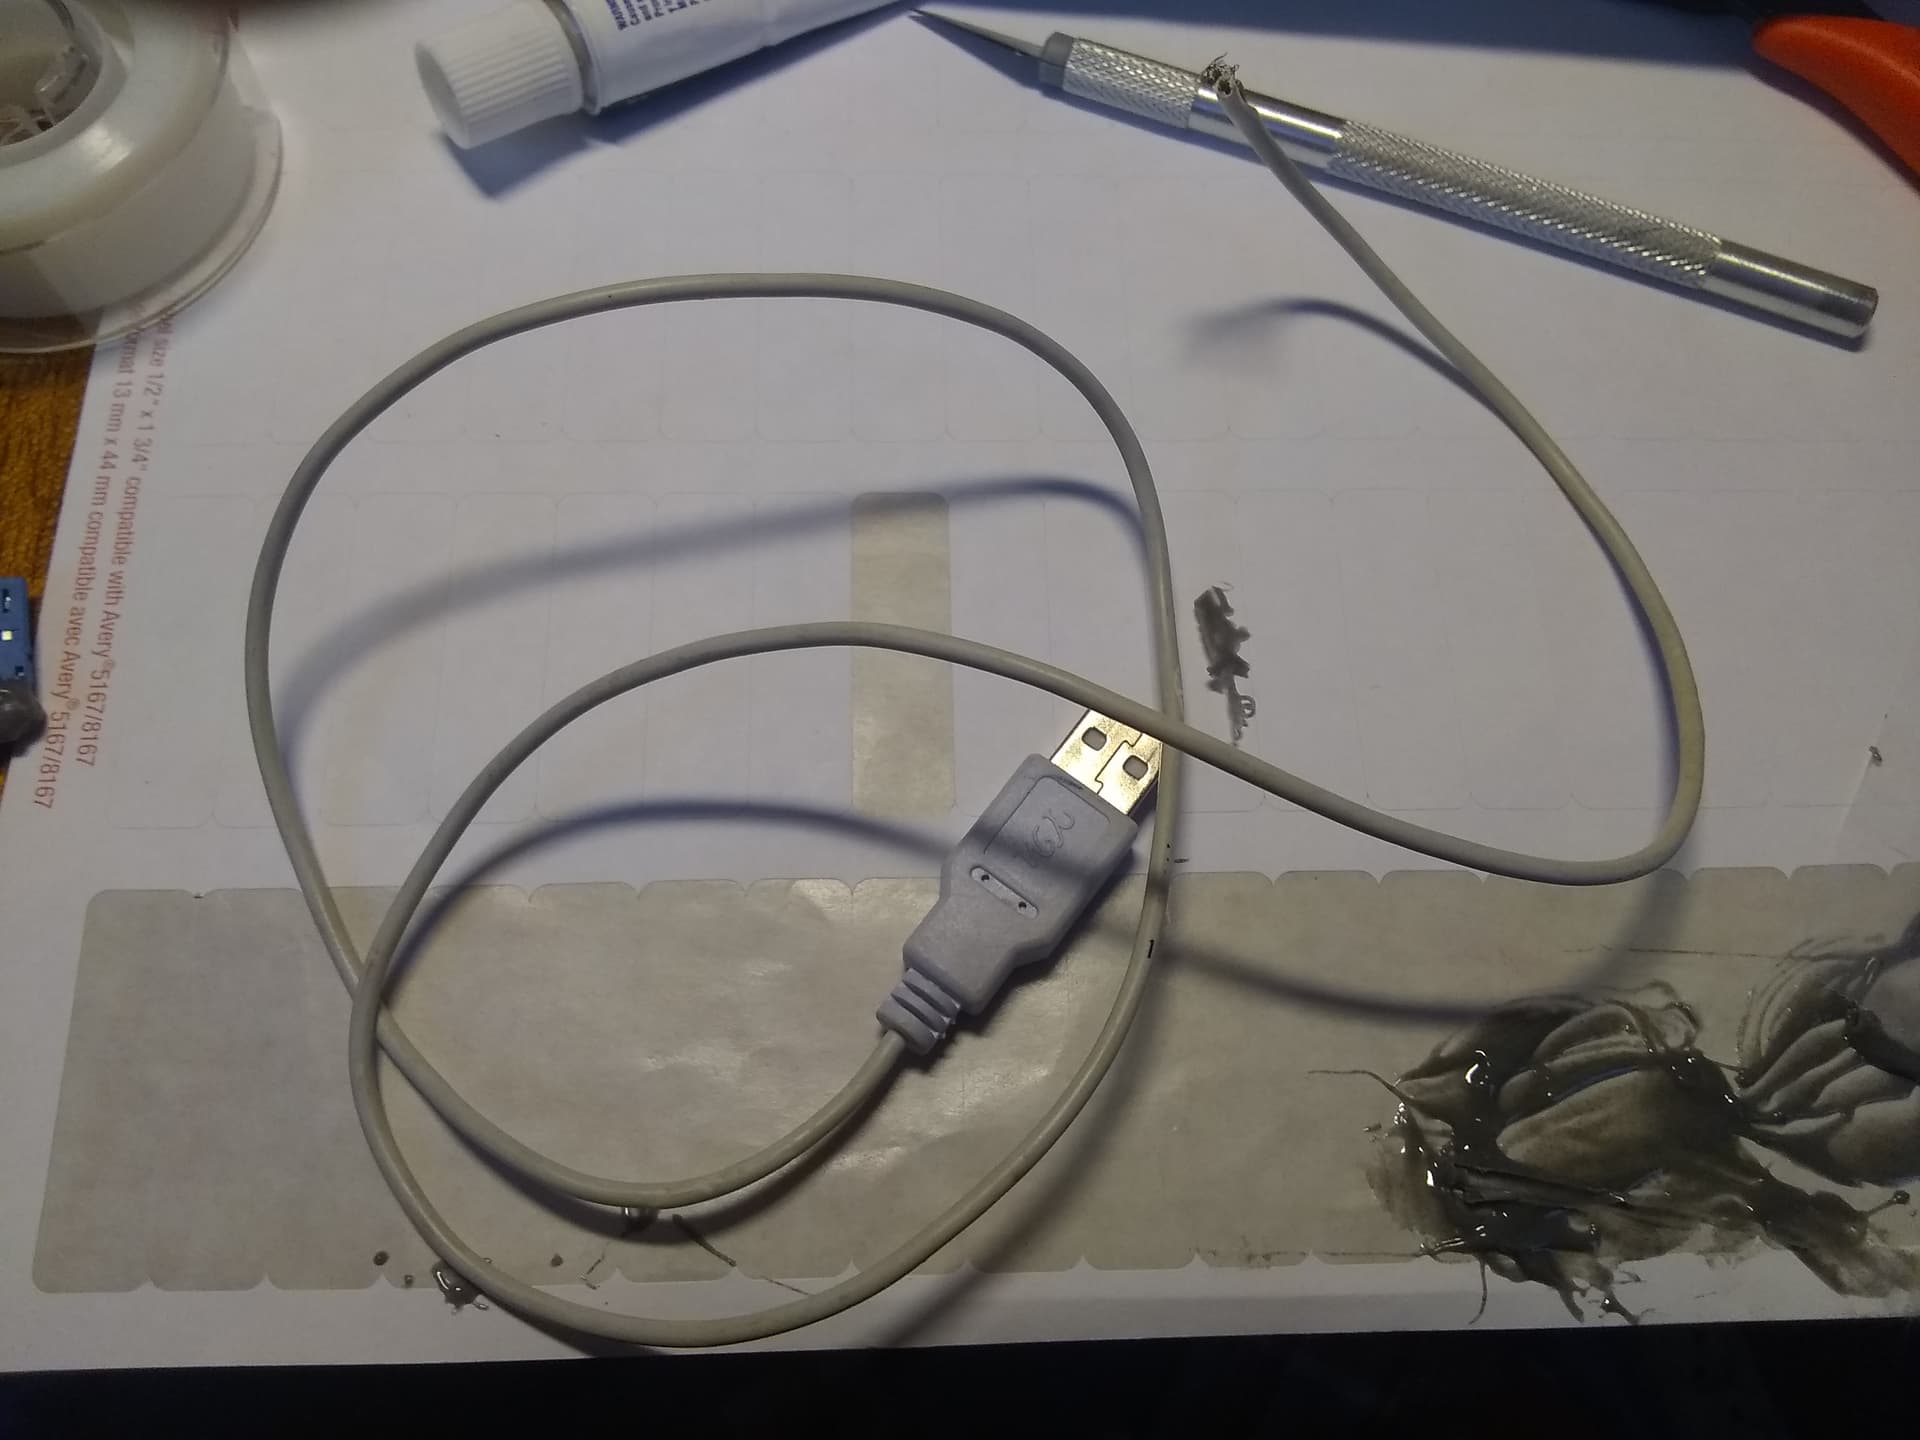
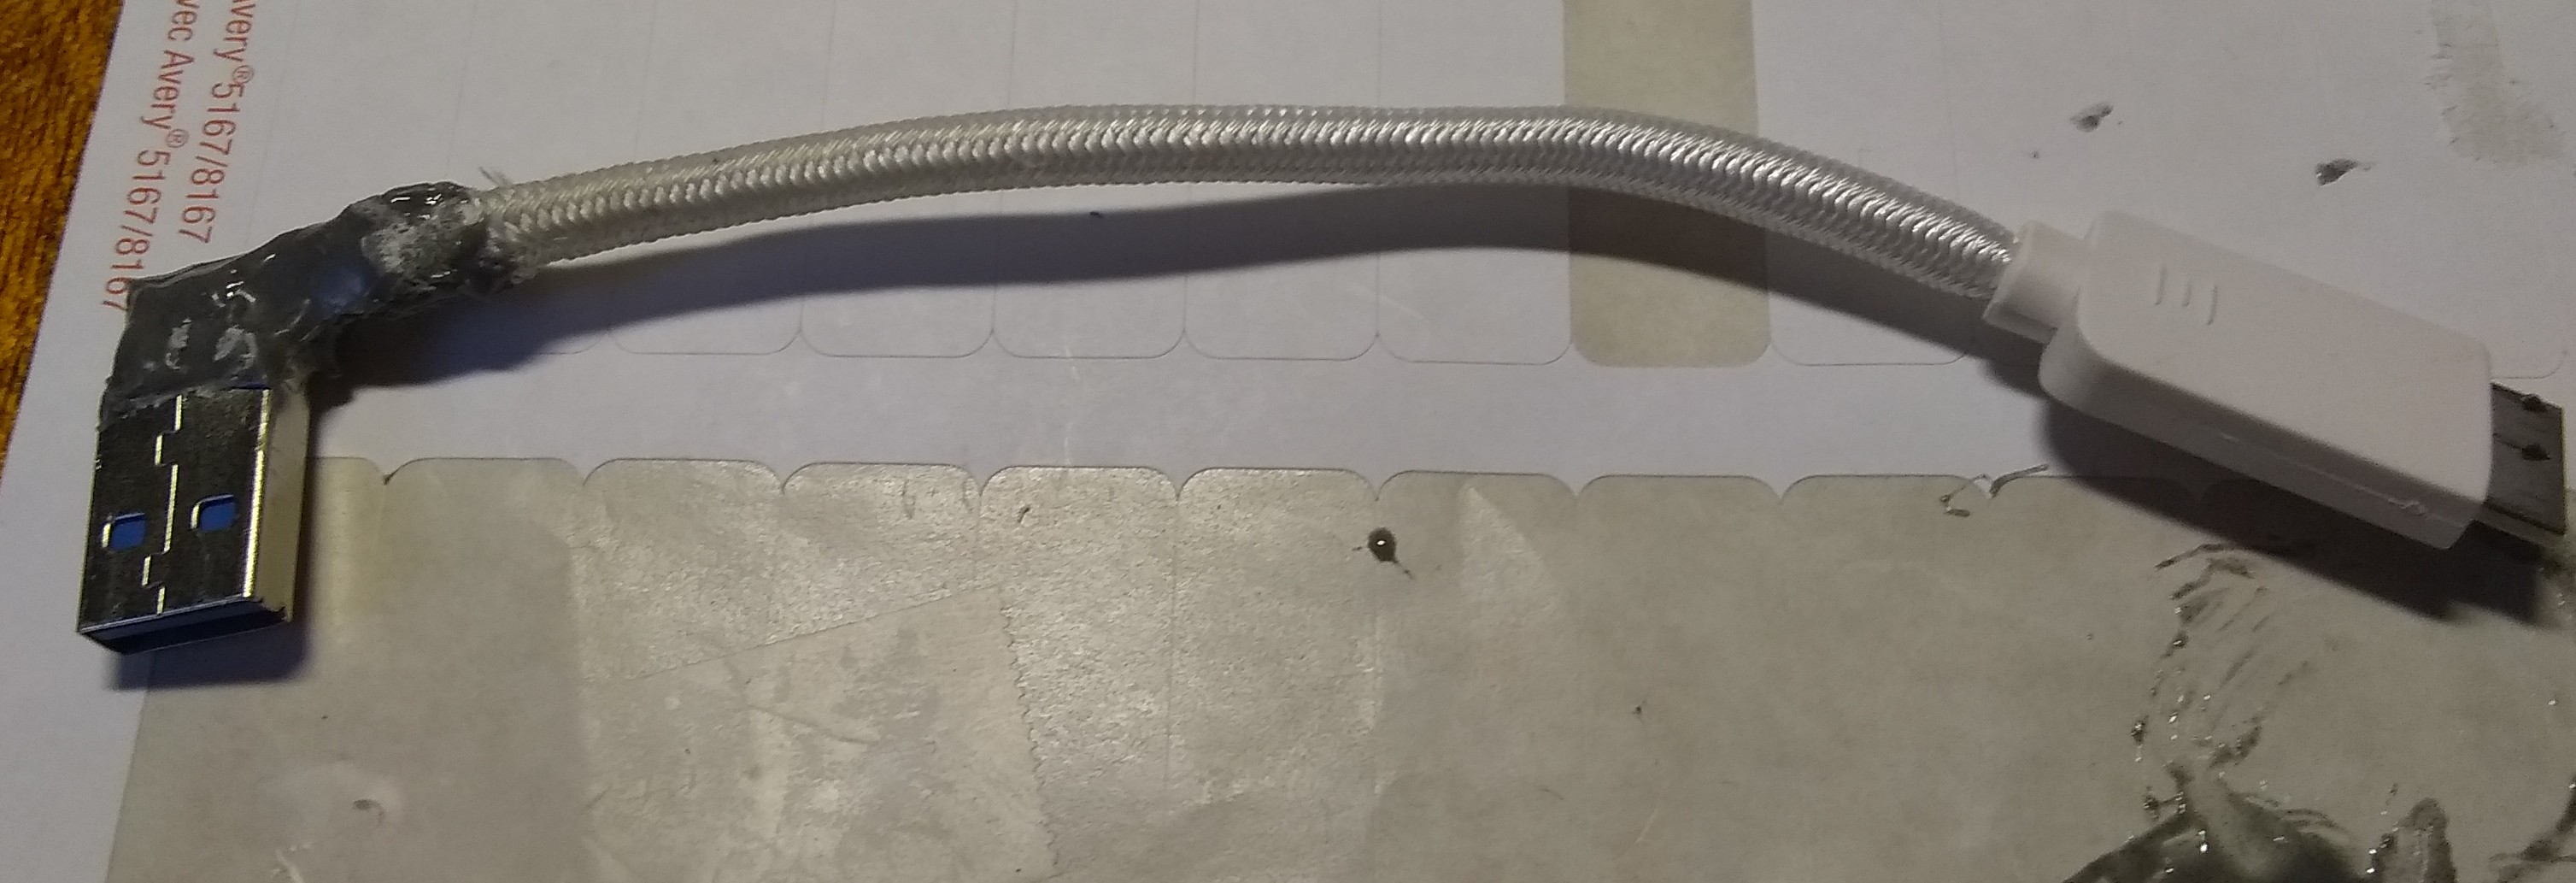
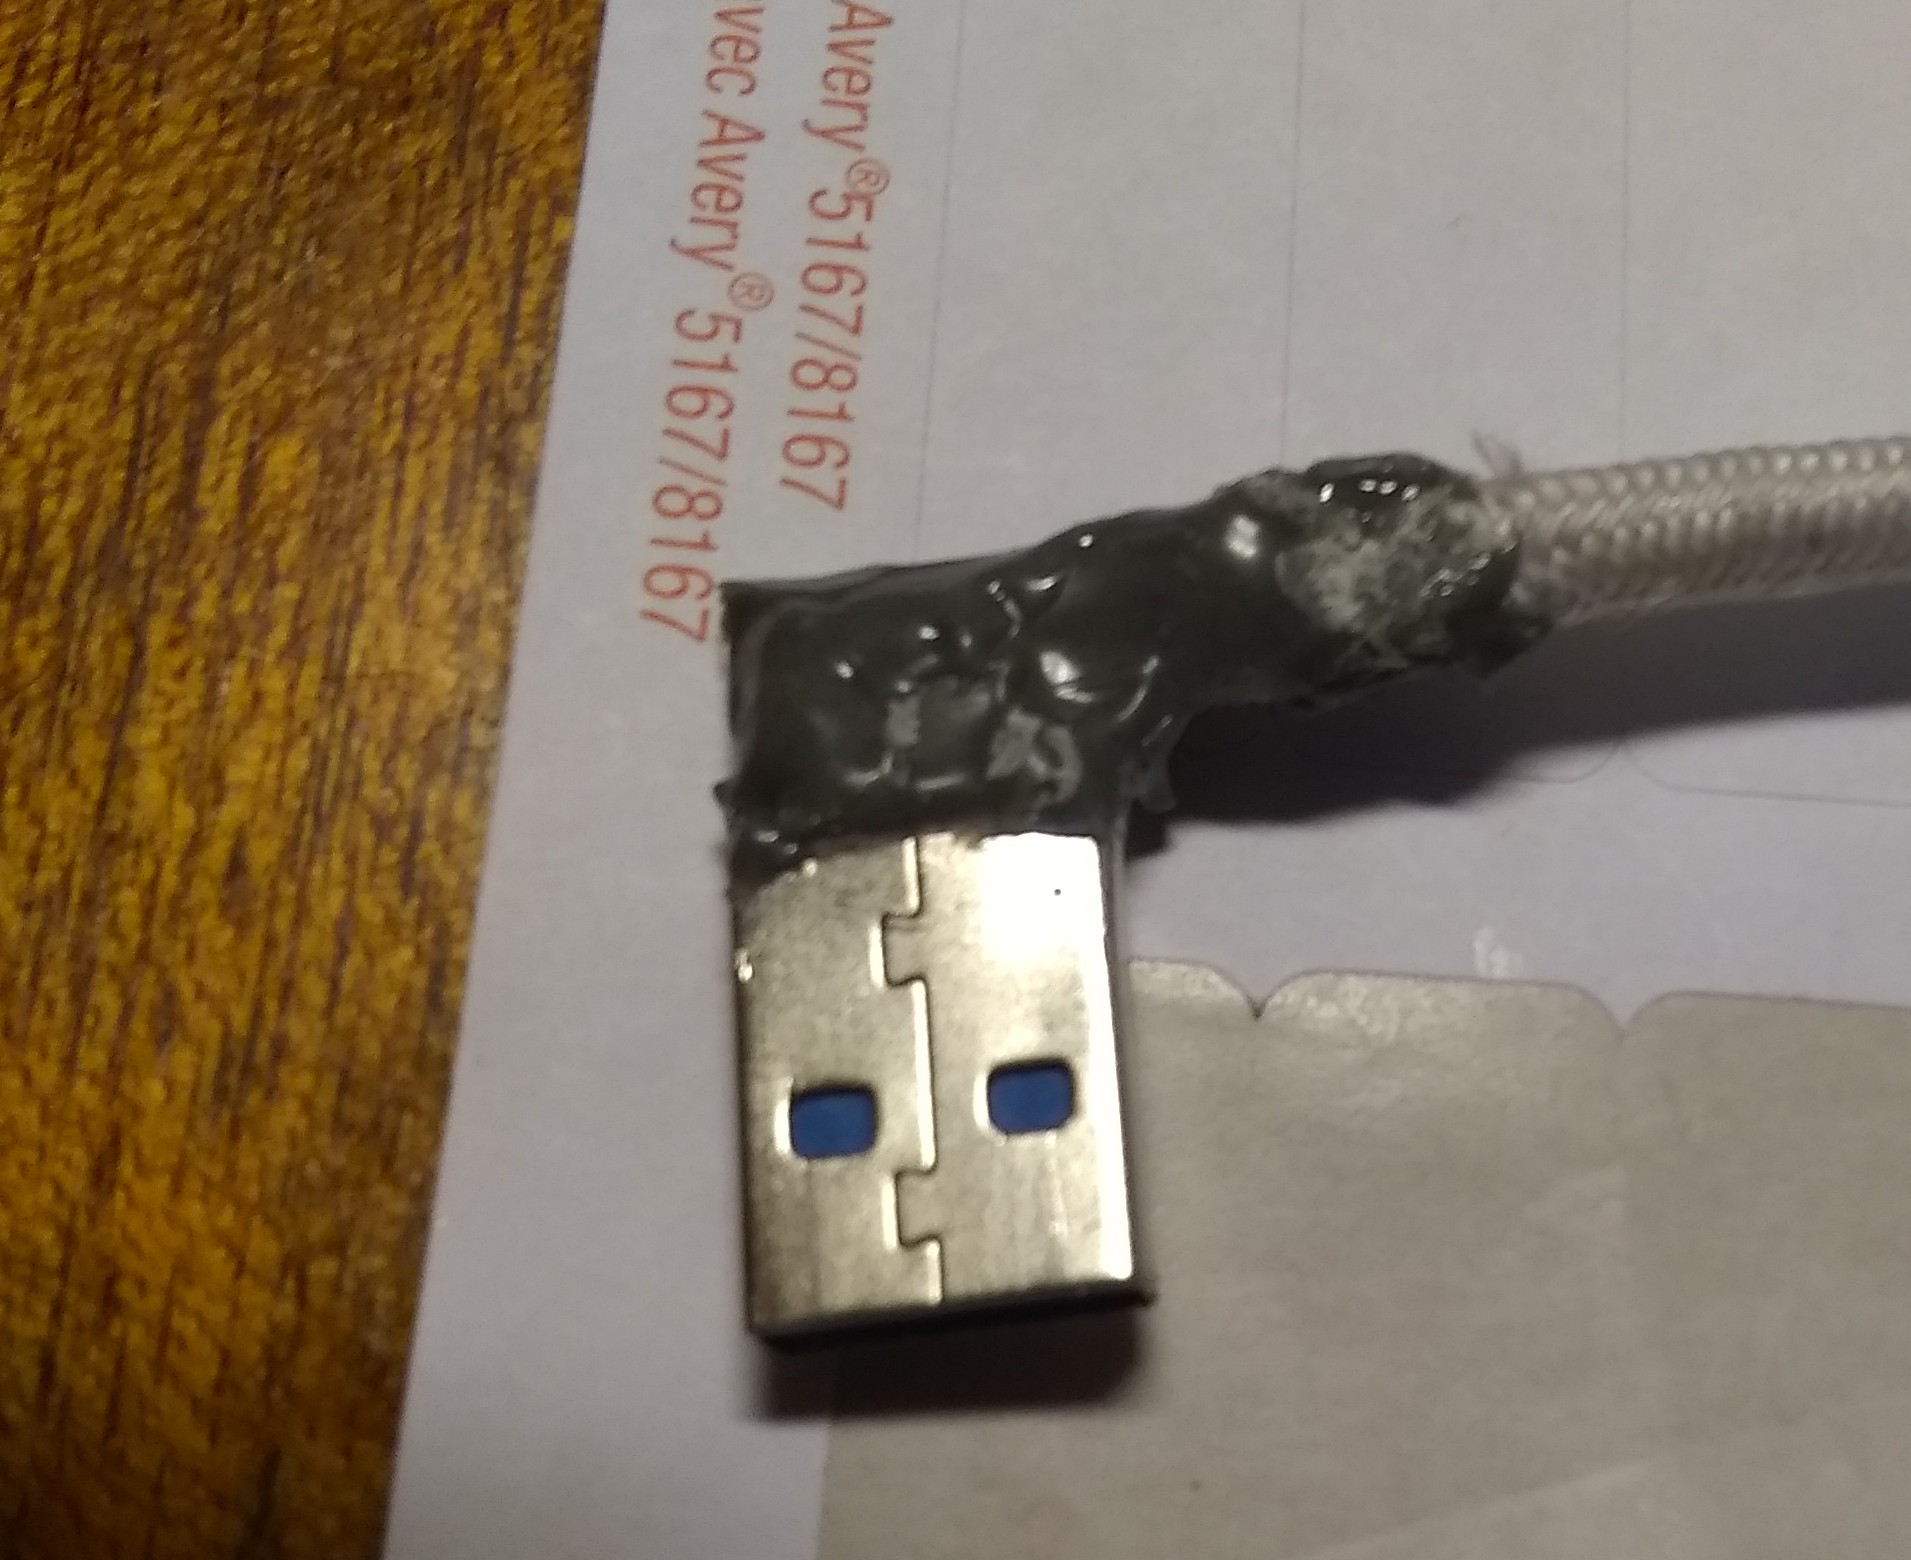
I took apart the USB connector from one of the SSDs, removed the wiring (that was firmly embedded in hot-melt goop), resoldered all the wires and potted them in epoxy.

It’s about 3 inches shorter and fits behind and below Charlie’s pan-and-tilt.

All I need to do now is tear apart a dead USB cable for the shell, and put the metal shell back over the contacts to help lock it in place.

Ugly as :poop:, but it works!

2 Likes

That’s what counts (as long as it’s safe).
/K

2 Likes

Update:

Finished the connector.

This is the old USB connector I ripped apart to take the shell.

I cut part of the back of the shell off and, (literally), crammed the connector into it

Here is me potting the connector with epoxy.

The white connector is the old USB connector that I am using to help form the epoxy.

(Hint:  When the epoxy is something like 60-75% cured, you can remove parts like that and trim the excess with a razor knife.)

Here is the fully potted connector.

And here it is installed on Charlie.

Note the green “eyes”.  I have Charlie set up to set his eyes to a particular color, based on the “bitness” of the running kernel.  Green is the 32 bit kernel and blue represents the 64 bit kernel.

(I avoided the antenna LED to allow it to indicate network state and avoid messing with system services as much as possible.)

Now all I need is a right-angle micro-HDMI connector so I can attach a monitor without taking the wheels off!

2 Likes

Looks good.

That is a nuisance if you have to do local troubleshooting.
/K

2 Likes

Done.

Viz.:
How to remove hot-melt glue/potting compound without destroying things

Prior to potting:


You will notice that I did not remove the hot-melt glue from within the cable itself.  This is deliberate - I wanted some strain-relief on the cable and wiring to remain.
 

After potting


Here it is, plugged into Charlie.  Note that it fits neatly behind the wheel.


Verified working.

Next steps:

Figure out how to mold the epoxy resin to make it look like something less amateurish.

The other option is to oversize the epoxy, and then file/sand it down to a nicer shape. Granted it would be a bit tedious.

But it looks OK as is, and certainly convenient.
/K
/K

1 Like

That risks damaging the tiny wires.  I would much rather form-in-place than attempt to machine to shape afterwards.

1 Like

Congratulations but with both web desktop display and vnc remote access, why do you want to “tie down” Charlie with a physical monitor?

2 Likes

Just as soon as you show me how to see the firmware boot screen, PINN boot status/menus, and/or the startup/shutdown console messages from within the web or vnc, I’ll be more than glad to abandon the annoying need for a direct KVM connection to the 'bot along with the maze of cables it entails.  You’re right.  It’s a pain and I’d really like to avoid it if I can, but I haven’t figured out how to remote in to the firmware boot process yet.
:wink:

And I’m not talking about reading the logs.  I’m talking about real-time access while the 'bot starts up or shuts down.

And then there’s the annoying times when, for whatever reason, the network doesn’t bind properly.  The only way to troubleshoot that kind of problem is a direct connection.

2 Likes

Well there is your problem - too much custom complexity. Right you are, only a monitor. You mean you understand all those “scroll by so fast I get vertigo” messages?

Well there is the way I used the last few days bringing up an old RPi3B with an old WiFi dongle. My router had reserved IPs for the RPi3B MAC and the dongle’s MAC, but I couldn’t ssh in on either.

I kept running “arp -a” to see if they were live, but nothing. I was jerking the power from the system to try different network setups, and reflashing the card, you name it I thought I had tried it.

Eventually, I tried disabling IPV6 in the cmdline.txt file and voila IPV4 IPs got assigned to both the board and the dongle. BUT they weren’t the reserved IPs, even though the router was now showing the connections as the reserved IPV4 IPs.

I tried ssh to the mystery IPs and I got in. Mystery solved.

Perhaps if I had dredged out my spare keyboard, mouse, and hooked the HDMI up I could have saved a day, but I get real lazy when it comes to messing with the cables behind my monitors - even though one of them has dual inputs and split screen capability, the monitor’s menu system is so crazy I will try bashing my head against any and all walls before trying that.

2 Likes

You and me both! :wink:

That’s why I set my external monitor to a specific HDMI port and invested in a 5-port HDMI video switch.

The nice feature is that if only one HDMI input is active, it automatically gets routed to the monitor.  So, I have a cable for whatever I might need to connect, and a Raspberry Pi keyboard and mouse, (only needs one USB port for both!), ready should I need it.

This way I plug in the relevant cable, fire it up, and it’s all automatic from there.
 

Wasn’t I just saying that about ROS awhile back? :wink:

If you remember, one of my projects was “multi-booting the Raspberry Pi” - and that requires access to boot and system screens.
 

Yup.

I can read remarkably rapidly.

Understanding what the boot and startup messages are trying to tell you is essential if you want to troubleshoot thorny issues.

P.S.
I was going to write:
“What?  You’ve never had to troubleshoot a broken hardware RAID configuration on a Dell 2879 server before?”

. . . but thought better of it.  Some of the stuff you’ve tangled with gives ME vertigo just thinking about it! :wink:

2 Likes

. . . and this is why I tell everyone, (especially @cleoqc), to disable IPv6 unless it’s absolutely necessary.  It’s nothing but trouble.
:face_with_symbols_over_mouth: :roll_eyes:

2 Likes

Care to share how?  I’d like to make that part of my standard configuration.

1 Like
=== DISABLE IPV6
Insert card into reader
Browse the disk (/boot)
Rt Click on System Volume Information->Open Terminal Here
cd ..

cp /boot/cmdline.txt /boot/cmdline.txt.bak
nano cmdline.txt
add to end of line/file:
ipv6.disable=1
save, exit editor
1 Like

What OS were you trying to boot?

2 Likes

Ubuntu 20.04 64-bit Server (headless bring up)

Once I got in, the first thing I did was reverse engineer the DI ip_feedback and slap it onto this system. Don’t need it now that I know the IP, but if it ever announces something different, at least I’ll be able to get into the system.

(I’m getting pretty good at this “install Ubuntu, install ROS2, install the iRobot professionally built ROS2 examples for the Create3, and report a bug” (Their code doesn’t fail if there is no Create3 robot to execute the goals the ROS2 Create3 coverage_server accepts and starts executing, and it didn’t time out after the commanded “explore” max_duration.)

I’m really seeing a lot of Create3 ROS2 goodness that I need to bring to GoPiGo3 ROS-ifying for Dave.

The most interesting thing about this whole experience is that I needed a RPi and the only one I had was marked “Bad”. I remember having trouble with the WiFi and perhaps that the SPI bus was blown. This system is to be for the free Create3 robot that I hope iRobot will deem me worthy of, so it doesn’t need SPI. The RPi3B is successfully resurrected! (and running the ROS2 Create3 controller only uses 0.2 load (20% of one core) not even breaking a sweat.

2 Likes

In this case you had a running system and, eventually, a working connection.

But what if the system doesn’t come all the way up?  Or, the network never binds?

A hard-wired monitor, keyboard and mouse connection always works.

I also have my “back door” - a live network cable ready to plug in if all else fails.

In any event, I have found it convenient to have the ability to connect a KVM directly to the 'bot.

2 Likes

Here’s the HDMI switch connected to my large monitor, (small TV), with Charlie running GPGOS.


And this is my latest artistic creation:

“Still-life with Charlie, monitor, HDMI switch, and messy desktop”

2 Likes

oh yes - robot art. Better NFT it before someone steals it.

2 Likes

NFT?

You mean more like “NFG”, 'eh?
:wink: